The most common first step when creating a new project in EasyMorph, is to load in data from one or more files. Files can be loaded either:
- one file at a time, specifying the specific file; or
- multiple files at once, either selecting the desired files from within a single folder, or defining a search query to load all files which match the search; or
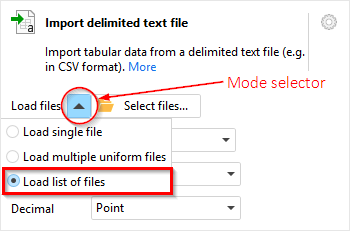
- by loading or creating a list of files, then logically looping through the list loading them in to one or more tables.
The latter is considered an advanced method and so is covered in the "Advanced topics" section at the bottom of this page.
Supported file types
EasyMorph supports loading data from a wide range of file types:
| File Type | Extensions |
|---|---|
| EasyMorph dataset files | .dset |
| Delimited text files (e.g. CSV) | .csv, .psv, .tsv, .txt or any other |
| Excel spreadsheets | .xls, .xlsx, .xlsm |
| Fixed width text files | .txt or any other extension |
| Apache Parquet files | .parquet |
| JSON files | .json or any other extension |
| Plain text files | .txt or any other extension |
| Qlik QVD files | .qvd |
| SAS data files | .sas7bdat |
| SSPS/PSPP data files | .sav |
| XML files | .xml |
| EasyMorph project files (metadata only) | .morph |
Hint: EasyMorph also supports loading from SQLite database files (.sqlite, .sqlite3, etc). For more information on this, please see Loading data from a database.
This tutorial would be incredibly long if all possible file types named above were covered in detail. However, the process differs very little between file types and so even if your specific file type is not covered below, you can still follow the same steps and should find it possible load in your file(s).
Loading one file at a time
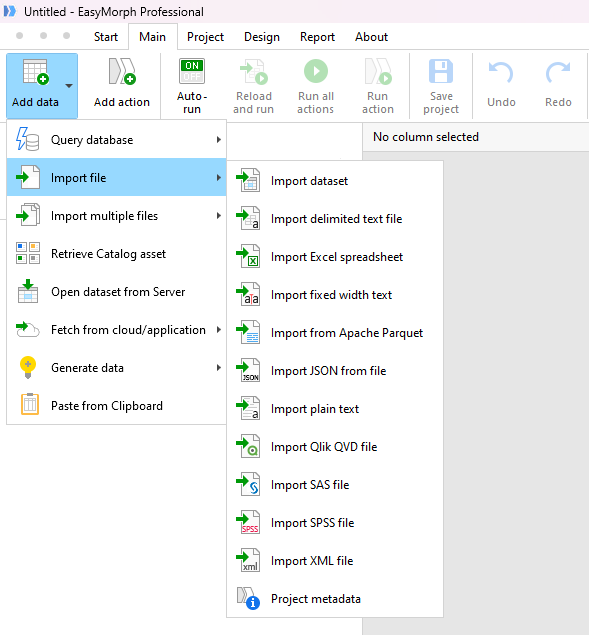
There are several ways to load a single data file in to EasyMorph. In this tutorial we will look at the most commonly used method. Open your EasyMorph project or create a new one. Then on the "Main" tab select "Add data", followed by "Import file" and then select the option to match the file type of your data file.
In the dialog that appears, browse to the data file you wish to load into EasyMorph, select it and click "Open". EasyMorph will automatically add the relevant action to load the file with the default options for that type.
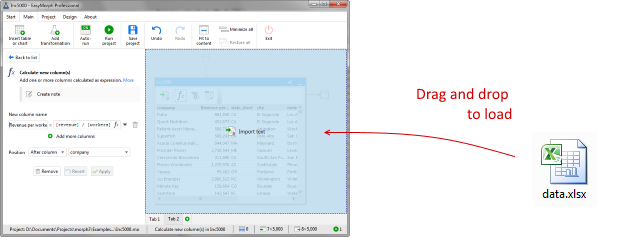
Hint: Some file types can also be loaded into EasyMorph by dragging them on to the main window. Supported file types include .xls, .xlsx, .txt, .csv, .psv, .tsv, ..qvd, sas7bdat and .dset. The automatically added action can then be modified as described below if needed.
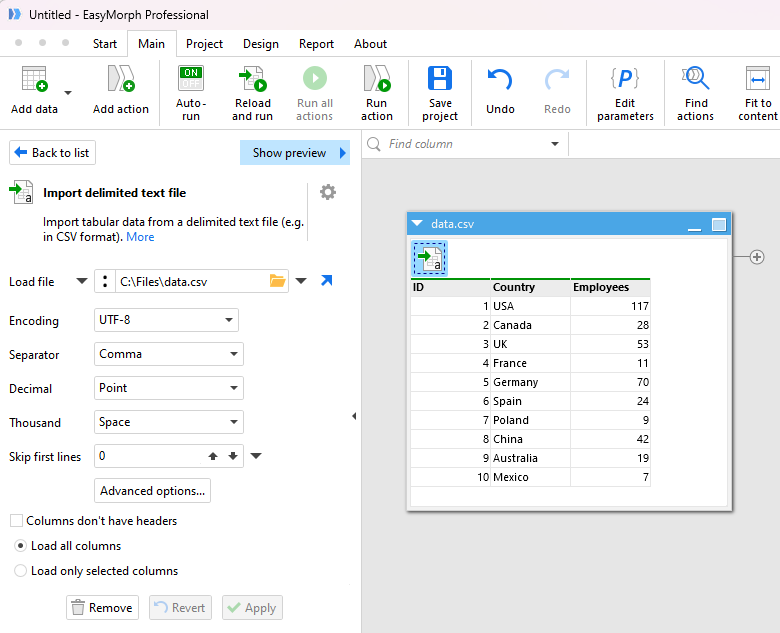
You can tailor the default options as needed if the file is not loaded as you expect. The options available will vary depending on the type of file being loaded. When configuring the action options for your file, it can be helpful to see the contents and how the different options may effect how the data will be loaded. Some file types have a "Show preview" link at the top right of the action options sidebar. Clicking on this link will display a preview window.
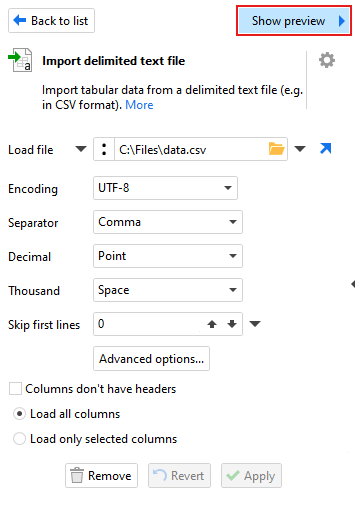
NOTE: Not all file types are supported within the preview. If you do not see the "Show preview" link then the type of file being loaded is not supported.
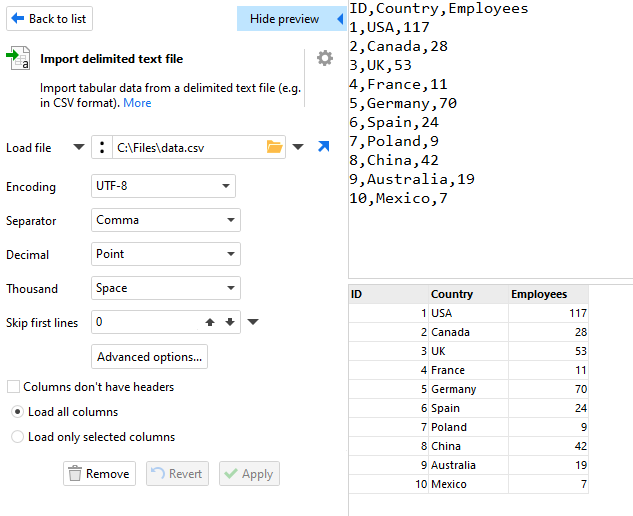
The top half of the preview shows the data as it appears in the file. The bottom half of the window shows how the data will look once loaded using the current options and will be updated as you make changes to the configuration options.
Hint: Once you have loaded multiple files into multiple tables, your workspace may become cluttered and difficult to work in. To reduce clutter, you can move tables to different "groups". Groups are tabs which appear at the bottom of the workflow window. To organise your tables, create a new group, then right-click a table's tile bar and choose "Move to group", or press Ctrl+M.
Loading multiple files simultaneously
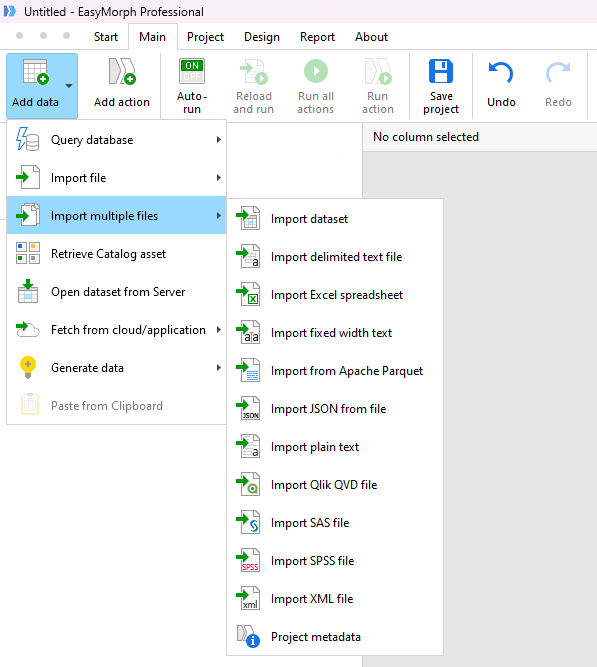
In EasyMorph, it is possible to load multiple files from a single folder simultaneously, combining them into one table. This is done in a similar way to loading a single data file. Open your EasyMorph projector create a new one. Then on the "Main" tab select "Add data", followed by "Import multiple files" and then select the option to match the file type of your data files.
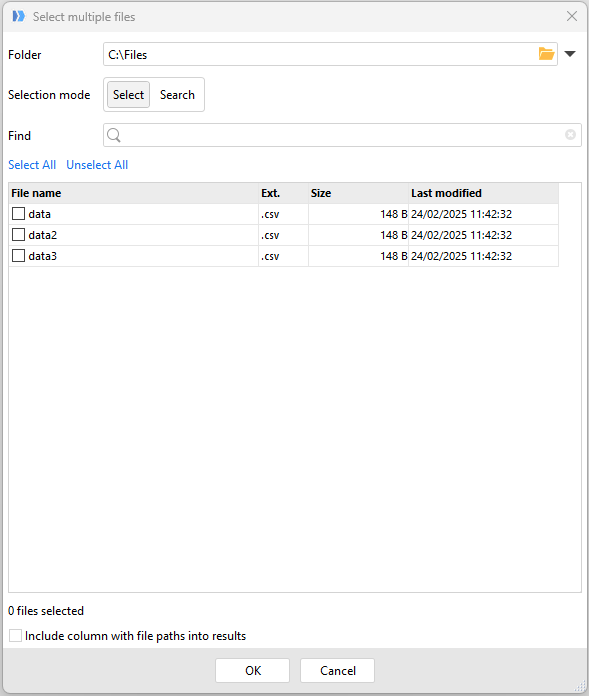
In the dialog that appears, select the folder that contains the files you wish to load. There are 2 selection modes available: "Select" and "Search". In Select mode, you can pick the desired files from the list shown by selecting the checkboxes next to the file names. Once all required files are chosen, click "OK" and EasyMorph will automatically add the required action to load that file type.
Hint: As with loading a single file, it is also possible to load multiple files by selecting them in Windows file explorer and dragging them at the same time to EasyMorph. Supported file types include .xls, .xlsx, .txt, .csv, .psv, .tsv, ..qvd, sas7bdat and .dset. The automatically added action can then be modified if needed.
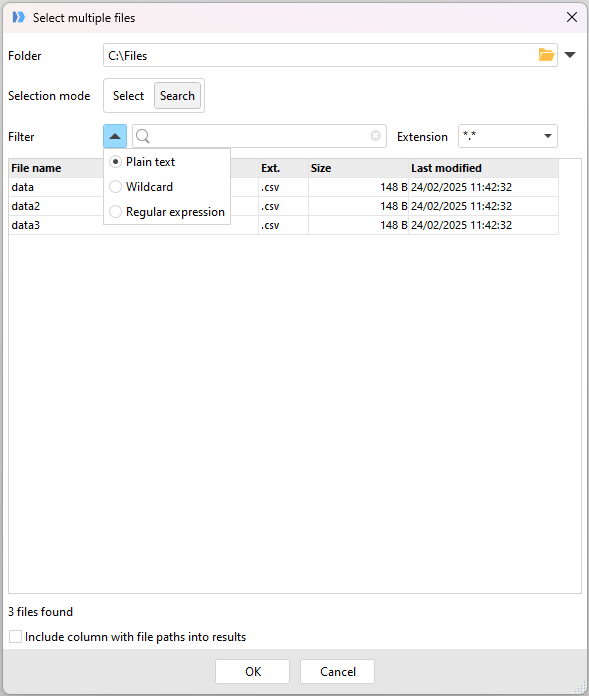
In Search mode, rather than selecting individual files, you can specify a search string instead. EasyMorph will then load in all files in the folder which match the search. Searches can be specified as one of 3 types:
- Plain text - All files which contain the specified string will be returned. The search is not case sensitive.
- Wildcard - All files which contain the specified pattern containing one or more "*" as wildcards will be returned (e.g. "dat*")
- Regular expression - All files which match the provided regular expressions pattern will be returned.
EasyMorph shows the list of files which match the provided search. Once happy with the selection, click "OK" and EasyMorph will automatically add the required action to load that file type.
Which ever mode is used, all of the files selected will be returned and added into a single table in the same way as a "UNION" in SQL. This is sometimes called "concatenating". If the files are the same structure (i.e. have the same number of columns all named the same), columns with the same name will be "lined up". Columns that are not in all files will still be included in the resulting table but the value with be "empty" for those records which are loaded from a file that doesn't contain the column.
WARNING: It is possible to select files of more than one file extension or format. EasyMorph will add the relevant action and default configuration based on the first file. If this configuration will not work for all files, errors or unintended results may occur.
Loading a folder into EasyMorph
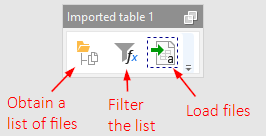
As well as loading the contents of data files, it is also possible to load a folder into EasyMorph. When doing this, rather than the result being a table containing the data from within the files, EasyMorph will create a table containing a list of the files within the folder. This can be useful as a starting point for then performing more advanced file actions or for applying advance filtering of the files you wish to subsequently load data from (e.g. only load from files under 100Mb).
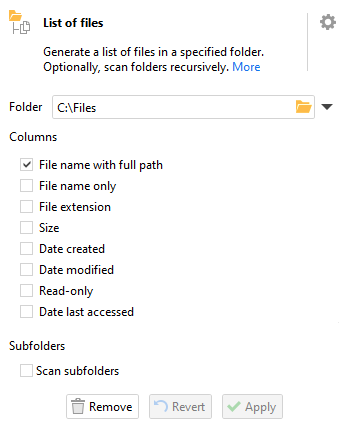
To load a list of files within a folder, on the "Main" tab select "Generate data", followed by "List of files". In the dialog that appears, select the folder containing the files you wish to list.
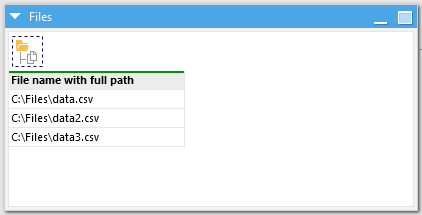
By default, EasyMorph adds a single column to the resulting table which contains the full path, filename and extension. It is possible to specify other columns instead or in addition using the action options on the left. Additionally you can specify whether sub-folders should also be scanned and included.
Once you have a list of files in EasyMorph, you can then loop through the list, loading data from them. For more information on how to do this, please see the "Advanced topics" section at the bottom of this page.