EasyMorph supports loading data from a wide range of database types. There are two main methods for connecting to a database from EasyMorph:
- Native Database Connector - where EasyMorph has built in connection drivers for all of the most common enterprise database types. You don't need to install any additional software.
- ODBC (64-bit only) - where a third party ODBC driver is used to connect to the database. These are generally provided by database vendors and must be installed and configured separately from EasyMorph before they can be used. Due to EasyMorph using in-memory technology and memory limitations when using 32-bit ODBC connections, only 64-bit ODBC drivers are supported.
Video: Loading data from a database
Currently, EasyMorph natively supports the following database types:
 |  |  |
 |  |  |
 |  |  |
Some examples of databases which you can connect to using a 64-bit ODBC driver would be:
 |  |  |
 |  |  |
Hint: Even if your database type isn't specifically mentioned above, as long as there is a 64-bit ODBC driver available for it, EasyMorph can connect to it. Install the driver, then create a "User DSN" or "System DSN" using Windows "ODBC Data Sources (64-bit)" tool. This connection will then be available to select using the "ODBC" type when creating a connector in EasyMorph.
There are 3 main steps required to load data from a database into EasyMorph:
- Create a connector to the database using the EasyMorph Connector Manager.
- Create an EasyMorph project (or open and existing project) into which you wish to load data from the database.
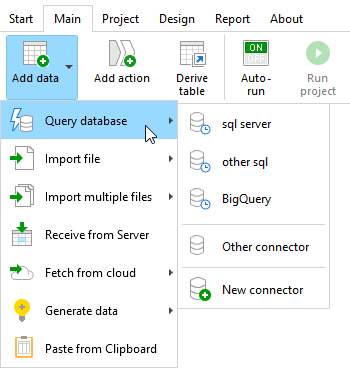
- "Add data" to your project and use the EasyMorph Query Editor to define the data you wish to load.
Connector Storage
EasyMorph stores connectors in one of 3 locations:
- Within the Spaces of a connected EasyMorph Hub. This is the preferred method allowing connection details to be kept secure and shared amongst multiple users of a Space.
- Within Repository files stored locally or on network drives. If you don't have access to an EasyMorph Hub, you can still store connectors and reuse them across your projects.
- Embedded with the current EasyMorph project. This option should only be used if you specifically need your EasyMorph project to be portable, allowing them to be shared with other people (e.g. an example to share EasyMorph Community). Be aware that any credentials stored in the connector may be accessible to others.
Note that connectors don't just store connection information for databases but also other external system supported by EasyMorph (e.g. data visualization platforms such as Qlik Sense, Tableau and Microsoft PowerBI; many email services like Exchange Server, Office 365 or Gmail; 3rd-party RESTful APIs; and lots more).
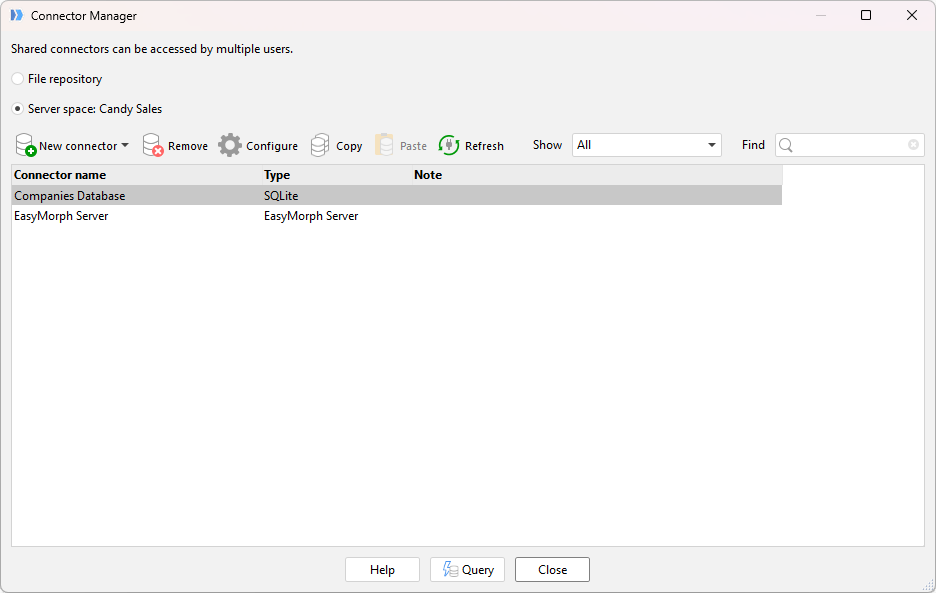
Connector Manager
Repository files, the connectors stored within them, and connectors stored on EasyMorph Hub Spaces can all be created and edited using the Connector Manager.
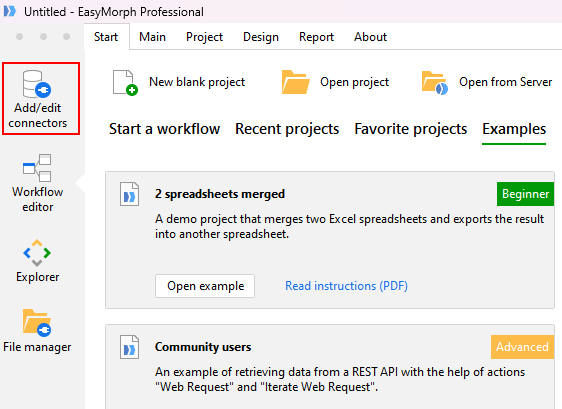
It can be accessed from the Start screen by clicking on "Add/edit connectors" in the top left-hand corner.
Hint: Wherever you are in EasyMorph, pressing the F7 key will take you straight to the Connector Manager also.
You can switch between managing a "File repository" or "Hub space" repository using the radio buttons at the top of the Connector Manager window.
Operations that can be performed using the Connector Manager are:
- Create new repository files
- Switch between a Hub space repository, and one or more repository files
- Create, edit and delete connectors in repositories
- Copy and paste connectors between repositories
- Filter and search all connectors
Repository files
On first launch, EasyMorph automatically creates an empty repository file (AppData\Local\EasyMorph\repo.sqlite) if no repository is present.
Hint: It is possible to secure a repository file from being changed using a password. Note that users will still be able to use (read) all Connectors within a repository even when it is protected with a password. To protect a repository file from unauthorized access, use standard Windows file permissions applied to the repository file. Or better still, move the Connector to an EasyMorph Hub repository.
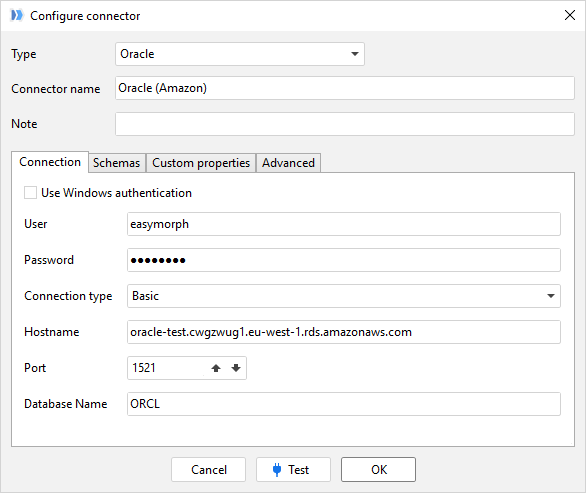
Database connectors
A database connector in EasyMorph is a set of connection properties (i.e. a server address, port, database name, access credentials, etc) that are used to connect to a particular database. The properties that are required vary depending on the type of database being used. If at all unsure, your database owner or administrator should be able to provide the required settings.
Embedded Connectors
It is also possible to embed connectors within an EasyMoprh project. This can be useful in some situations, mainly to make the project portable allowing it to be shared with someone else who is not within the same organization, such as if sharing an example on the EasyMorph Community. It is worth noting that if the connector is using an ODBC driver to connect to the database, this will not be stored in the project and so will not guarantee it will work on another computer without the same driver installed and a user or system DSN set up with the same name. It is advised that caution is taken when using embedded connectors as these will and other options should be used if possible (e.g. storing them on an EasyMorph Hub Space). Embedded connectors include any credentials needed to access the database and so may potentially be available to anyone who can access the project.
Embedded connectors can be accessed by clicking on "Embedded Connectors" on the "Project" tab.

Embedded connectors can be added, removed, configured, copied, pasted, filtered and searched in all the same ways as within the Connector Manager.
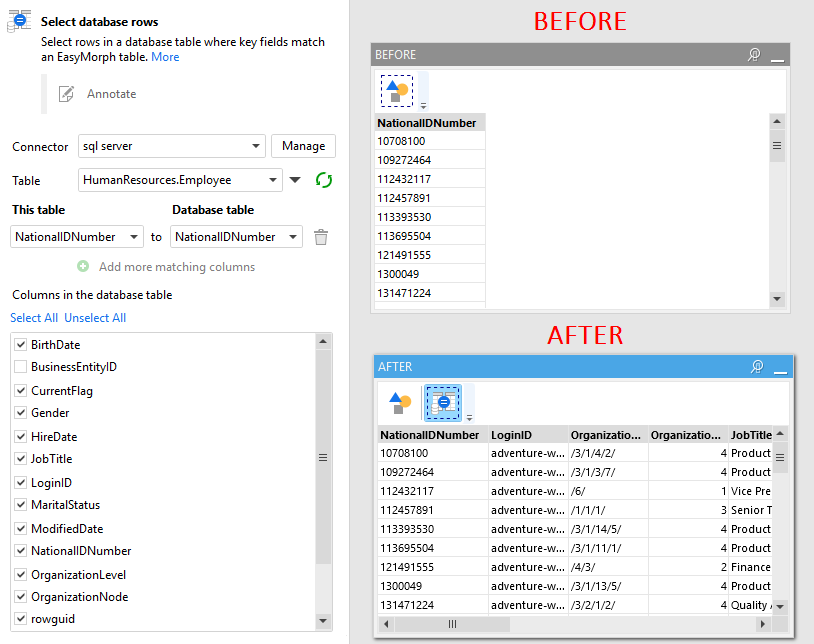
Query Editor
Once a connector has been created for the database, you can begin to load data from it into EasyMorph using the Query Editor. From within the Connector Manager, the Query Editor opens automatically when you click the "Add data" button. It can also be accessed at any time from within an EasyMorph workflow by selecting the "Add Data" button, clicking on "Query Database" and selecting the relevant database connector.
Hint: Wherever you are in EasyMorph, pressing the F8 key will take you straight to the Query Editor also.
There are three main areas in the Query Editor:
- The column selector1 - Allowing you to select a table from the database, see the fields in the table and the data type and select which fields to be returned from the database.
- The filtering condition(s)2 - Where you can visually build complex filters to reduce the data returned from the database.
- The result preview3 - Showing you a preview of the data which will be returned by the query. This preview is limited to the top 100 rows by default but this can be changed if needed. The result preview can also be used to add additional modification to the query such as reordering columns, sorting the data by a column and aggregating the data (see below for more details).
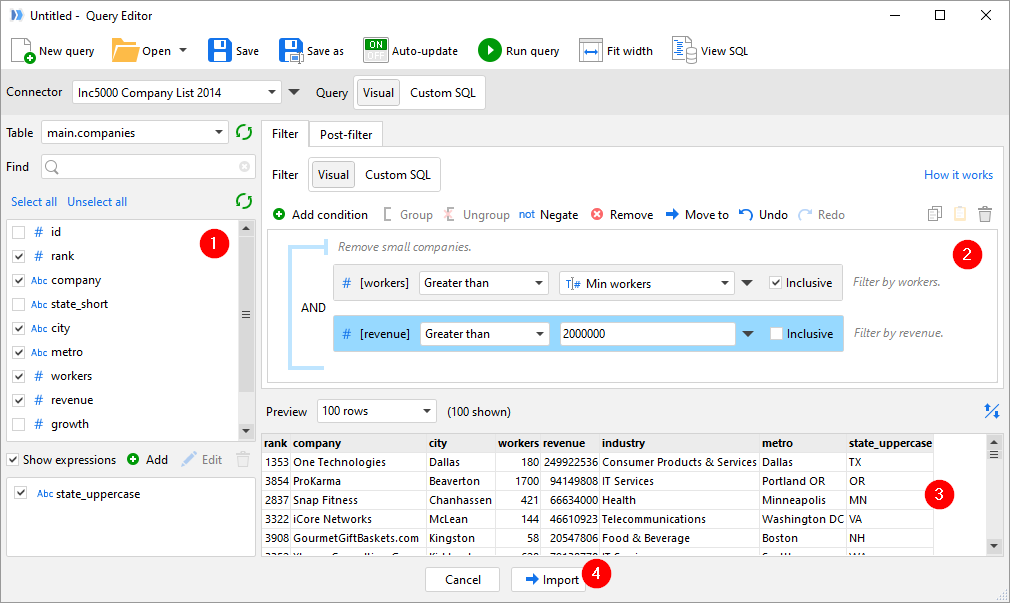
Using the Query Editor usually follows a simple process: select the required columns in the column selector1, create/edit filtering condition(s)2, and check the results in the result preview3. When everything looks good, press the "Import" button4 to load the query result into EasyMorph. A new table containing an "Import from database" action will be created automatically.
The most common tasks performed in the Query Editor are:
- Reorder columns
- Ordering the data (i.e. SQL "ORDER BY" statement)
- Applying filters to the data (i.e. SQL "
As well as these simple tasks, the Query Editor is capable of creating complex SQL queries to import data from a database. More examples can be found in the advanced topics section below.
Reordering columns
Columns can be reordered in both the result preview and the data returned from the database. This can be done by right clicking the column header in the result preview, selecting "Move" and then the direction you want to move the column (i.e. left, right, to the start or to the end). Alternatively, you can reorder columns quickly by selecting the "Reorder columns" button to the top right of the result preview.

You can use the arrows to move the columns up or down the list, or alternatively you can drag and drop columns to a new position in the list.
Ordering the data
Columns can be reordered in both the result preview and the data returned from the database. This can be done by right clicking the column header in the result preview, selecting "Sort" and then the direction you want to sort the column (i.e. ascending or descending).
Filter conditions
Filters can be added to reduce the data to only that which is needed. These queries can be incredibly complex, but can be entirely built without writing any code. Filters can be added in multiple ways:
- Dragging a column from the column selector to the filter conditions.
- Dragging a column from the result preview to the filter conditions.
- Right clicking on a column heading in the results preview and select "Filter...".
- Clicking on the "Add condition" button at the top of the filter conditions, followed by "Condition with field".
All of these methods are very similar and which you use is a matter of personal preference. Let's look at using the "Add condition" button as an example.
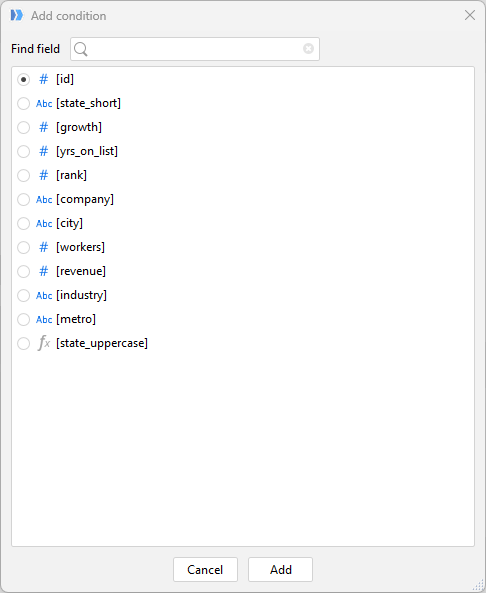
We need to select the field we want to apply the filter to, followed by clicking on "Add". The filter will be added to the filtering conditions ready for us to configure. Firstly, we must specify the operator to use when applying the condition to the field.
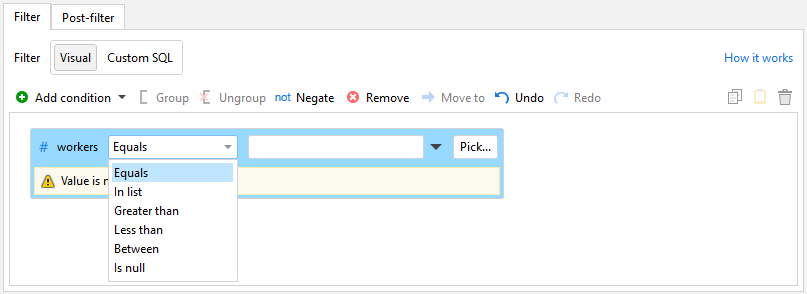
The operators available will depend on the data type of the field and generally match those operators available in SQL languages:
- Equals - where the field equals a specified desired value.
- In list - where the field contains a value from a provided list of desired values.
- Greater than - where the field contains a value that is greater than a specified value.
- Less than - where the field contains a value that is less than a specified value.
- Between - where the field contains a value that falls between two specified values.
- Is null - where the field contains a NULL value.
- Contains - where a specified piece of text can be found anywhere within the field value.
- Starts with - where the field contains a value that starts with a specified piece of text.
- Ends with - where the field contains a value that ends with a specified piece of text.
- Is like - where the field contains a value that matches a provided pattern.
Each operator has its own configuration, although all are generally simple and similar. For operators which require you to provide a value to match the field against, you can specify one of several options: a value, a parameter from the current project, the first value from a column resulting from the previous actions in the workflow table, or NULL.
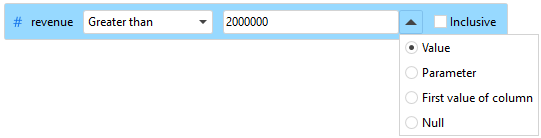
For the "Greater than", "Less than" and "Between" operators, there is an additional options to make them "Inclusive". If this check box is selected, the operator includes the specified value (e.g. "Greater than" becomes "Greater than or equal to").

Filters can also be negated which attaches a logical "NOT" to the condition. For example, negating a filter which uses the "Equals" operator effectively turns it into "Not equal to". To negate a filter, right click it and select "Negate" from the drop down menu.
Filter groups
When 2 or more filters are added, they are combined within groups. These groups apply the logical operands "AND" or "OR" between the filters affecting how they are applied. The below example shows 2 filters applied within a logical "AND" group and thus, both filters must apply to a record for it to be returned from the database.

It is also possible to negate groups in the same way as described for filters above. The type of group can be changed between "AND" and "OR" by right clicking the group and selecting "Change type to...". Filters can also be moved in and between groups by dragging and dropping them to a new location.