Once our data is loaded into EasyMorph, we can start transforming it. We apply transformations to our data by adding actions. Each action transforms the data step-by-step.
There are more than 180 different actions available to use in our workflows. You can see all of the available transformation actions here.
Adding actions to transform data
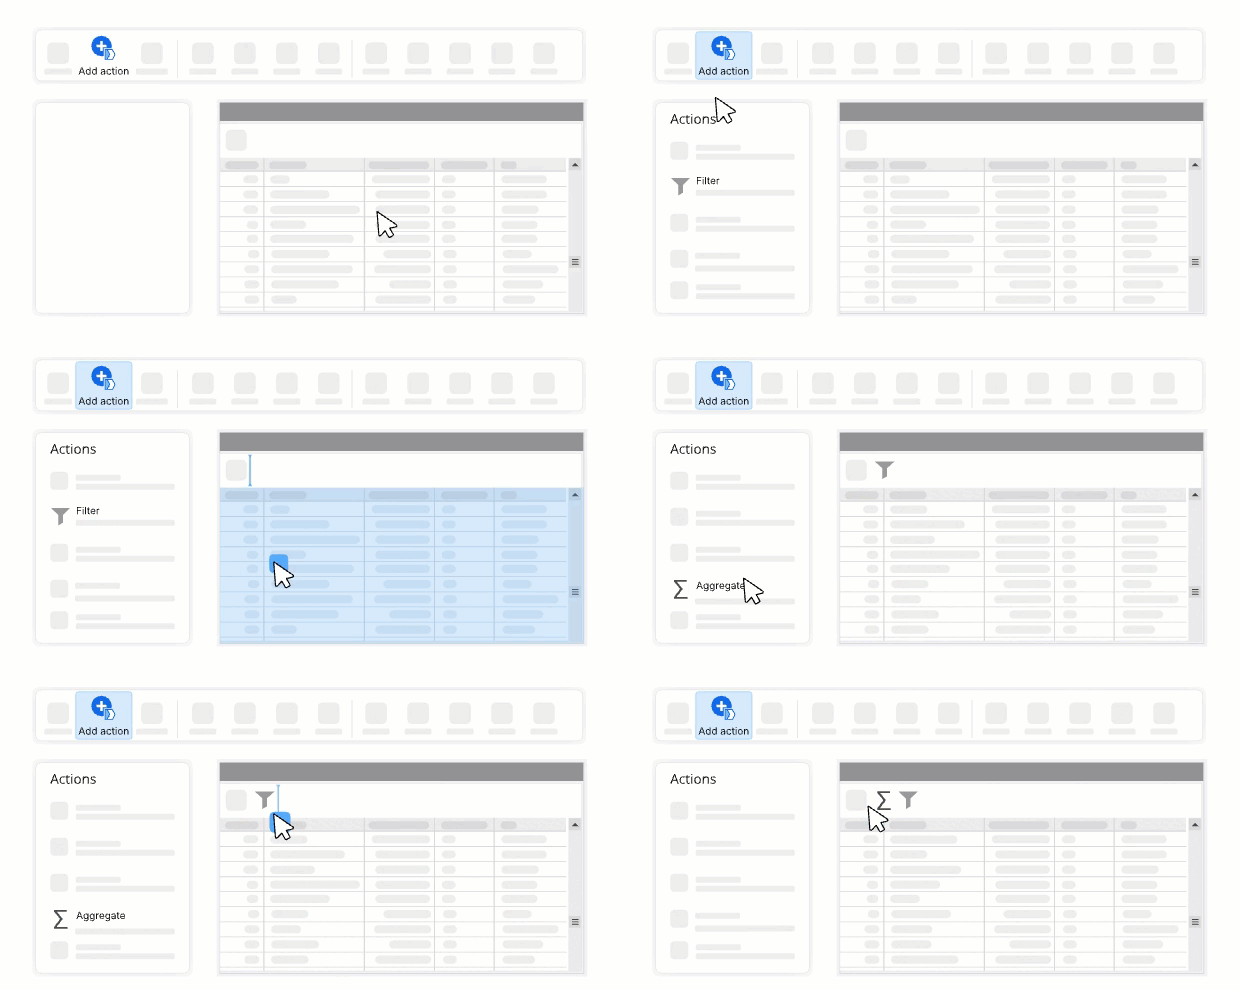
The most common way to add an action to our workflow is to use the Add action button from the navigation bar. When clicked, the lefthand settings panel shows us all available actions for us to browse and find the action which will transform the data in the way we need.
Once the necessary action has been found, drag-and-drop it from the list (in the settings panel) onto a table. You can insert actions at the end of the actions chain, or between existing actions.
Finding the right transformation action
When new to EasyMorph, you may not know which action does what you need. Don’t worry, in the lefthand settings panel you can find a couple of tools to help.
All actions are divided into categories to help you find them. The categories are:
- Import - Actions which import data into EasyMorph.
- Create - Actions which create data, such as a lookup table.
- Transform - Actions which modify and transform the data in some way.
- Export - Actions which export data from EasyMorph.
- Workflow - Actions which perform some other purpose.
Unsurprisingly, when transforming data, we can concentrate on the transformation category.
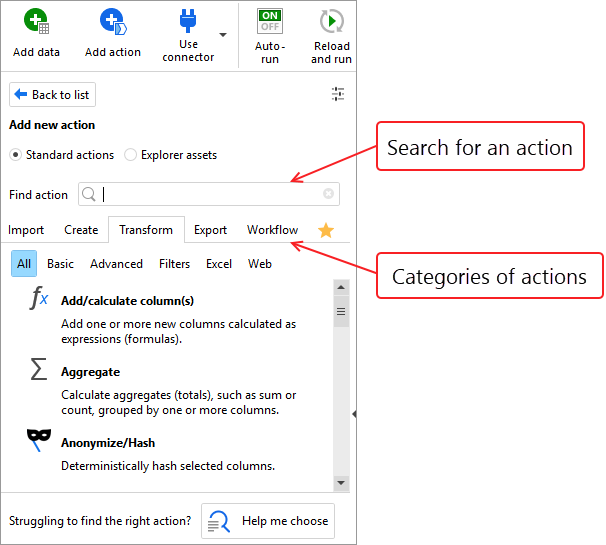
At the top of the settings panel is a search bar which we can also use to search for a specific action.
Tip: If you struggle to find relevant actions using the search bar, you can try using the AI powered extended search by ticking the “Try extended search” checkbox at the bottom of the search results. When you enable extended search, your search query is sent to EasyMorph’s cloud AI engine, which will suggest actions that might fit what you need. If there are more than one possible action, the AI will sort them so that the most likely one is at the top. You can include both keywords and full sentences in your search query.
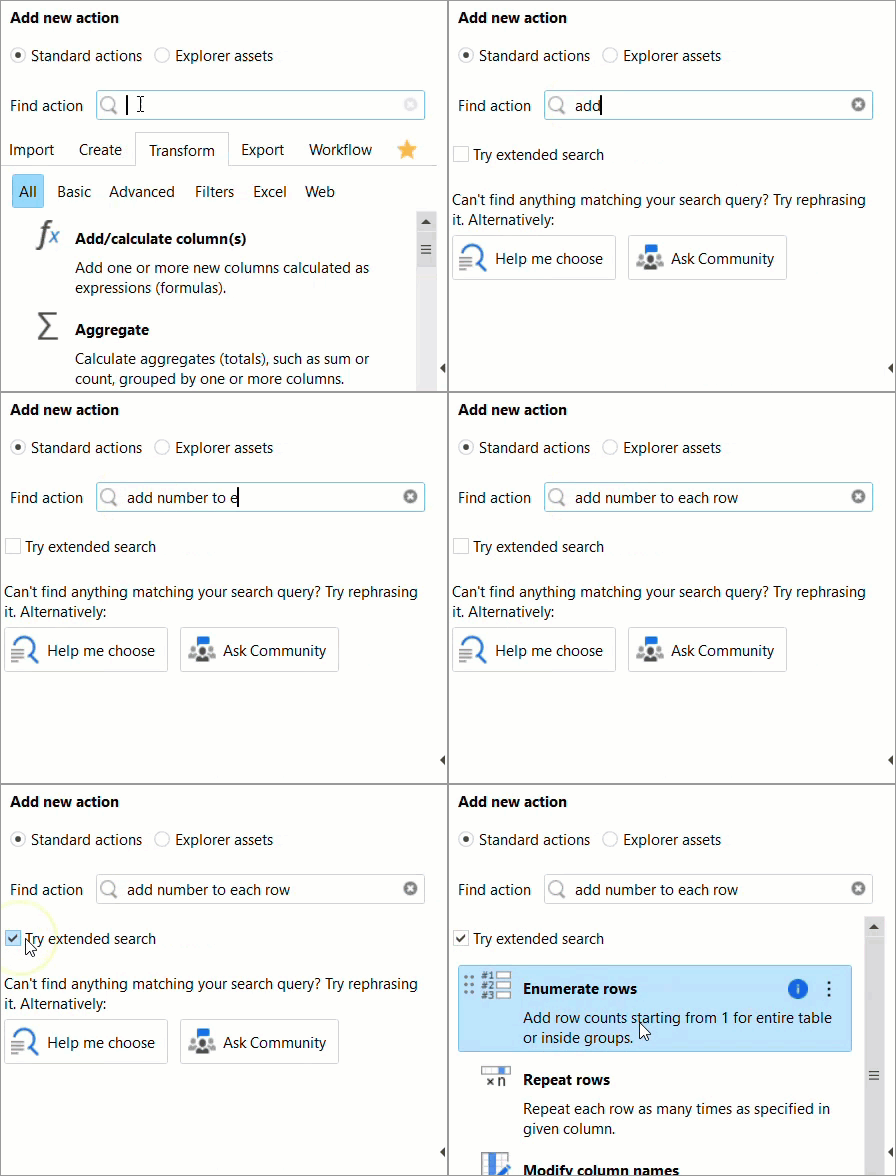
Note that only your search query is sent to the cloud AI engine in extended search. No data is ever transmitted. The first time you use one of the AI powered features in EasyMorph, you will be asked to consent to using 3rd-party AI services. You can opt-out at any time in the Application Settings (found in the About tab).
At the bottom of the settings panel you will also find the Help me choose button.
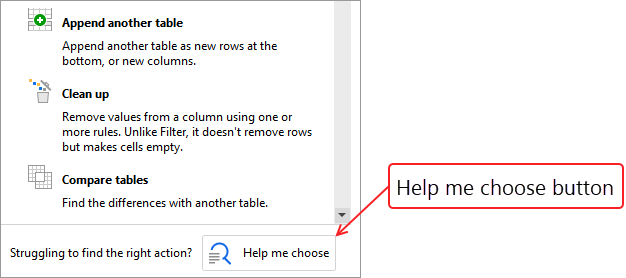
When we click this button, the Help me choose dialog opens which allows us to find actions based upon the capability (e.g. “Generate unique identifiers” or “Move a file“) or system/data they work with (e.g. “Gmail”, “SalesForce”, “MySQL”, etc)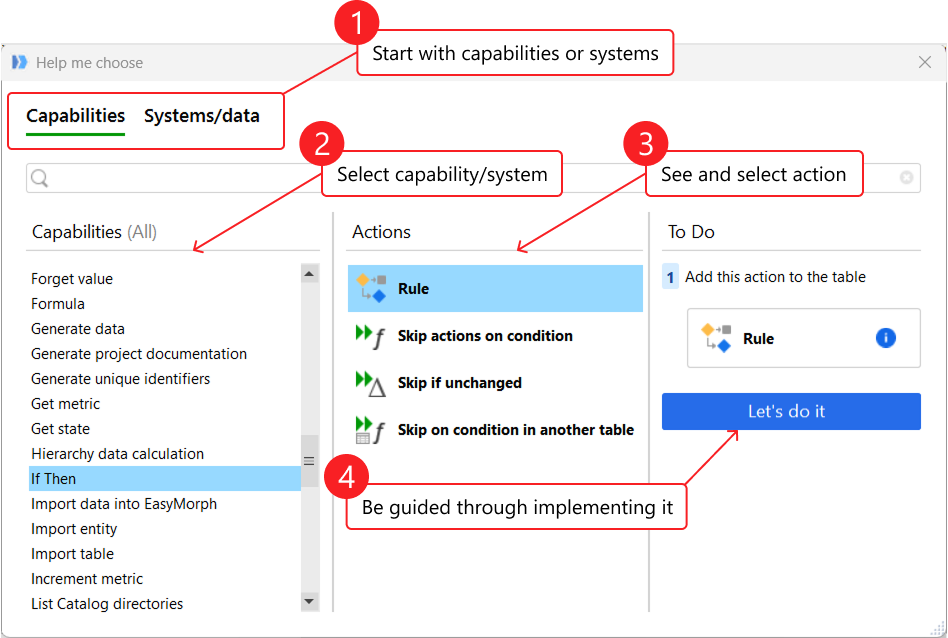
When we have found the relevant capability or system, we can then find the actions which are relevant, and when selecting an action, we are shown the steps needed to implement it. If we click on the Let’s do it button, EasyMorph will not only add the action to our workflow, but will also guide us through any other necessary steps such as creating a connector to the system or configuring the action settings.
Shortcuts to add actions
Another way to quickly add actions to transform our data is to use the right-click context menu commands. Relevant context menus can be accessed by:
- Right-clicking an individual cell in a table’s datagrid (e.g. apply a filter to the value, replace the value, etc)
- Clicking the context menu icon in the top right of a column header or right-clicking the header itself (e.g. apply a filter, sort the data, aggregate the data, etc)
- Right-clicking an existing action (e.g. copy or clone an existing action)
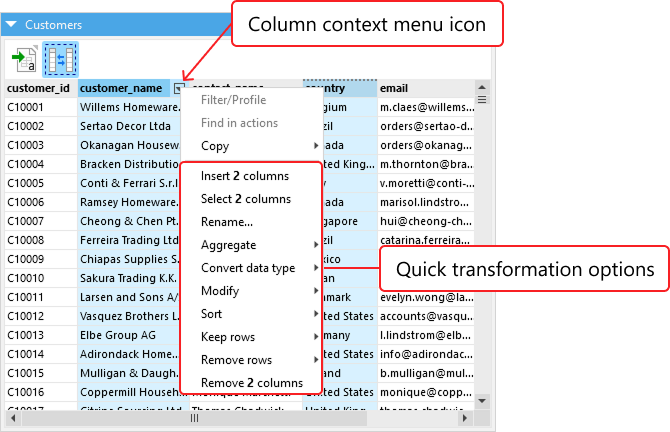
When using any of these context menu command, the relevant action is added to the table’s action chain and pre-configured for us. For example, if we open the column context menu and select the Remove column option, EasyMorph will add the Keep/remove columns action set to remove the column.
Tip: You can apply the commands from the right-click menu to multiple columns at once. To select multiple columns, hold the Ctrl key and click their headers.
You can also use the cell context menu to automatically add actions to filter, clean up, replace and trim (remove leading or trailing spaces) the data using the value in the cell.
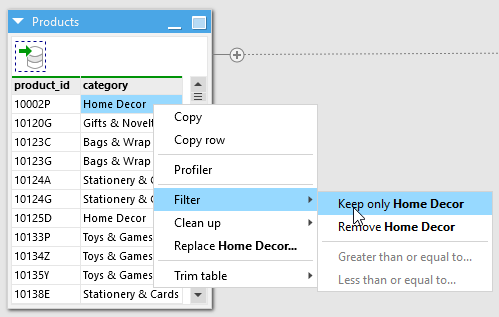
Note that in some cases, the default settings of actions added using these context menus might may not be exactly what you expect or need. For instance, when you aggregate data using the column context menu, EasyMorph automatically creates the "Aggregate" action and tries to guess anticipated aggregated functions and grouping. To change the aggregation function and grouping you may need to additionally edit properties of the "Aggregate" action in the settings panel.
Configuring action settings
When we add an action using any of the methods explained above, the lefthand settings panel changes to show us the available settings for the action.
While the settings for each action are different, they all share the following:
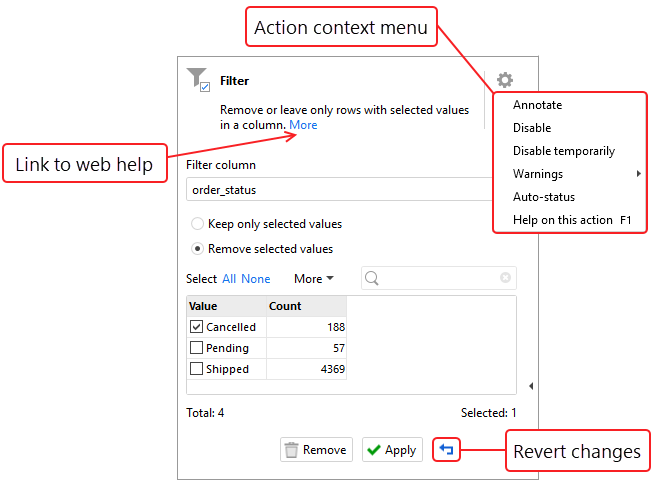
- The action’s name and short description. A link to the action’s web-help page is also included (see the More link in the short description).
- The generic action settings menu (cog icon) on the top-right corner of the settings panel. In this menu, it is possible to add an annotation to the action, disable the action and configure additional settings.
- The Remove, Apply and Revert buttons at the bottom. Every time an action setting is changed, click Apply to save the changes, or Revert to undo them. To delete the action from the workflow, click Remove.
Reordering actions
Reordering an action inside a table is very easy - just drag and drop it to the desired position. This also applies to moving an action between tables.
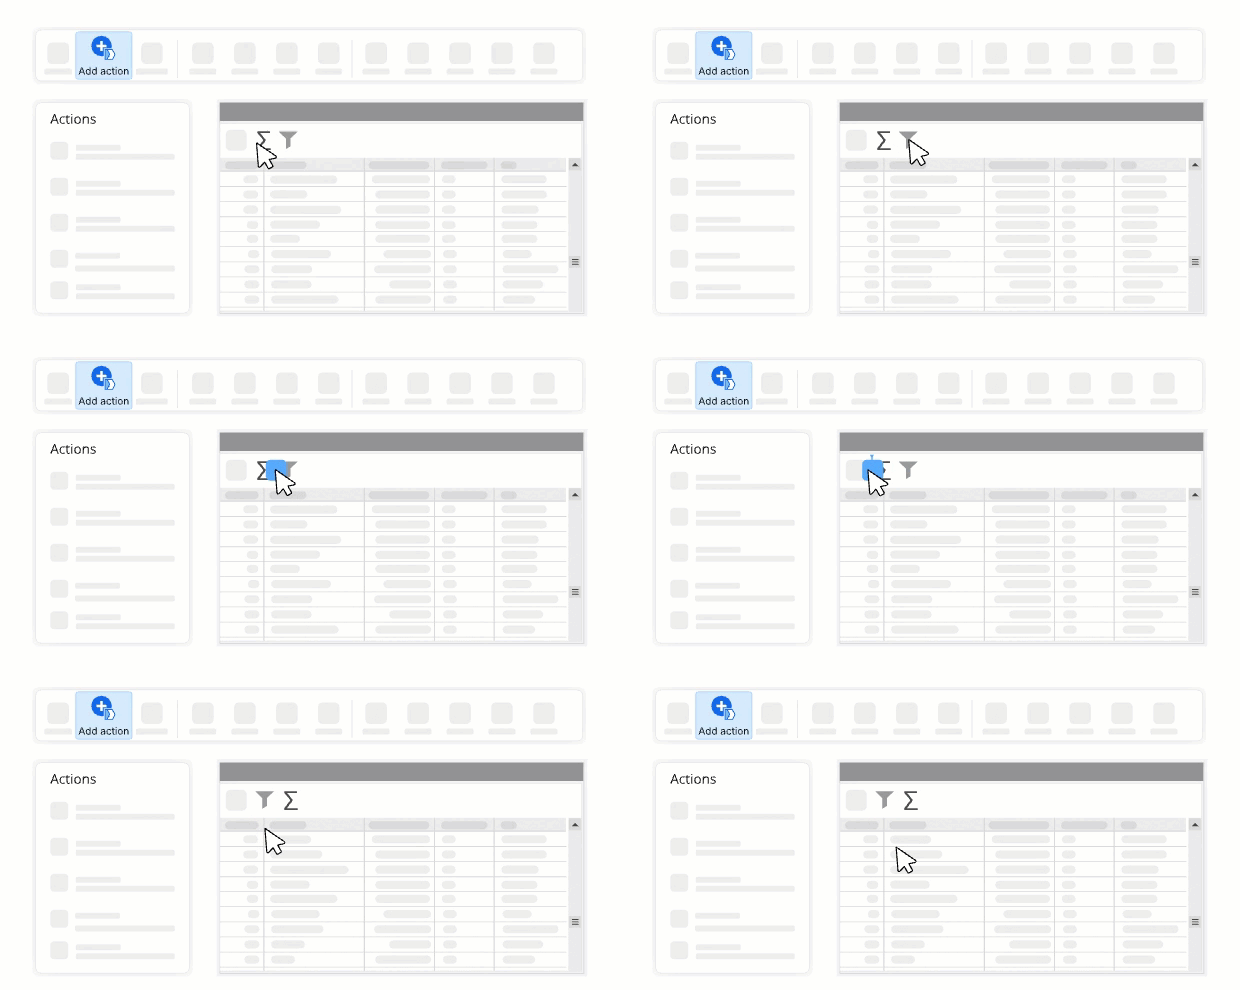
If want to copy an action to another table, you have two options:
- Drag and drop the action while holding the
Ctrlkey - Right-click the action, select Copy action and in the destination table, right click the top bar or any action, and select Paste action(s).