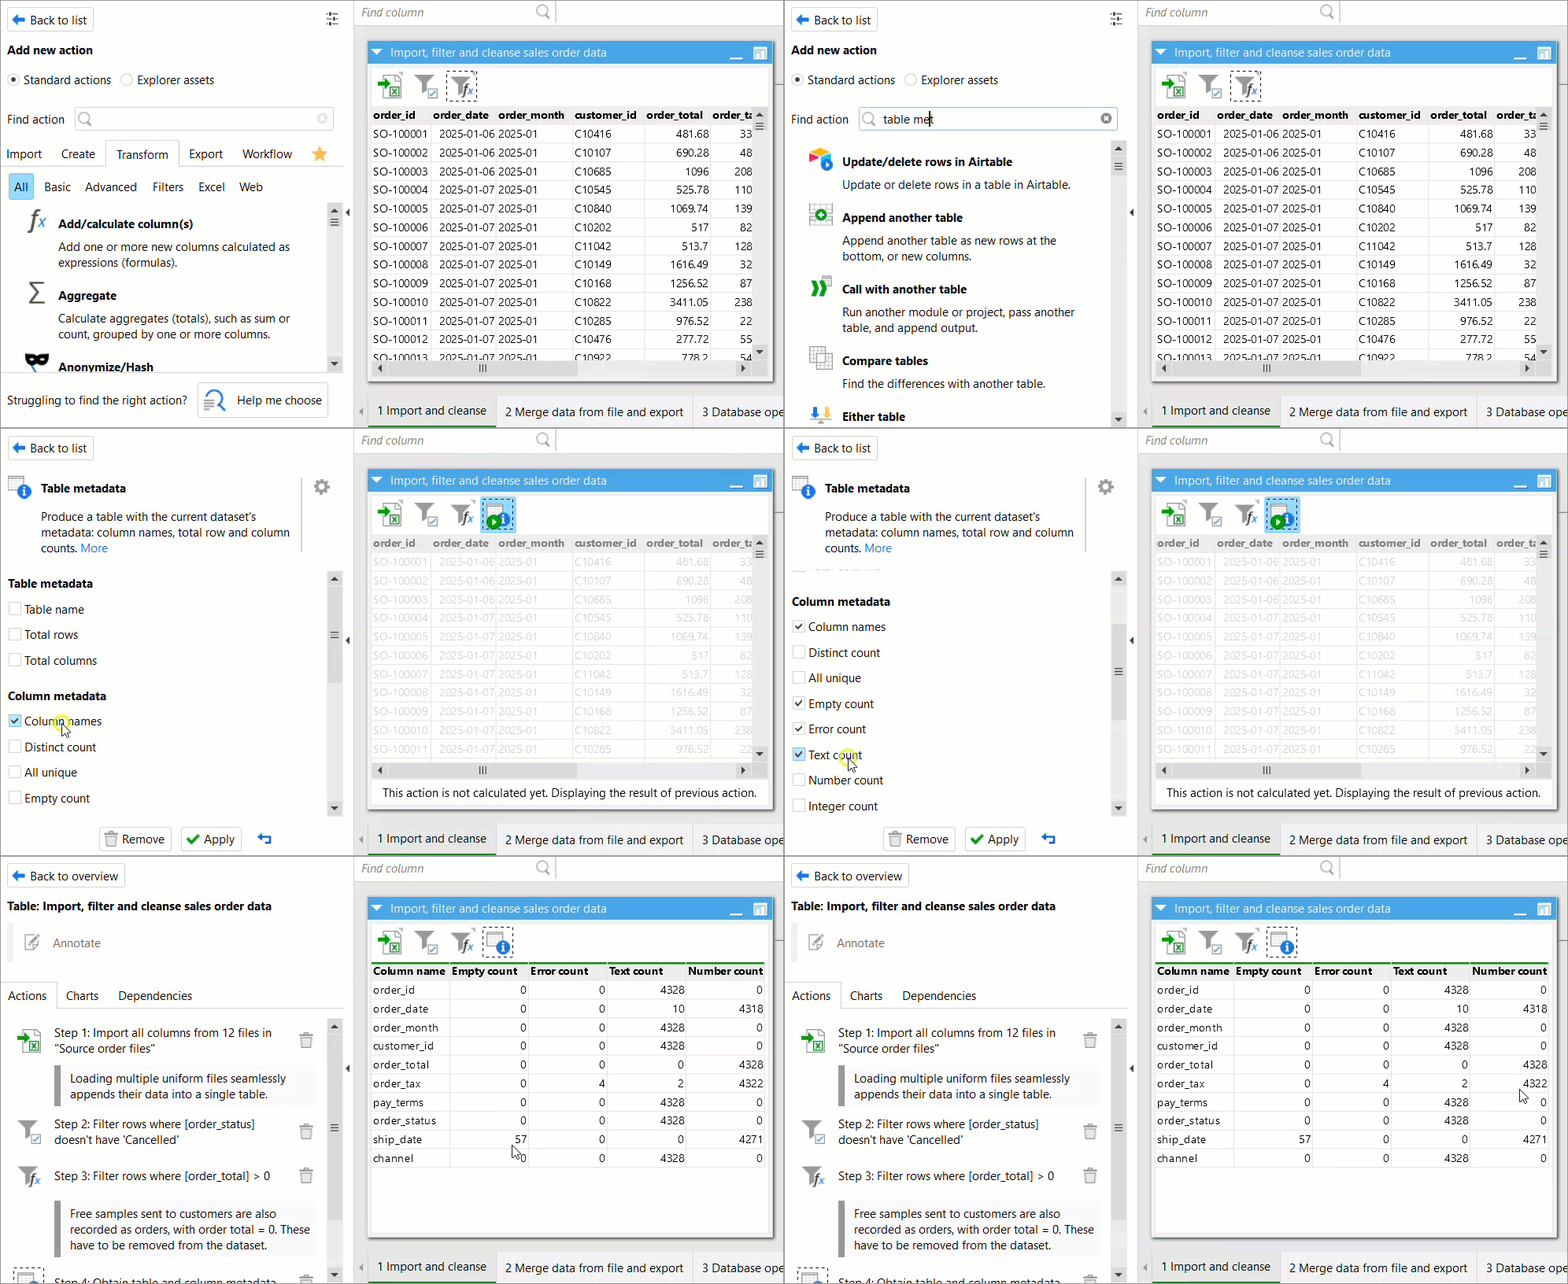
Once you have data loaded into EasyMorph from one or more files (or other sources), the most common next step is to explore the data to check whether it makes sense and to find any issues with the data quality.
In the case of data quality issues, you may want to perform a more thorough analysis in order to understand the scale of the problem and whether or not there are any patterns to it.
This process is frequently called data profiling and there are many places where this analysis can happen:
- The column information bar - includes a quick overview of the data types present in a column.
- The Cell Metadata dialog - used to profile individual cell values in a table.
- The Column Profiler dialog - used for profiling all values in a column.
- The Analysis View - a powerful tool for viewing, instantly filtering, exploring and analyzing of an entire table of data.
Data types in the column information bar
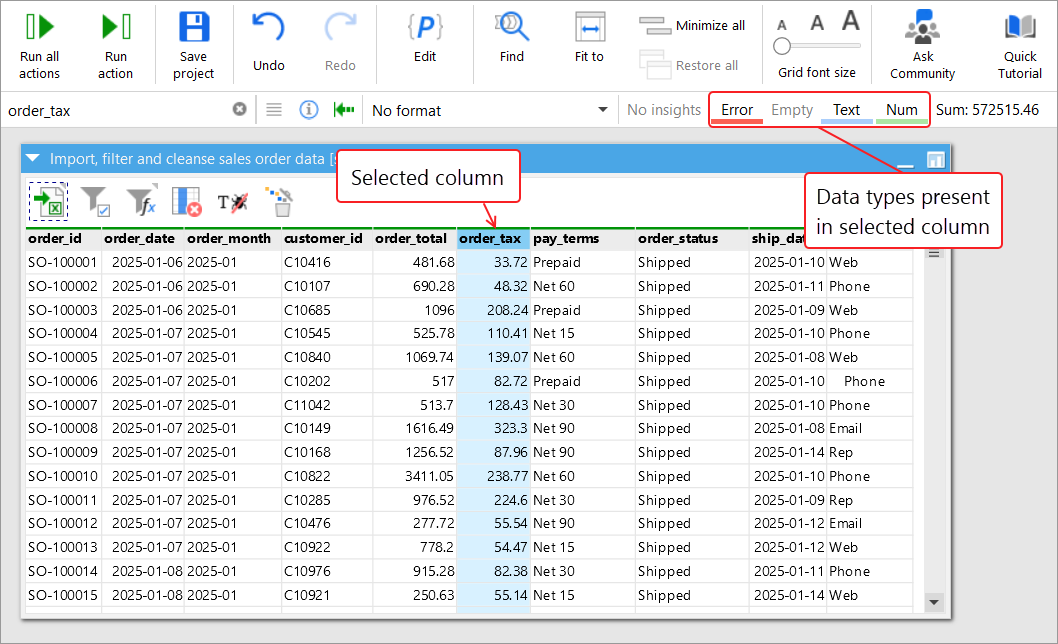
The column information bar is found just below the Menu bar, and is filled out when a column is selected. On the right hand side of the bar, the data types present in the column appear underlined. If a data type appears greyed out, it is not present in the column. In the following example, column order_tax has error, text and number values. This indicates that there are possible data quality issues with this column.
By hovering over the different data types, we can see a count of values of each type. Clicking a type gives us the option to keep / remove rows with certain data types. This will add a filter action to our workflow.
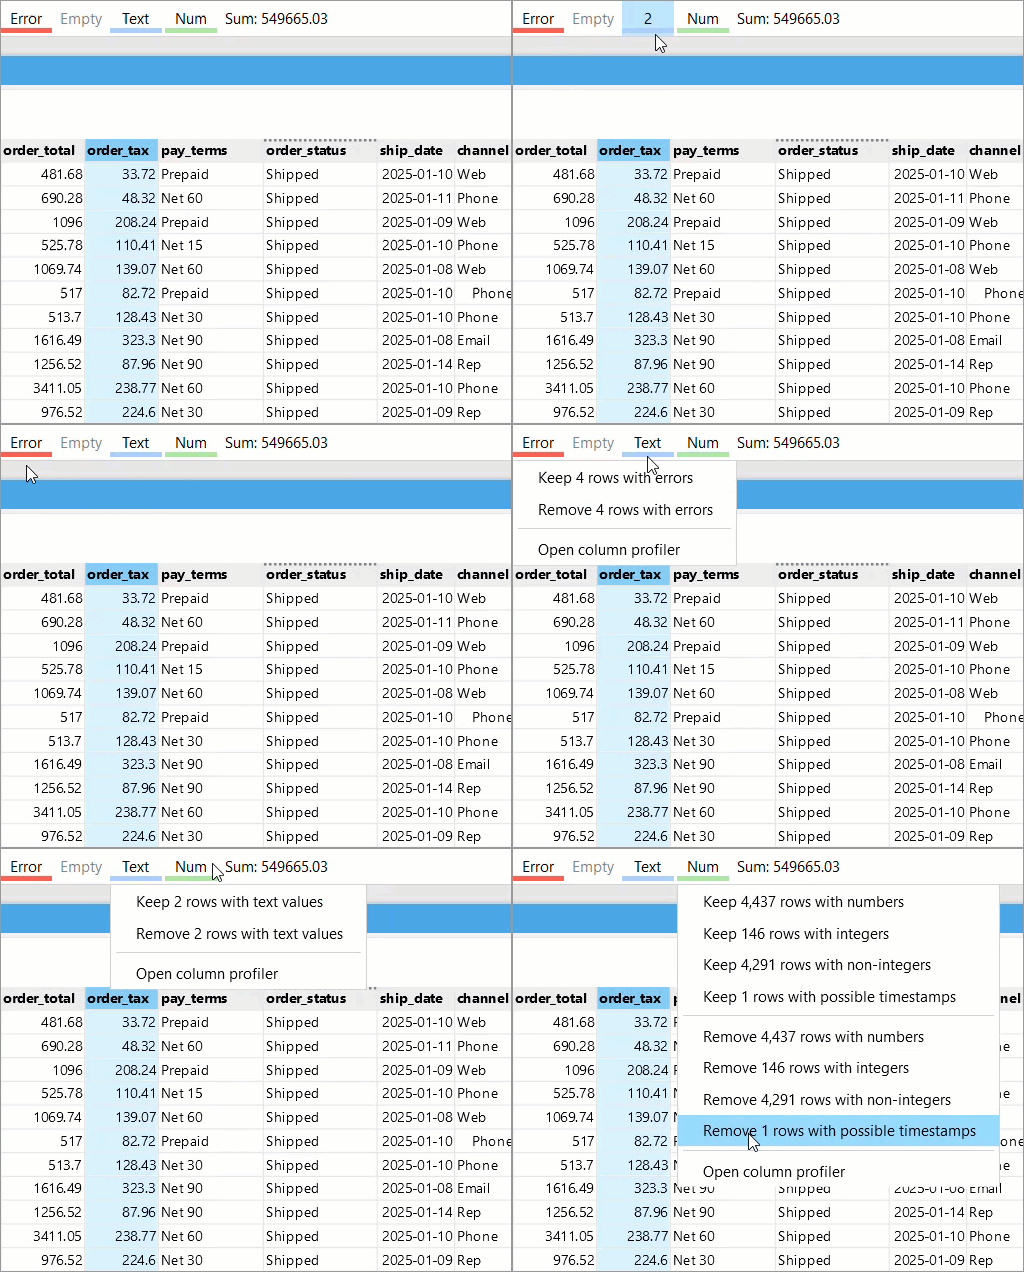
From the dropdown it is also possible to open the column profiler for additional profiling information of the selected column.
Cell Metadata
The Cell metadata dialog is invoked by right-clicking on an individual cell in a table and choosing Cell metadata in the context menu. It displays the cell value, data type and and additional metadata which varies depending upon the data type of the value. For example, in the screenshot below, with the help of the cell profiler you can see that some of the values in column customer_name have trailing spaces.
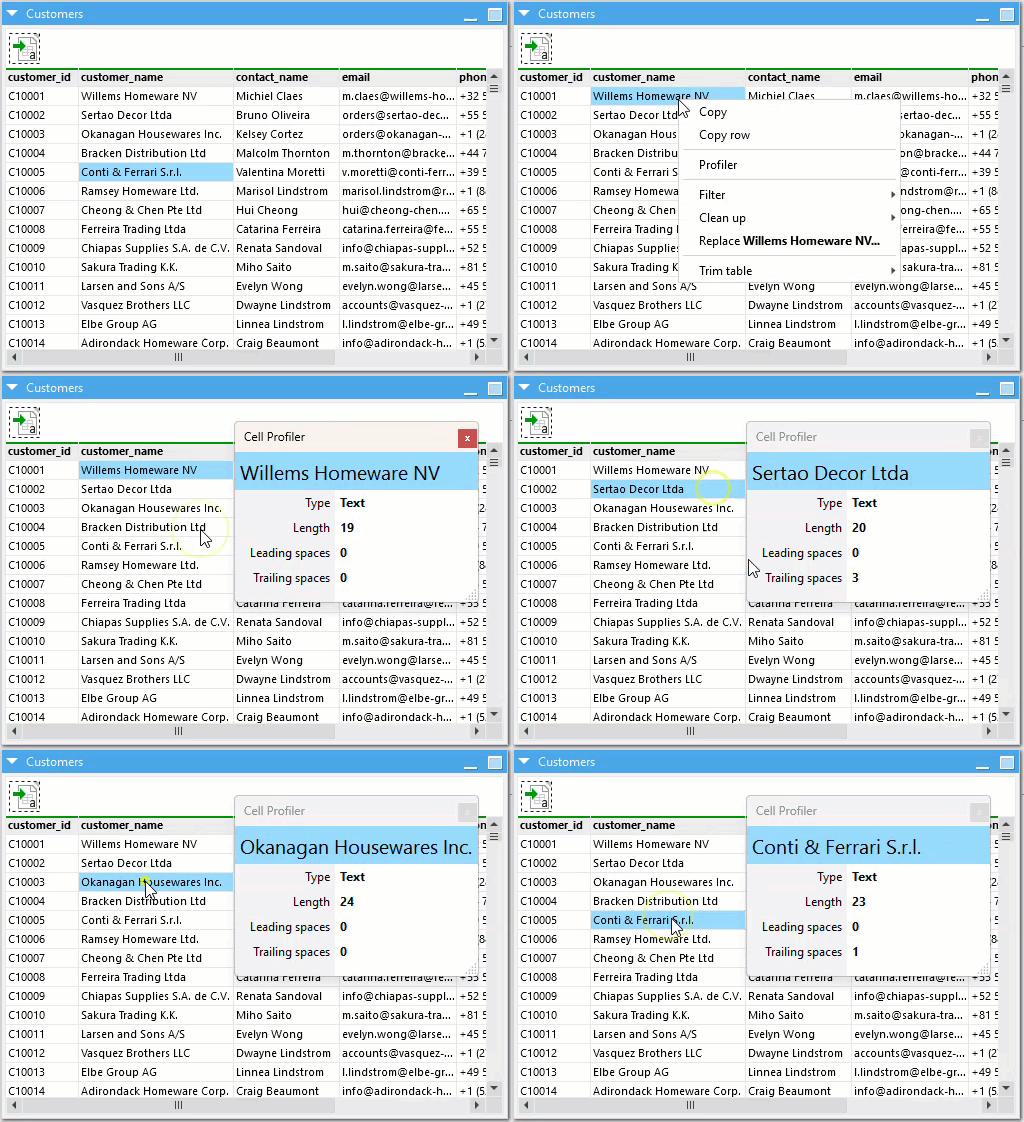
Hint: The Cell metadata dialog is floating, meaning you can keep it open whilst clicking on different cells within any table, allowing you to quickly profile many values.
Column Profiler
The Filter/Profile column values dialog (often referred to as simply the Column profiler) is invoked by double-clicking a column header within a workflow table. Alternatively, you can right-click the column header and select Filter/Profile in the context menu. The dialog displays information on the distinct values in the column, the data type(s) as well as any additional metadata. It can also be used to quickly apply Filter actions to the table.
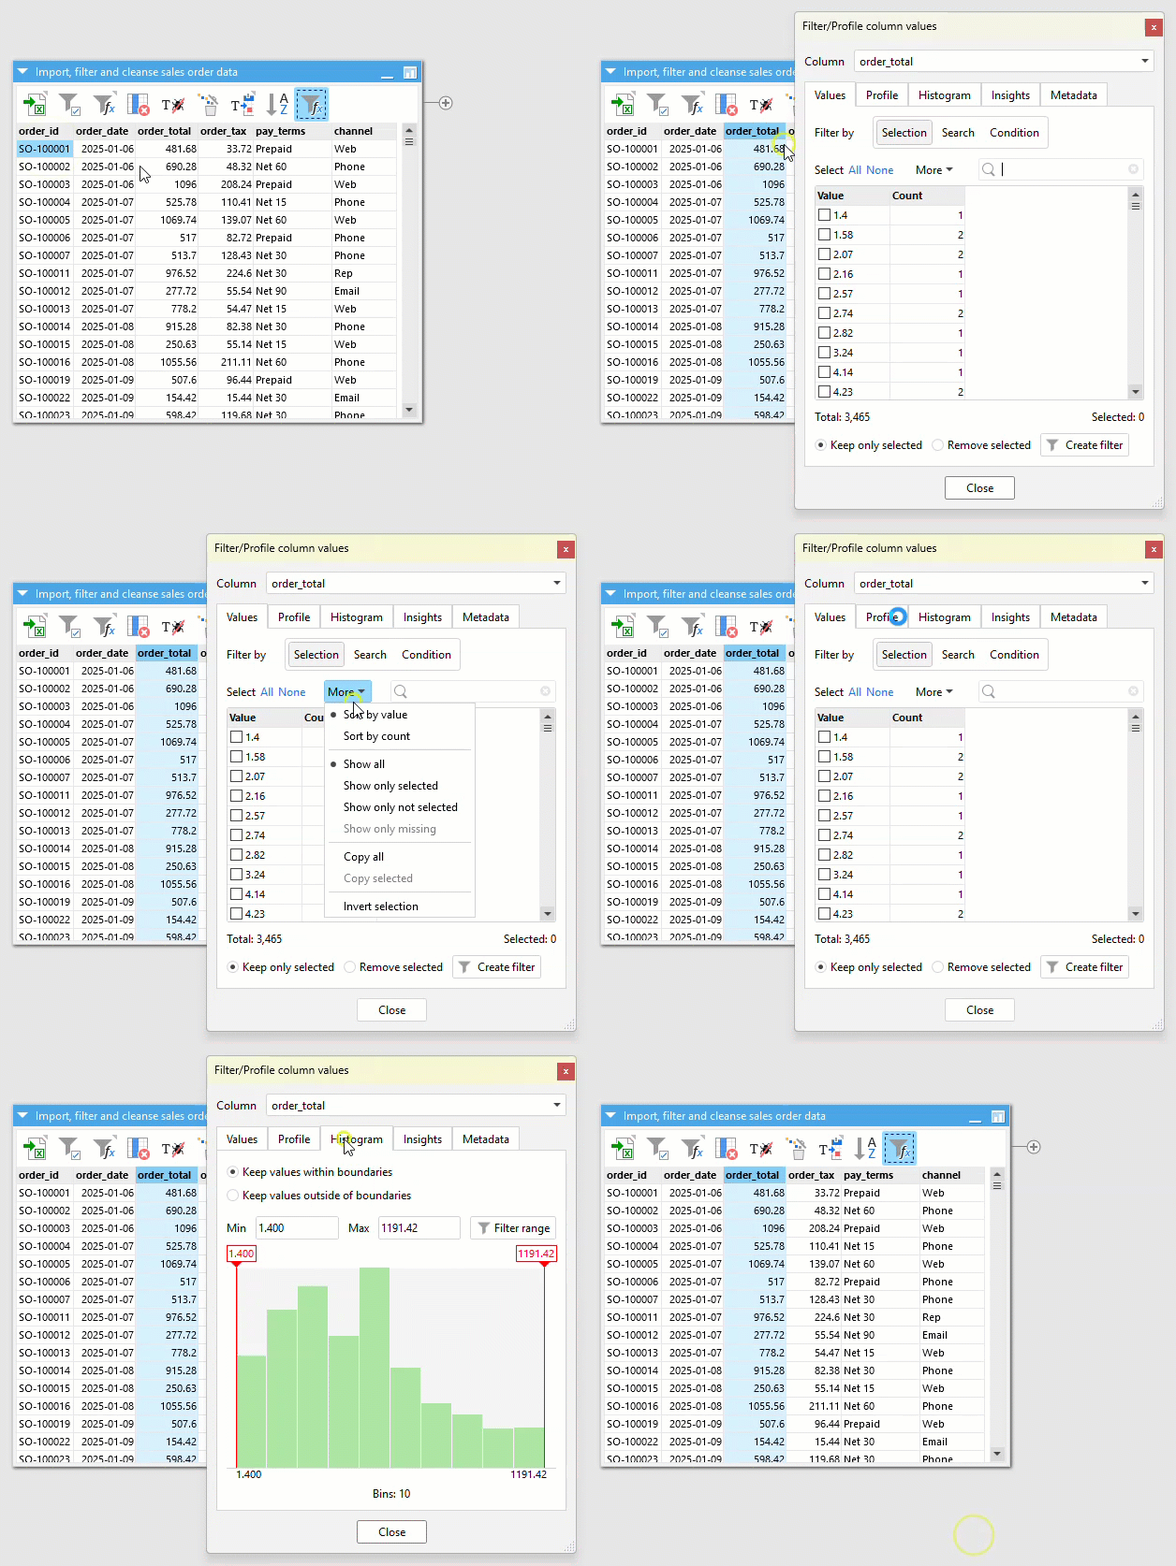
Hint: Like the Cell metadata dialog, the Filter/Profile column values dialog is floating also. Clicking on the column headers of other columns allows you to quickly profile an entire table.
The dialog has several tabs, each providing different information about the data in the selected column:
The Values tab
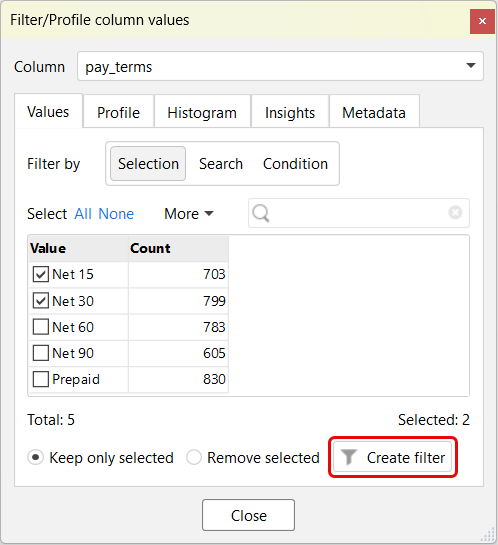
The Values tab shows a list of unique (A.K.A. distinct) values in the column. If the list is long, it can be searched. Alternatively you can define a search or condition, both of which allow you to see which values would be returned if a filter with the search or condition was applied. Selecting one or more values by ticking the check boxes next to them and then clicking on Create filter, will add a Filter action to the the workflow using the selected values.
The Profile tab
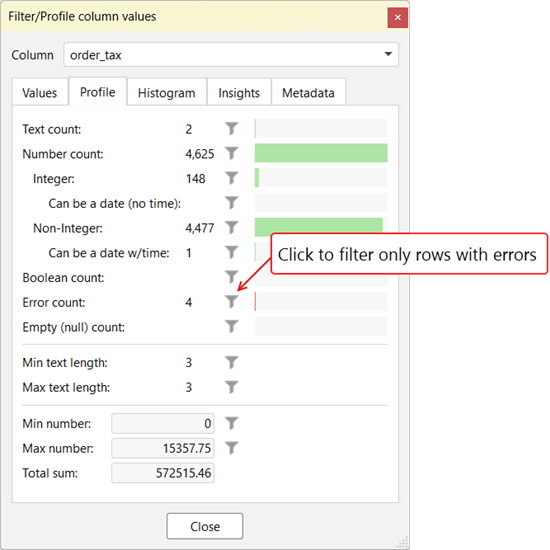
The "Profile" tab shows information regarding the types of data within the column such as the number of values of each type, any empty or null values and any errors. Clicking on the filter icons next to the data types will apply a Filter by type action to the table. Note that as dates are most commonly stored as numbers in EasyMorph, information about them is shown under the number count.
The Histogram tab
The Histogram tab shows a visual representation of the distribution of numeric values within the column. This can be useful for identifying outliers within the data that may be erroneous. Dragging the red Min and/or Max markers left or right allows you to select these outliers. Clicking on the Filter range button will add a Filter by condition action to the table matching the selected range.
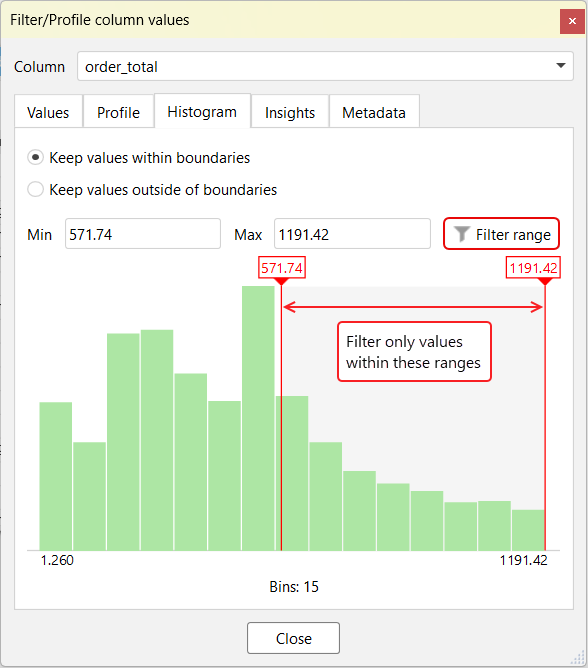
Hint: You can make the dialog bigger to increase the granularity of the histogram bins (also known as buckets).
The Insights tab
The Insights tab shows where EasyMorph has identified potential anomalies or data quality issues problems you may want to investigate. There are lots of different Insights which EasyMorph can identify. A few common examples include:
- Text strings which only contain numeric characters and so may need to be converted to numbers.
- Text containing duplicate, leading or trailing spaces.
- Text containing special characters.
- Text that is wrapped in quotes.
- Suspicious duplicate values in columns where the majority of values are unique.
- Numeric values that are positive or negative when the majority of values are the opposite.
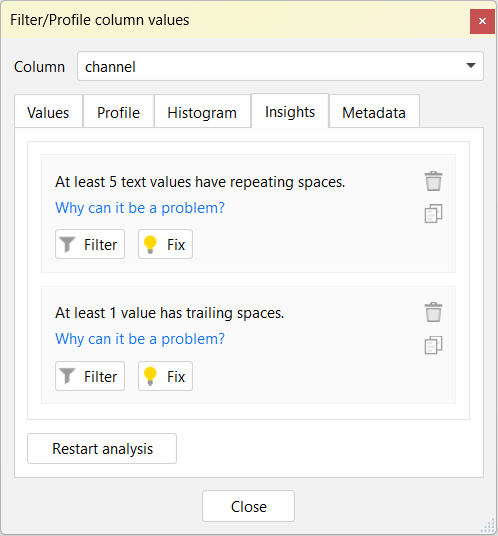
Clicking on the Filter button of any suggestion will add an appropriate action to the table to show the records where the problem exists. Some insights also have a Fix button which when clicked will add the relevant actions to resolve the issue. For example, where trailing spaces have been identified, a Sanitize text action will be added configured to remove them.
The Metadata tab
And finally, the Metadata tab shows any other metadata for the column, such as the original name (if the column has been renamed) and the number formatting being used when EasyMorph displays the column.
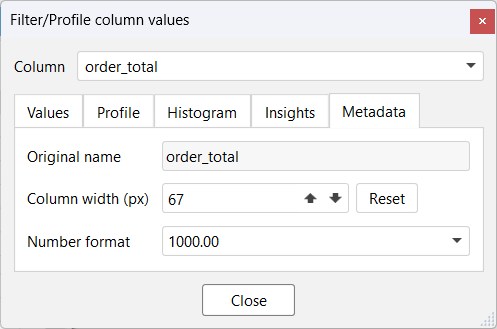
Table metadata
The Table metadata dialog provides a summary of the column profiles - similar to the column profiler describer above - but for all columns in a table. To access the dialog, right-click on any action in the table and select Action’s result -> View metadata. If you’re in Analysis View, you will find the Table metadata button directly in the top menu bar.
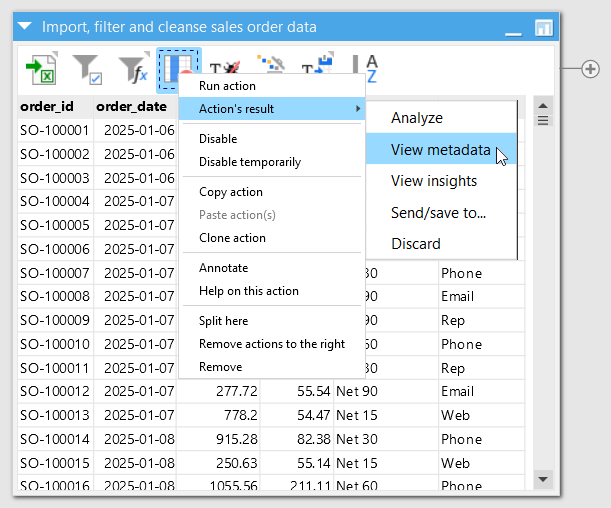
Note that the information provided in the table metadata dialog will be for the table as output by the selected action (initially the one which you right-clicked). This can be useful for seeing how different actions have affected the data profile and thus the quality.
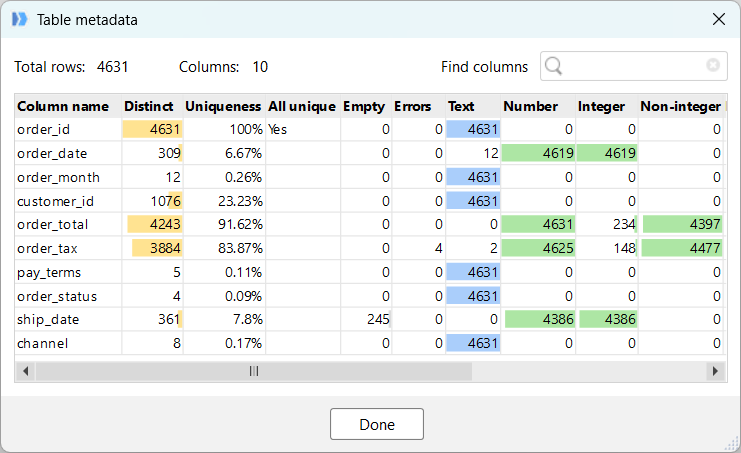
All numbers in the metadata summary table are clickable. When you double-click a number, a filter is added to the Analysis View selecting only those values which contribute to the number. Alternatively, holding the Ctrl key whilst double-clicking a number adds a filter which excludes those values.