The most common first step when creating a new project in EasyMorph, is to load in data from one or more files. Files can be loaded either:
- one file at a time, specifying the specific file; or
- multiple files at once, either selecting the desired files from within a single folder, or defining a search query to load all files which match the search; or
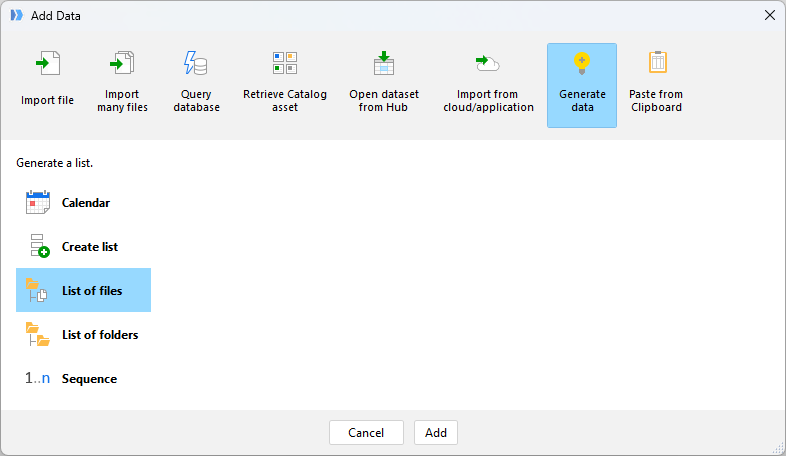
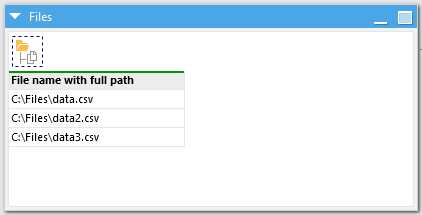
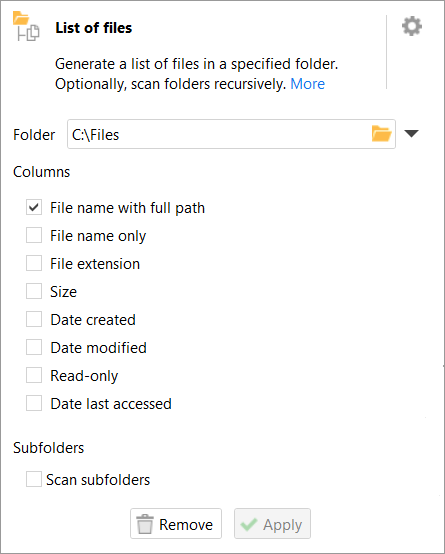
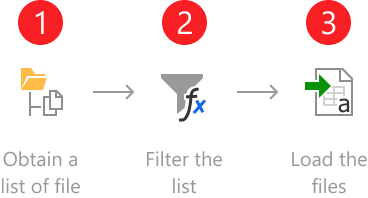
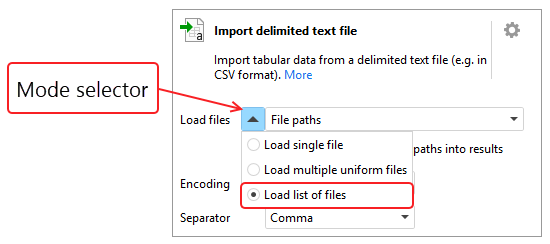
- by loading or creating a list of files, then logically looping through the list loading them in to one or more tables.
The latter is considered an advanced method and so is covered in the Topics for power users at the bottom of this page.
Supported file types
EasyMorph supports loading data from a wide range of file types. For full details on the associated import actions, you can click on the links in the table below.
| File Type | Extensions |
|---|---|
| EasyMorph dataset files | .dset |
| Delimited text files (e.g. CSV) | .csv, .psv, .tsv, .txt or any other |
| Excel spreadsheets | .xls, .xlsx, .xlsm |
| Fixed width text files | .txt or any other extension |
| Apache Parquet files | .parquet |
| JSON files | .json or any other extension |
| Plain text files | .txt or any other extension |
| Qlik QVD files | .qvd |
| SAS data files | .sas7bdat |
| SSPS/PSPP data files | .sav |
| XML files | .xml |
| EasyMorph project files (metadata only) | .morph |
Hint: EasyMorph also supports loading from SQLite database files (.sqlite, .sqlite3, etc) and DuckDB database files (.duckdb or .db). For more information on this, please see Loading data from a database.
Even though each file type has specific settings in their import actions, the general loading process differs very little between them. Therefore, if below we describe the process for loading in one specific file type, we can apply the same techniques easily to any other.
Loading one file at a time
There are several ways to load a single data file in to EasyMorph. In this tutorial we will look at the most commonly used method. We begin by opening our EasyMorph project or creating a new one. Then on the Main tab click the Add data button on the far left of the top navigation bar. This will open the Add data dialog that offers options to load data into EasyMorph form a large number of different sources. At the top of the dialog you will find the Import file option which when selected shows us options to load each of the supported file types mentioned above.
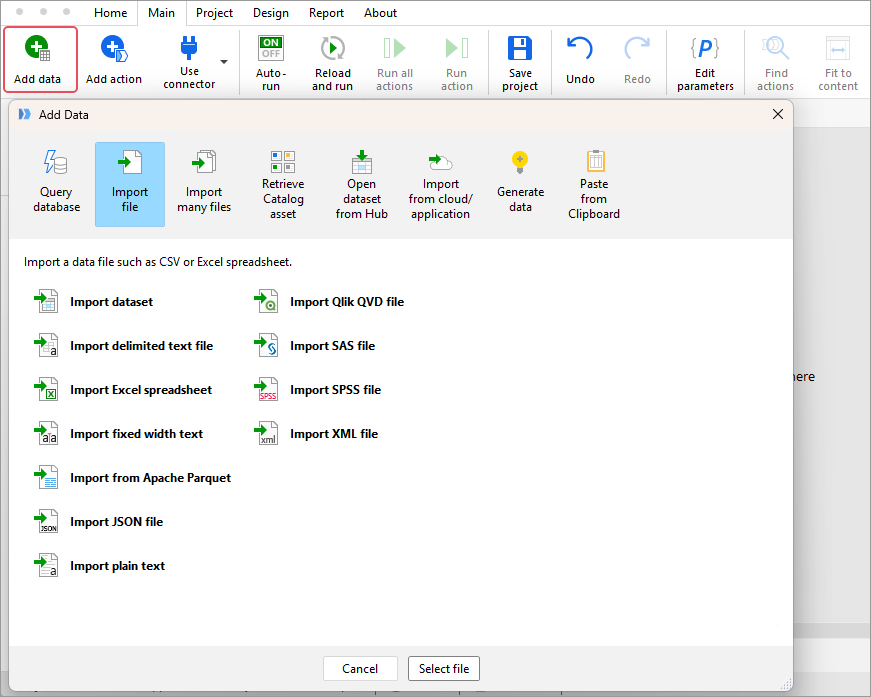
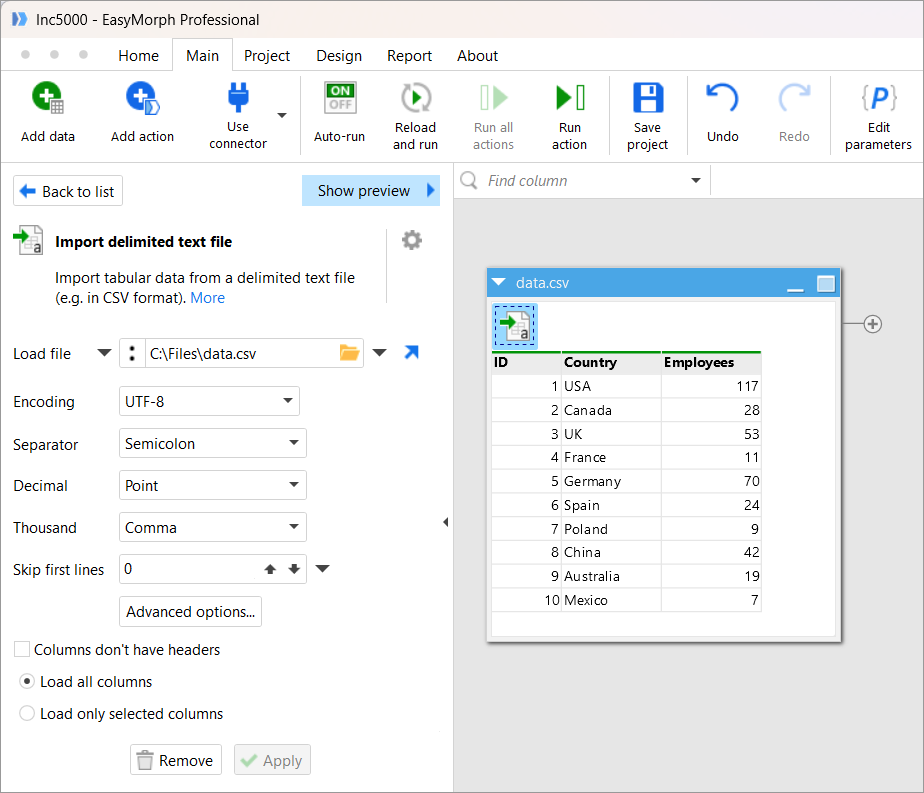
Simply select the appropriate file type, browse to the specific data file you wish to load into EasyMorph, select it and click Open. EasyMorph will automatically add the relevant action to a new table to load the file with the default options for that type.
Absolute vs. relative file paths
Notice that in the previous screenshot the path of the loaded CSV file is C:\Files\data.csv, and there are two vertical dots to the left of the file path. These two vertical dots mean that the absolute path of the file is being shown. The absolute path is the complete path of the file, starting from its root directory (in this case, C: Drive).
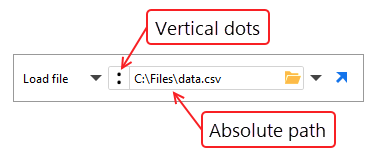
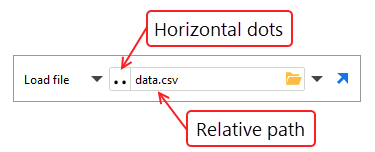
It is also possible to define the file location using a relative path. The relative path is the location of the file in regards to the location of the EasyMorph project’s .morph file. For example, lets say that the project file is found in C:\Files, which is the same location where the “data.csv” file is found. In this case, the relative path of the file would simply be data.csv - relative to the project’s file, there is no specific computer drive or folder we need to access to get to the file, it is already in the same location. Relative paths are shown in EasyMorph with two horizontal dots.
Warning: In order to use a relative path, you must first save the EasyMorph project file at a location. If not, the relative path can’t be obtained and the import action will fail.
When we import a file that is in the same folder or a child folder with respect to the project’s file, EasyMorph will always try to use the relative path. For example, lets say that at the same location of the project’s .morph file (C:\Files) there is the “orders” folder, where the “order_data.csv” file is found. When we import this file, we will automatically see orders\order_data.csv as the relative path (with the two horizontal dots).
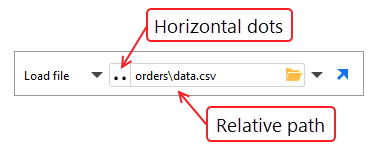
If the file to import is found in an unrelated folder (or in a parent folder) relative to the location of the project’s file, the absolute path will always be used.
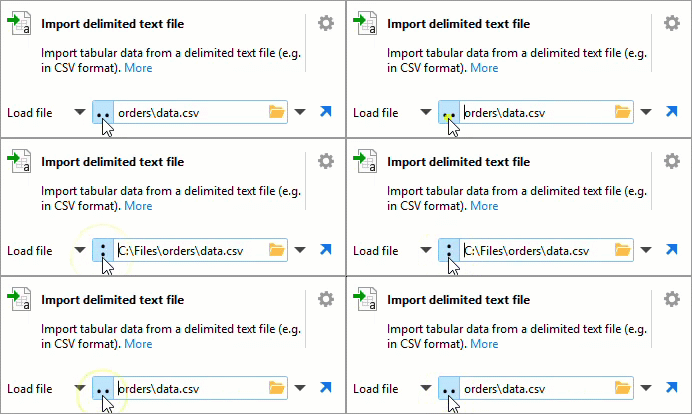
It is possible to switch back and forth between absolute and relative file paths by clicking on the dots:
File previews
You can tailor the default options as needed if the file is not loaded as you expect. The options available will vary depending on the type of file being loaded. When configuring the action options for your file, it can be helpful to see the contents and how the different options may effect how the data will be loaded. Some file types have a Show preview link at the top right of the left-hand settings bar. Clicking on this link will display a preview window.
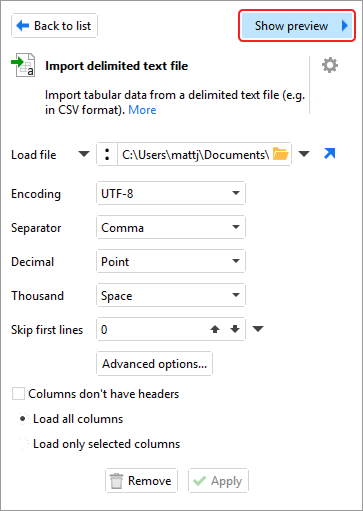
Note: Not all file types are supported within the preview. If you do not see the Show preview link then the type of file being loaded is not supported.
The top half of the preview shows the data as it appears in the file. The bottom half of the window shows how the data will look once loaded using the current options and will be updated as you make changes to the configuration options. You can close the preview by clicking on Hide preview.
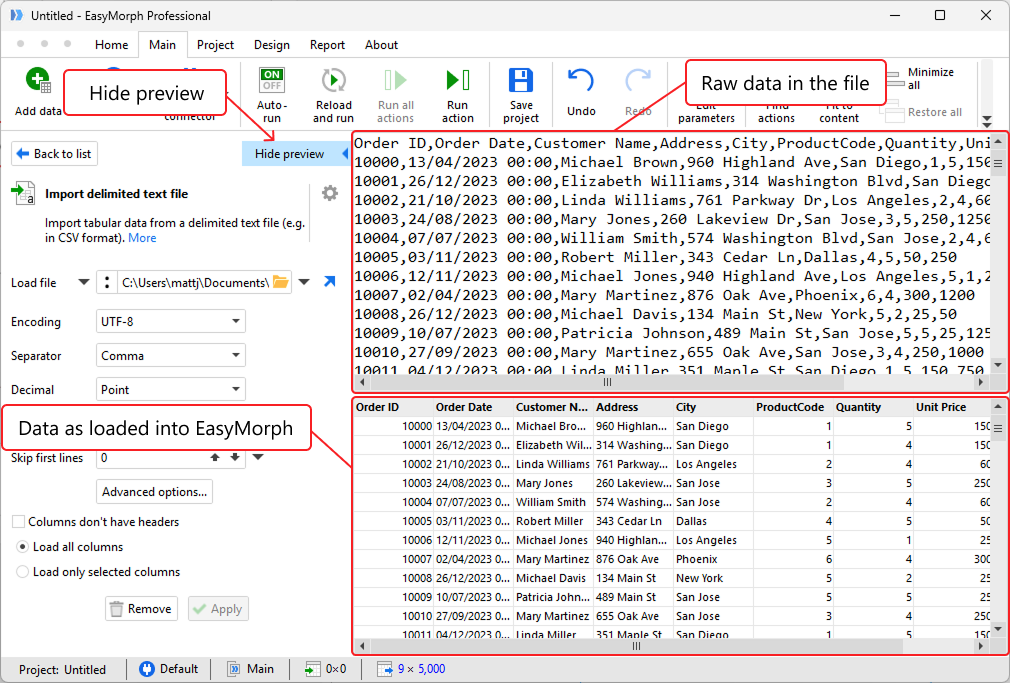
Example of loading data from a file: US Census 2012.
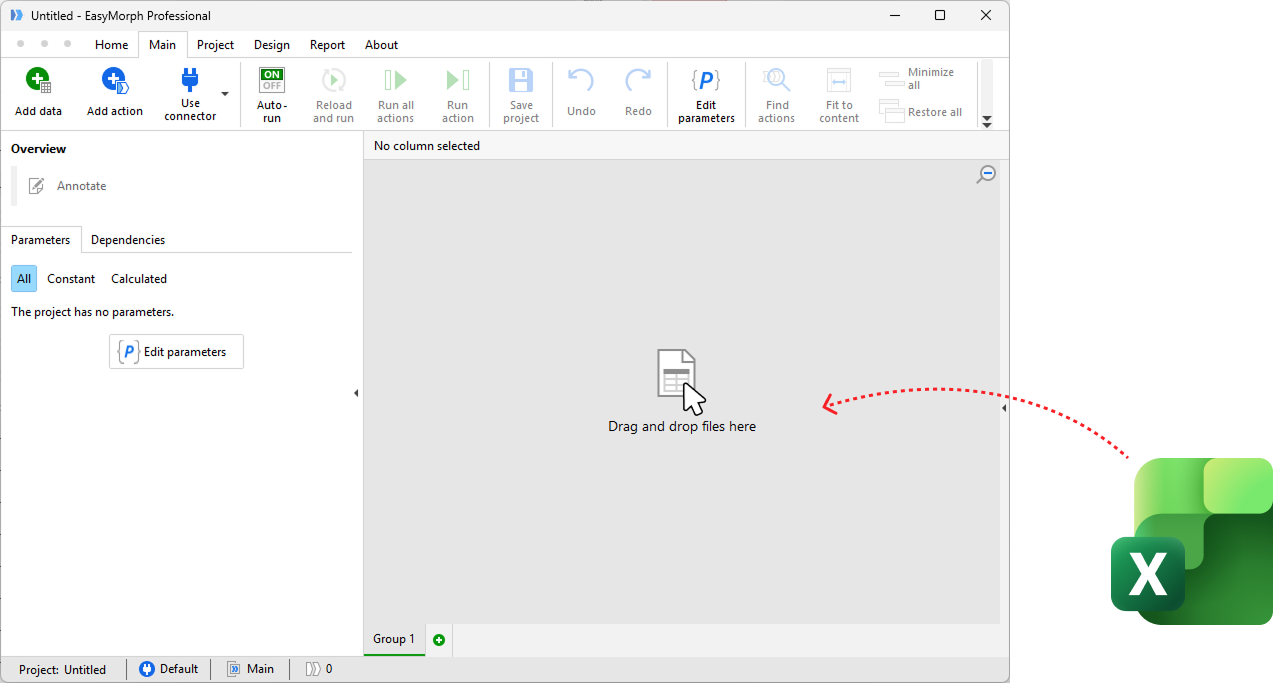
Hint: Some file types can also be loaded into EasyMorph by dragging them on to the main window. Supported file types include .xls, .xlsx, .txt, .csv, .psv, .tsv, .qvd, .sas7bdat and .dset. The automatically added action can then be modified as described below if needed.
Note: Once you have loaded multiple files into multiple tables, your workspace may become cluttered and difficult to work in. For best practices on organizing your workflow, take a look at the Structuring workflows tutorial.
Loading multiple files simultaneously
In EasyMorph, it is possible to load multiple files from a single folder simultaneously, automatically combining them into a single table. This is done in a similar way to loading a single data file. Begin by opening your EasyMorph project or create a new one. Then on the Main tab select the Add data button from the top navigation bar, followed by Import multiple files in the Add data dialog. As with loading a single file, you can then select the option to match the file type of your data files.
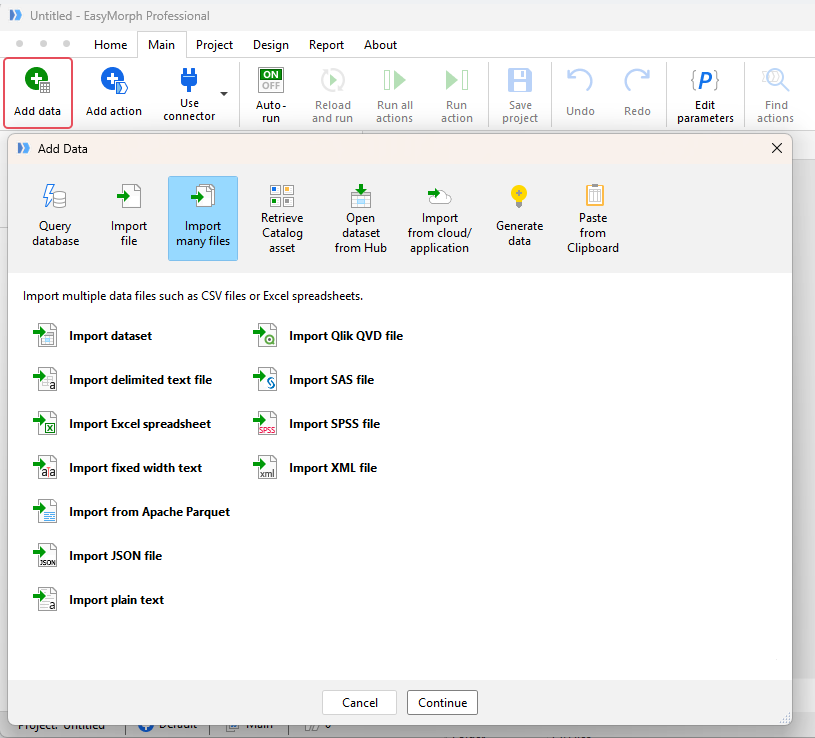
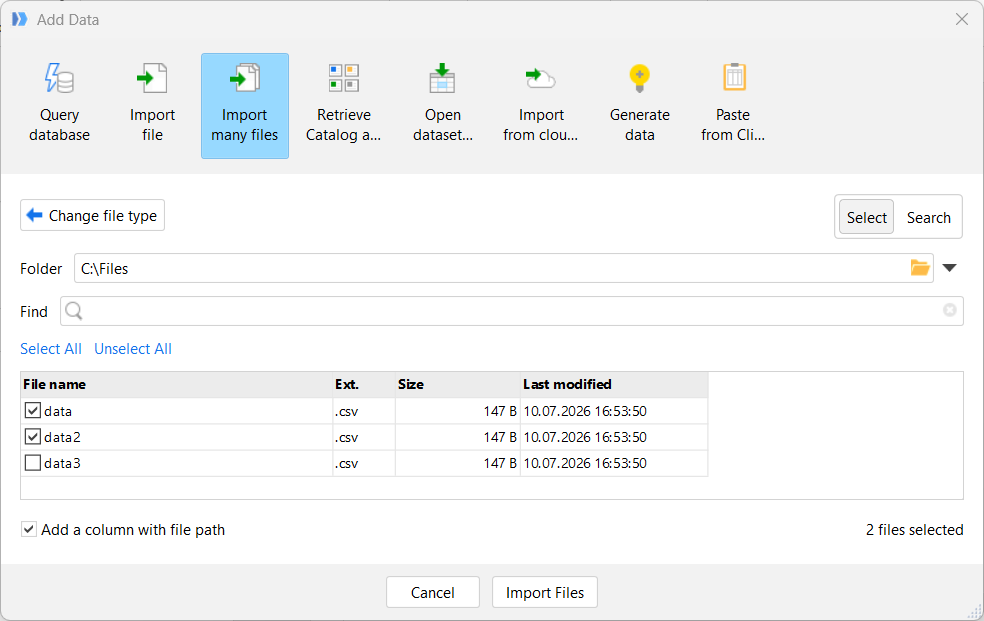
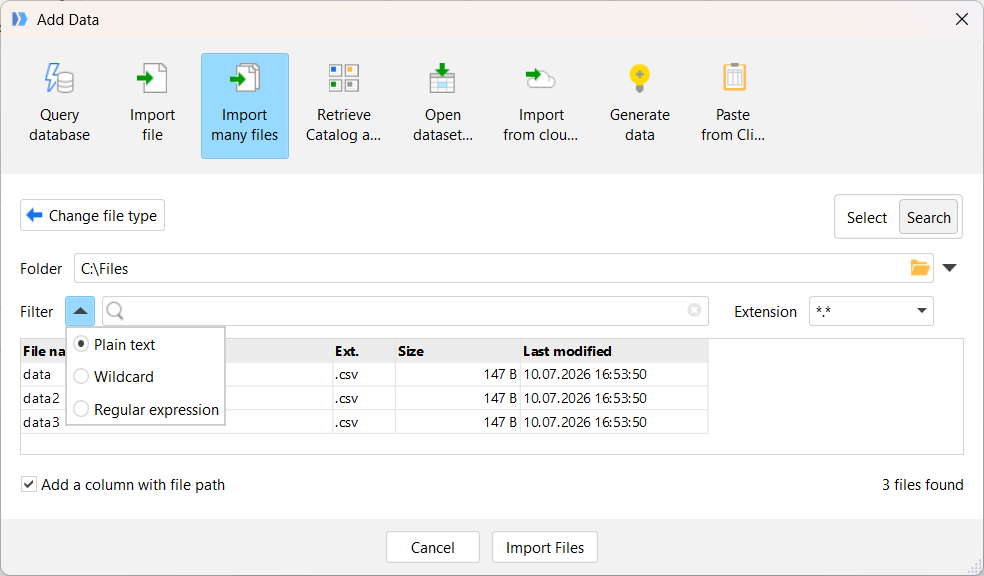
In the dialog that appears, navigate to and select the folder that contains the files you wish to load. There are 2 selection modes available: Select and Search.
Select mode
In Select mode, you can pick the desired files from the list shown by selecting the checkboxes next to the file names. Once all required files are chosen, simply click on Import Files and EasyMorph will automatically add the required action to load that file type.
Hint: As with loading a single file, it is also possible to load multiple files by selecting them in Windows file explorer and dragging them at the same time to EasyMorph. Supported file types include .xls, .xlsx, .txt, .csv, .psv, .tsv, .qvd, .sas7bdat and .dset. The automatically added action can then be modified if needed.
Search mode
In Search mode, rather than selecting individual files, you can specify a search string instead. EasyMorph will then load in all files in the folder which match the search. Searches can be specified as one of 3 types:
- Plain text - All files which contain the specified string will be returned. The search is not case sensitive.
- Wildcard - All files which contain the specified pattern containing one or more
*as wildcards will be returned (e.g.dat\*) - Regular expression - All files which match the provided regular expressions (A.K.A. regex) pattern will be returned. Note that EasyMorph uses the C# syntax for regular expressions
EasyMorph shows the list of files which match the provided search. Once happy with the selection, click Import Files and EasyMorph will automatically add the required action to load that file type.
When we load more than one file at the same time like this, they are appended together and added into a single table in EasyMorph, lining up columns with the same name. Columns that are not in all files will still be included in the resulting table but the value will be empty for those records which are loaded from a file that doesn't contain the column. This appending of data is also known as "concatenating" or a "union" in other data tools.
Warning: It is possible to select files of more than one file extension or format. EasyMorph will add the relevant action and default configuration based on the first file. If this configuration will not work for all files, errors or unintended results may occur.