As well as loading data from a database table, it is also possible to update a database table, either by adding new rows or updating existing rows with new values. Many of the topics discussed below build on what was discussed in the previous chapter and so it is recommended to read Loading data from a database before continuing.
To be able to export data from EasyMorph to a database, there are 4 main steps needed:
Create a connector to the database using the EasyMorph Connector Manager.
Create an EasyMorph project (or open and existing project) from which you wish to export data to the database.
Create a database table to export the data to if one doesn’t already exist.
Use the relevant action to perform the export.
Important: Most of the commands in this chapter are not calculated automatically, even when Auto-run is turned on. This is because they are considered “side-effect” actions because they make changes to external data and systems. Such actions can be run manually by pressing the Run all actions button on the top navigation bar, or by pressing the F5 key.
Database connectors
A database connector in EasyMorph is a set of connection properties (i.e. a server address, port, database name, access credentials, etc.) that are used to connect to a particular database. The properties that are required vary depending on the type of database being used. If at all unsure, your database owner or administrator should be able to provide the required settings.
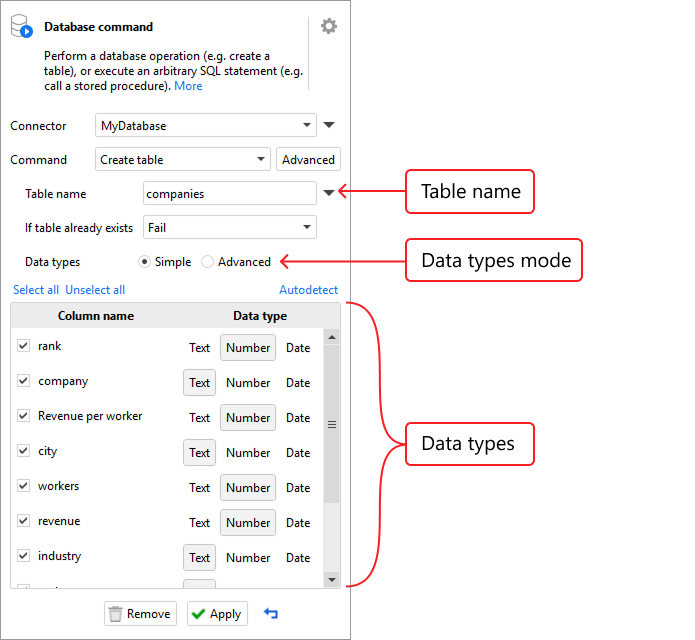
<<<<<<< Updated upstream If an existing database table doesn’t already exist, we can create one using the Database command action. In this action, select the database connector, choose the Create table command, and then provide a new table name. While most database types allow table names containing spaces and letters in mixed upper/lower cases, it is recommended to choose table names that have no spaces and contain either all upper-case letters, or all lower-case for maximum compatibility.
If an existing database table doesn’t already exist, we can create one using the Database command action. In this action, select the database connector, and then provide a new table name. While most database types allow table names containing spaces and letters in mixed upper and lower cases, it is recommended to choose table names that have no spaces and contain either all upper-case letters, or all lower-case for maximum compatibility.
Stashed changes
To facilitate dealing with database data types, regardless of the type of database, EasyMorph simplifies all data types to just three: Number, Text, and Date. EasyMorph automatically detects data types in the workflow table where the action is placed and picks appropriate database types depending on the type of database. You can change these auto-detected types, if necessary.
It's also possible to specify data types native to the database, instead of simplified ones by switching the Data types option in the action’s settings to the Advanced mode.
Tip: To create a table in a particular database schema, append the schema name to the beginning of the table name separated by a period/full stop. For example myschema.mytable. Note that the schema must already exist.
Exporting data into a database table
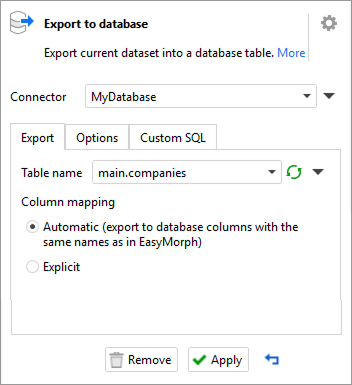
To export data into a database table, we can use the Export to database action. Configuring the action is simply a case of selecting the database connector to use and the table you wish to export the data to.
Important: The table must exist in the database prior to exporting data otherwise the Export to database action will fail to run.
Under the hood, this action uses SQL INSERT to insert batches of 10/100/1,000/10,000 rows into the target database table (defaults to 100). The batch size can be changed on the Options tab in the action’s settings.
Prior to exporting data, EasyMorph automatically detects data types in the target database table. In case of type mismatch for a particular value, by default the batch will fail and an error will be shown. Therefore, it's typically a good idea to ensure your data is clean and consistent before exporting. EasyMorph has plenty of actions that can help you cleanse your data.
In any case, if we don't want the export to fail on type mismatch, on the Options tab we can instead choose to export type mismatches as NULL or as a default value.
Watch a similar video in
Tip: In order to map fields in EasyMorph to fields in an existing database table, just rename EasyMorph fields so that the new names exactly match corresponding field names in the database. You can do the renaming and export in a derived table if you prefer to keep working with unchanged names in EasyMorph.
When working with large tables of data greater than 1 million records, using the Export to database action can be slow due to the need to perform many separate batch uploads. Instead, we can use other actions and techniques to make bulk data exports much more performant.
SQL Server, Postgres and Snowflake databases
<<<<<<< Updated upstream For Microsoft SQL Server, Postgres and Snowflake databases, we can instead use the Bulk export to database action which, instead of SQL INSERT, performs fast data insertion into a database table using bulk export mechanisms provided by these target databases. Using the Bulk export to database action is straight forward. It is very similar to the regular Export to database action described above.
For Microsoft SQL Server, Postgres and Snowflake databases, we can instead use the Bulk export to database action which, instead of SQL INSERT, performs fast data insertion into a database table using bulk export mechanisms provided by these target database. Using the Bulk export to database action is straightforward. It is very similar to the regular Export to database action described above.
Stashed changes
Other database types
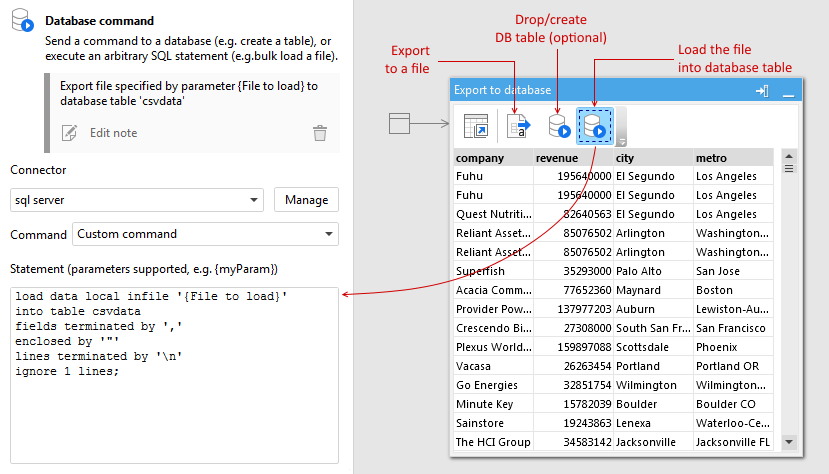
For all the other database types that are not supported by the Bulk export to database action, it's still possible to perform bulk export by combining a few actions together. Typically, the process works as follows:
Export data from EasyMorph into a temporary text file (e.g. CSV).
(Optional) Transfer the temporary text file to the database server machine or to a cloud storage supported by the target database.
(Optional) Create or empty a table in the database if required.
Instruct the target database to upload the temporary file in a bulk load mode using a special custom SQL command.
Exporting data into a text file was described in the Exporting data into a file chapter towards the beginning of these tutorials. To bulk load data into a database, send a special custom SQL statement to the database using Database command action’s Custom command option.
Bulk loading typically has excellent performance, and allows fast loading of big tables due to database-specific optimizations, although, it requires learning how to compose the necessary SQL command. See the links below to find documentation on bulk load commands in some popular RDBMSes:
Hint: You can insert parameters into SQL commands using “curly” braces. When sending a command, a parameter name in curly braces will be replaced with the parameter's value.
Updating rows in a database table
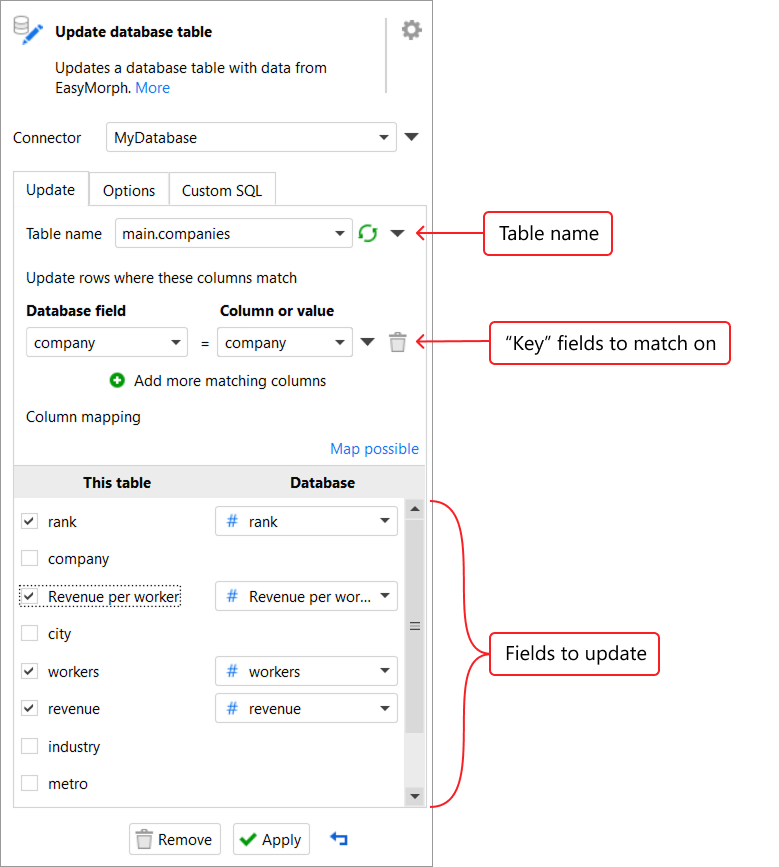
The Update database table action can be used to update existing records in a database table. This action allows us to specify:
Which database table to update <<<<<<< Updated upstream
What database field values should be matched to which EasyMorph column values, in order to select the rows to update =======
What database field values should be matched to which EasyMorph column values.
Stashed changes
Which database fields should be updated using which EasyMorph table column fields.
Under the hood, the action executes an SQL UPDATE statement like:
UPDATE db_table_name SET db_field1 = easymorph_value1 , db_field2 = easymorph_value2 ,... WHERE db_key_field1 = easymorph_key_value1 AND db_key_field2 = easymorph_key_value2 AND...;
It's also possible to not specify any key fields to match on. In this case, the EasyMorph dataset must have only one row, in which case the underlying SQL UPDATE statement would look as like:
Note: If no fields are specified to match on and the EasyMorph dataset has more than 1 row, the action will fail.
Deleting database rows
Sometimes we might need to delete rows from a database table. There are a couple of different methods for doing this, depending upon the specific use case:
Deleting database rows using a query
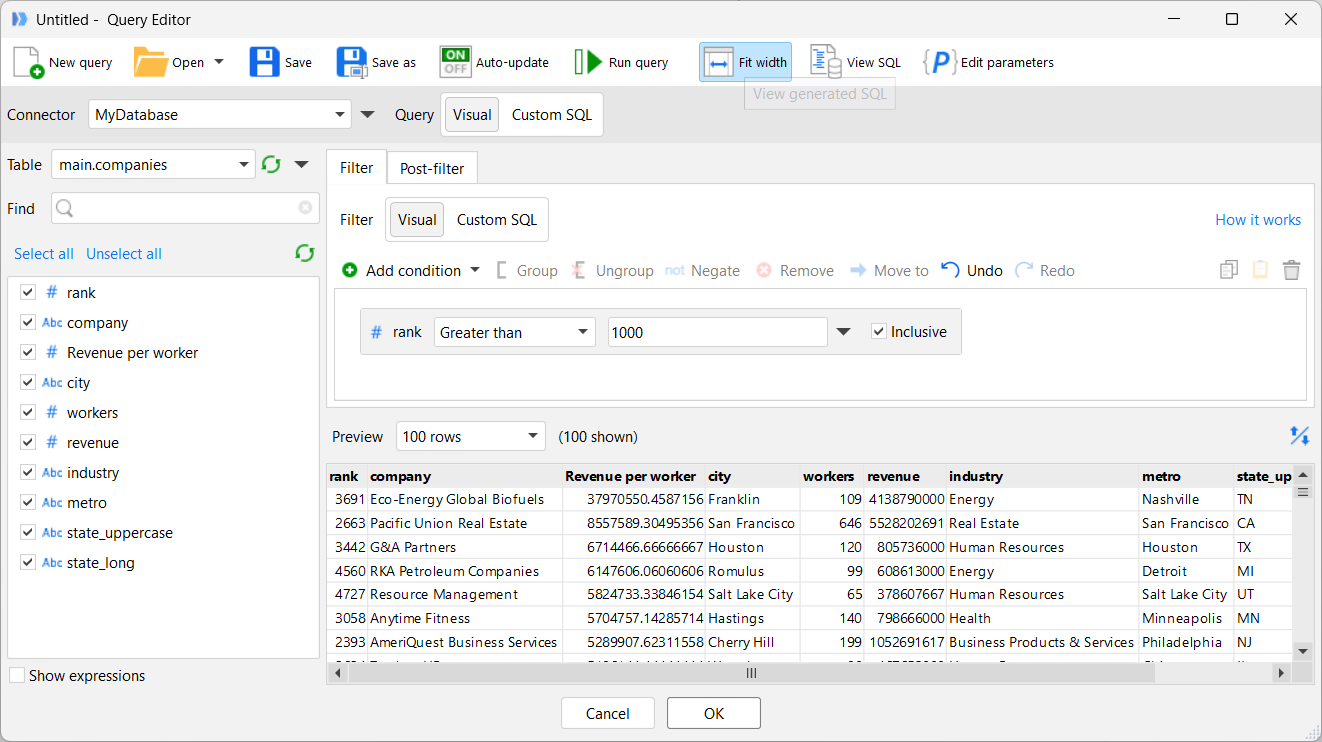
One way to delete database rows is to use a query in the Delete database rows action. The Delete database rows action has only one setting - a query. The query can be defined using the EasyMorph visual SQL Query Editor, just like when loading data from a database into EasyMorph. The editor will also show a preview of the data which will be deleted.
The action deletes rows using the filtering conditions of the query. Column selections in the query are ignored. For the above example, under the hood, the action generates an SQL statement like:
DELETE FROM main.companies WHERE rank >= 1000
Hint: You can use the query preview to see the rows that will be deleted by the action.
Deleting matching database rows
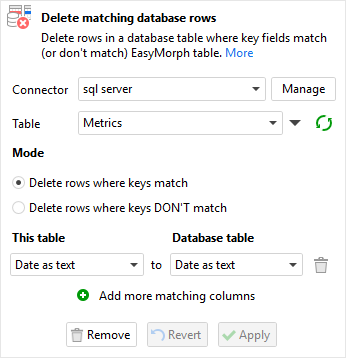
Another way to delete database rows is using the Delete matching database rows action. This action deletes rows where defined “key” fields in the database table match columns in the current EasyMorph table.
Under the hood, the action creates a temporary table in the database with keys from the EasyMorph table, then generates a SQL request like:
DELETE FROM [table] WHERE [key] EXISTS IN [temp.table]
Important: Matching works only for key fields of particular types:
Integer numbers
Text strings
Dates without time
If at least one value in matched columns has another type, the action will fail.
This action is frequently used together with the Select matching database rows action. It's also convenient in the cases where a list of IDs to delete is obtained from a 3rd party data source (e.g. a spreadsheet).