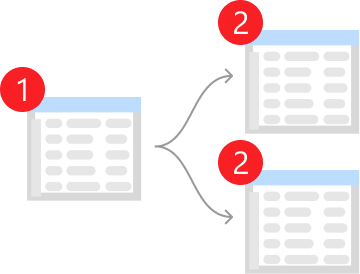
Towards the beginning of these tutorials, we looked at loading data into our workflows, from Excel spreadsheets, CSV files and other similar sources. Sometimes however, instead of beginning a new table by loading in or creating a new set of data, we instead may wish to create one from an existing table in our workflow. We describe this process as deriving a table.
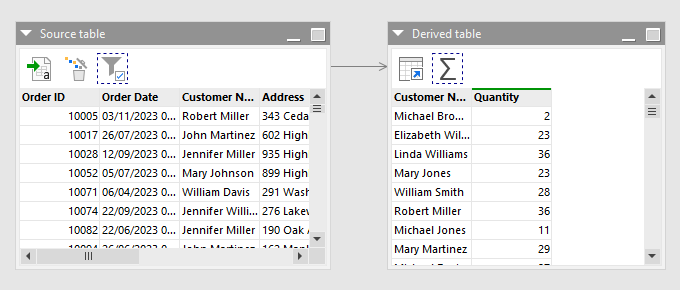
In this scenario, the data from the end of one table (the source table) becomes the starting data of another (the derived table). As we can see above, a solid arrow indicates the direction in which the data flows in between the source table and the derived table. You can think of a derived table as creating a dynamic copy of another existing table in your workflow. It is dynamic because any changes to the source table are reflected in the starting point of the derived table.
Important: Derived tables are indicated using a solid arrow. Dashed arrows in our workflows instead indicate where data is merged between tables. See the introduction to tables and merging data tutorials for more details.
Below, as well as looking at how to create derived tables, we’ll also look at some of the scenarios where creating derived tables in our workflows is either helpful or even essential.
Why create derived tables?
There are many reasons to use derived tables in our EasyMorph workflows, from simple organization to building complex branching workflows. Let’s consider some of the most common:
Logical separation
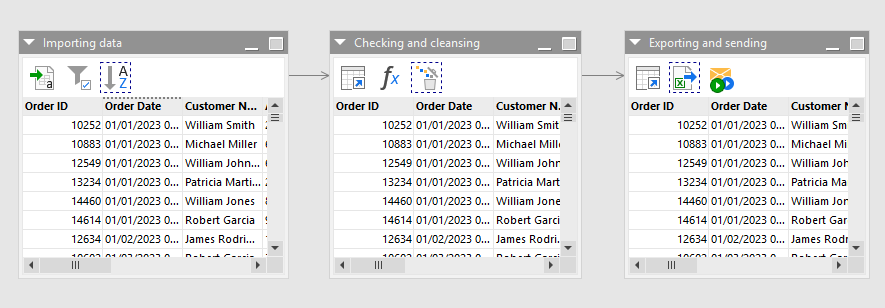
The most simple reason to derive one table from another is to help us to organize our workflow into logical sections. For example, let’s consider a workflow which follows these high-level steps:
- Loads in, sorts, and filters the data
- Checks and cleanses any data quality problems
- Exports the data to a file
Rather than building this all in one single table of our workflow, we might wish to break it up into 3 tables instead, each of which contains the actions for one of the steps and derives its data from the previous.
Note: For more information on other ways to structure your workflow, see the Structuring workflows section later in these tutorials.
Branching workflows
It is also possible to derive more than one table from a single source table. This opens up the ability to load a set of data and then direct it down two or more different paths within our workflow, each of which does something different with it. For example, after loading and cleaning my data, I may wish to calculate two different aggregations of it.
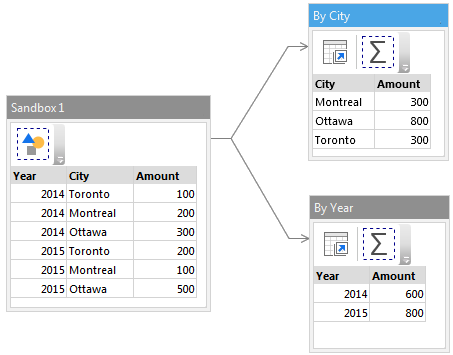
As you can see above, we have derived two different tables, one of which aggregates the data by City and the other by Year.
We could of course load in the same data file twice, but there are a couple of good reasons to use derived tables instead. Firstly, except in a few specific scenarios, the slowest part of the process is loading the data in to EasyMorph from wherever it is located (e.g. a file on the disk, a database, etc.). This means loading it once and deriving the necessary copies is usually more efficient and therefore faster.
Note: As well as being quicker, if our workflow tries to load in the same file twice at the same time, we can experience errors due to the file being locked by whichever load got to it first. See the Order of operations tutorial for more information on this problem and additional ways to prevent it.
Splitting a table into two or more parts
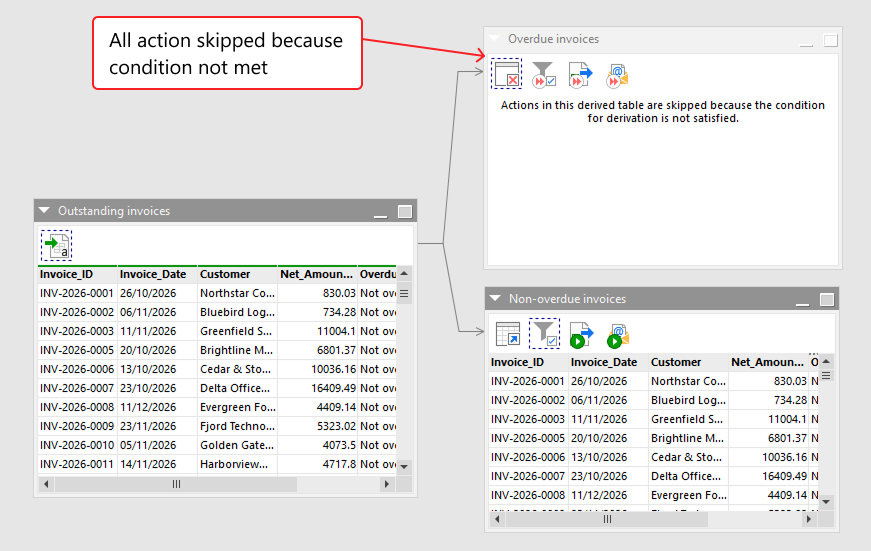
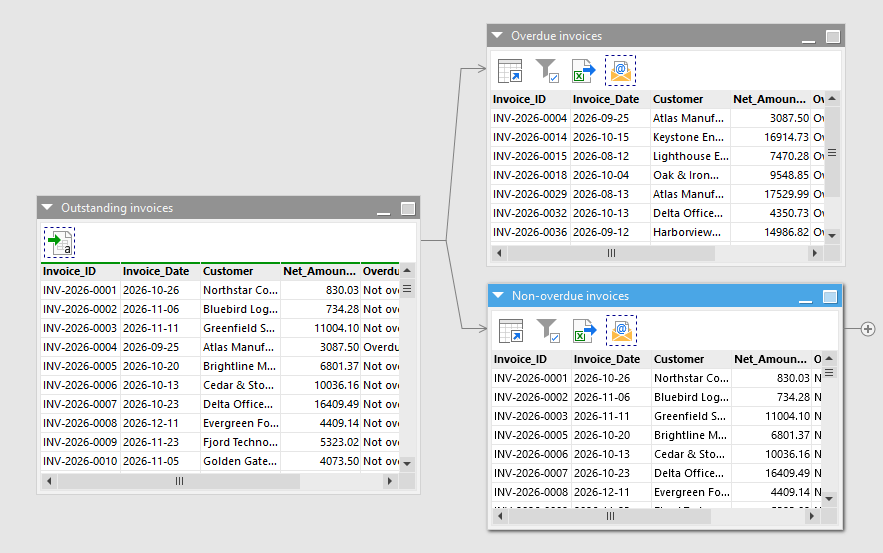
Another common reason to derive more than one table from a single source is when we want to split a single table into different subsets. For example, if I have table of unpaid invoices, I may wish to split them into two tables, one containing those that are overdue and another containing those which are not. We can then deal with them differently, such as emailing the two lists to different people.
More advanced use cases for deriving tables
There are many more use cases where derived tables can be important. Just a few examples to consider are:
- Sending different subsets of data to different people.
- Filtering a dataset based on its aggregated metrics.
- Monitoring data quality at certain points of a workflow.
- Performing self-joins where a table is joined or merged with itself.
- And many more…
How to create a derived table
Creating a derived table in EasyMorph couldn’t be any simpler. When we select any table in a workflow, just to the right-hand side we will see a + icon. To recreate a derived table from the selected table, we simply click on this icon.
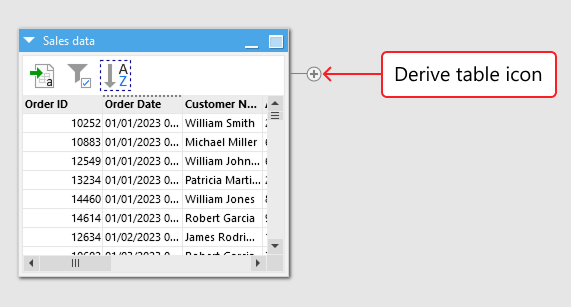
Alternatively, if we right-click a table’s heading we will see the option to derive a table in the context menu that appears.
The derive table action
You may have already noticed in the images above that all derived tables have the same icon at the beginning of their action chain. This icon represents a special action, the Derive table action. Other than the fact that they begin with the Derive table action, derived tables are no different to any other table.
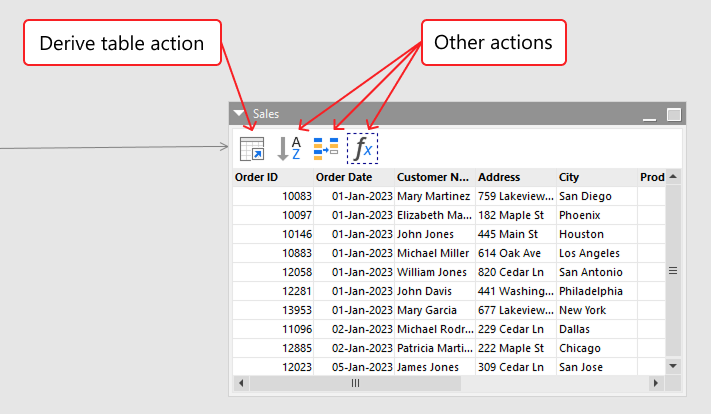
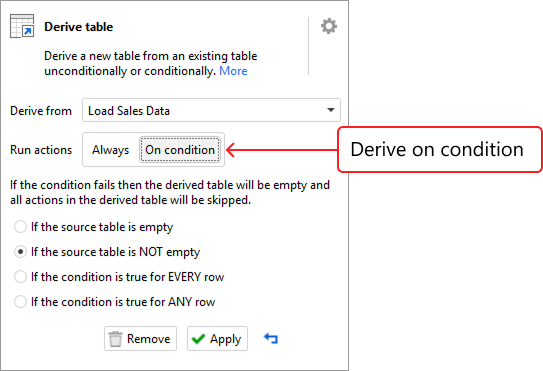
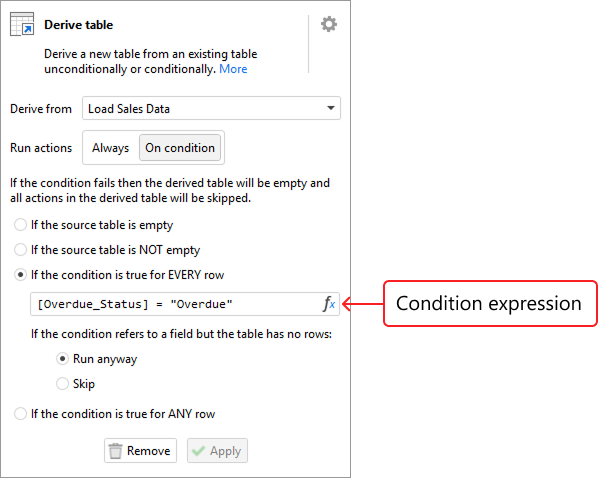
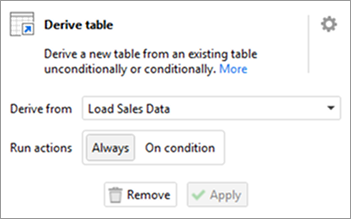
Just like for all other actions, if we select a Derive table action in our workflow, the left-hand settings panel shows us the settings for the action. The settings are simple, allowing us to do two things:
- Change the source table which this table is derived from.
- Apply conditions to only derive the table under certain circumstances (more on this in the Topics for power users section at the bottom of this tutorial).
Recombining derived tables
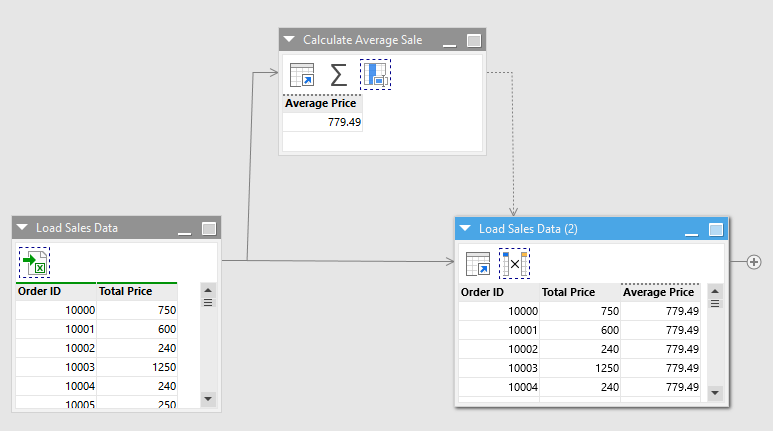
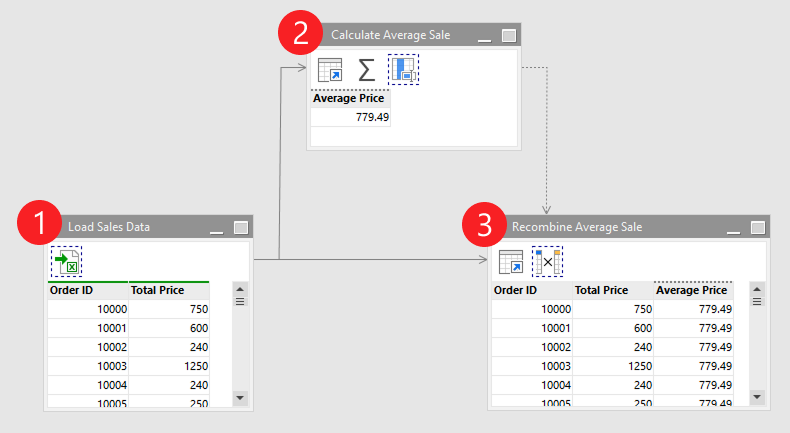
Sometimes, after branching our workflow by deriving two tables from the same source, we wish to recombine the two copies. For example, we may need to identify which of our sales are above the average value. To be able to achieve this, we need to have the average sale value as a column in our sales data. We can then compare it with the individual sales value. To do this, we can use derived tables which we recombine as follows:
- Load in our sales data
- Derive a table from it, and use the Aggregate action to calculate the
Average Price. - Derive another table from the sales data in which we merge the average sales back into it, so that we have both the individual sales
Total Priceand theAverage Priceon the same table row.
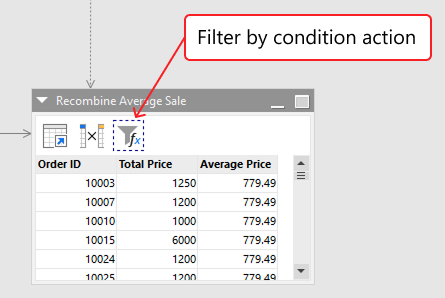
Now we have our Average Price as a column in our sales data, we can use the Filter by condition action to keep only those sales above the average.
Tip: See the Filtering data and Merging data tutorial sections for more information on the actions and topics covered in this example.