Many teams use Excel reports in order to monitor critical business concerns such as low stock levels, budget changes, project delays, decreased sales and missing information.
The issue with using an excel report to track these types of issues is that someone usually has to open the spreadsheet, review the file manually, decide what actually needs attention, and then send an email or notification to the corresponding team member.
That process may seem pretty simple at first, but it proves to be unreliable very fast. Professionals often become too busy and miss reviewing reports or team members report problems after they occur and the wrong person or possibly nobody receives a notification regarding the issue. To make matters worse, when the person that normally reviews the report is absent (on vacation, sick or has left the company), the entire process of reporting issues falls apart.
But there’s an easy solution that lets you automate notifications from Excel reports. We put together this guide to show you how to build an automated notification workflow that checks an Excel inventory report for low-stock items and sends alerts to the right people as soon as action is needed.
Why Manual Excel Notifications Break Down
At first, it appears to be simple: manually review a report and send a notification. An individual opens an Excel file and identifies the rows requiring their attention then sends off an email. The time required is approximately 20 minutes and it doesn’t appear to be a major issue.
However, the reality is this occurs repeatedly throughout reports designed to track inventory, budgets, project status, sales performance and many other items. If we multiply the amount of time spent (i.e. 20 minutes) by the number of weeks in a year (52), factor in the frequency that individuals skip reviewing reports due to being busy or away from work, and factor in the delays in receiving alerts to the incorrect recipient; what may have initially seemed as an easy task now represents a significant business risk. Also, professionals can make mistakes, so even if someone checks through data consistently, you aren’t always guaranteed to catch it.
A few common indicators of a dysfunctional manual notification workflow include:
- Reviewing a spreadsheet on a recurring basis simply to determine whether anything has changed or crossed a threshold.
- Ad-hoc, non-reliable emails sent as opposed to consistent, timed notifications.
- Late notifications or missed recipients; there is no secondary method for notifying personnel when the primary contact is unavailable.
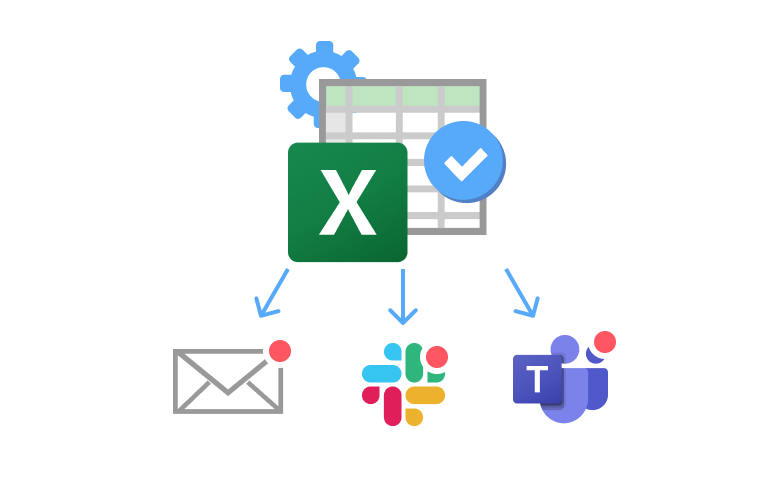
Automated Excel notifications replace each step in these manual processes with a clearly defined procedure. What we need is a tool that will read through your file, evaluate your data based upon the parameters you establish, create and build the necessary alert messages, and deliver automatic notifications to Email, Slack, and Teams on a schedule. And that tool is EasyMorph.
What Automated Excel Notifications Look Like
By automating Excel notifications, you will have replaced all of the manual steps needed for an alert. You will send the same alerts going out to the correct people as often as they are triggered, without someone needing to manually go into their spreadsheet.
The four stages of a fully automated Excel notification process are as follows:
- Ingest: Automatically pull in your latest data from a file location like a local directory, Google Drive, SharePoint or any other data source you wish.
- Check: Identify which rows need attention based on some criteria.
- Alert: Create a simple notification message based on each row with a specific issue identified.
- Distribute: Send those finished notification messages via e-mail, slack notification, teams notification etc.
Step-by-Step: Building Your Alert Workflow in EasyMorph
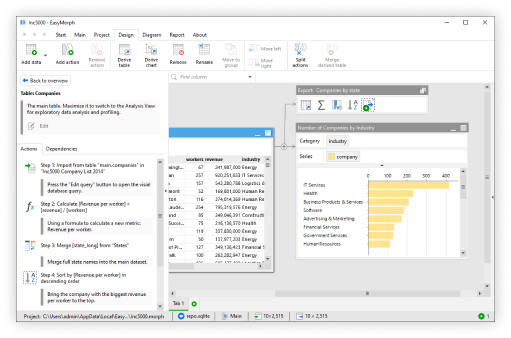
EasyMorph is a visual workflow automation tool for Excel users that are looking to create repeatable processes. And that’s exactly why we’re using EasyMorph to build your workflow to send out automated alerts and notifications. Here's how to build your automated workflow:
Step 1: Import Your File
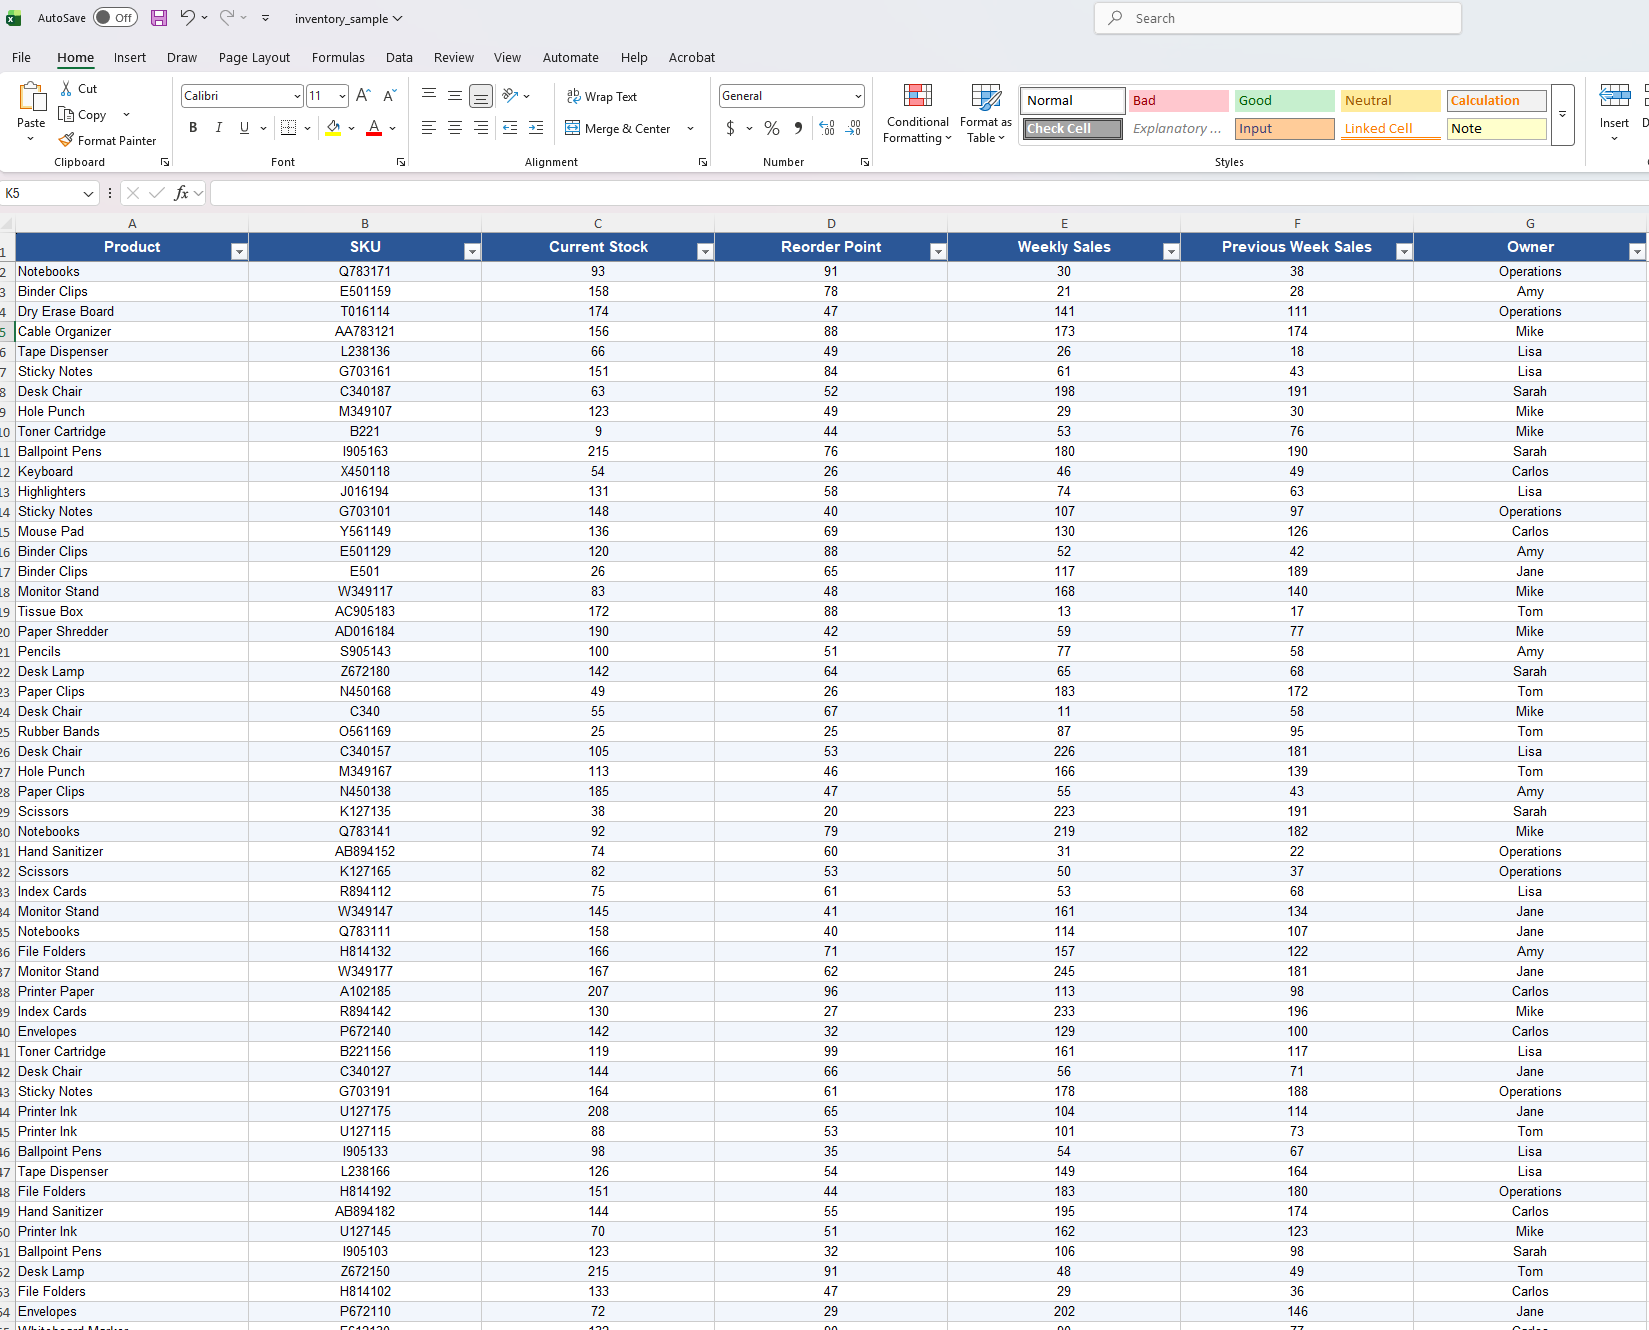
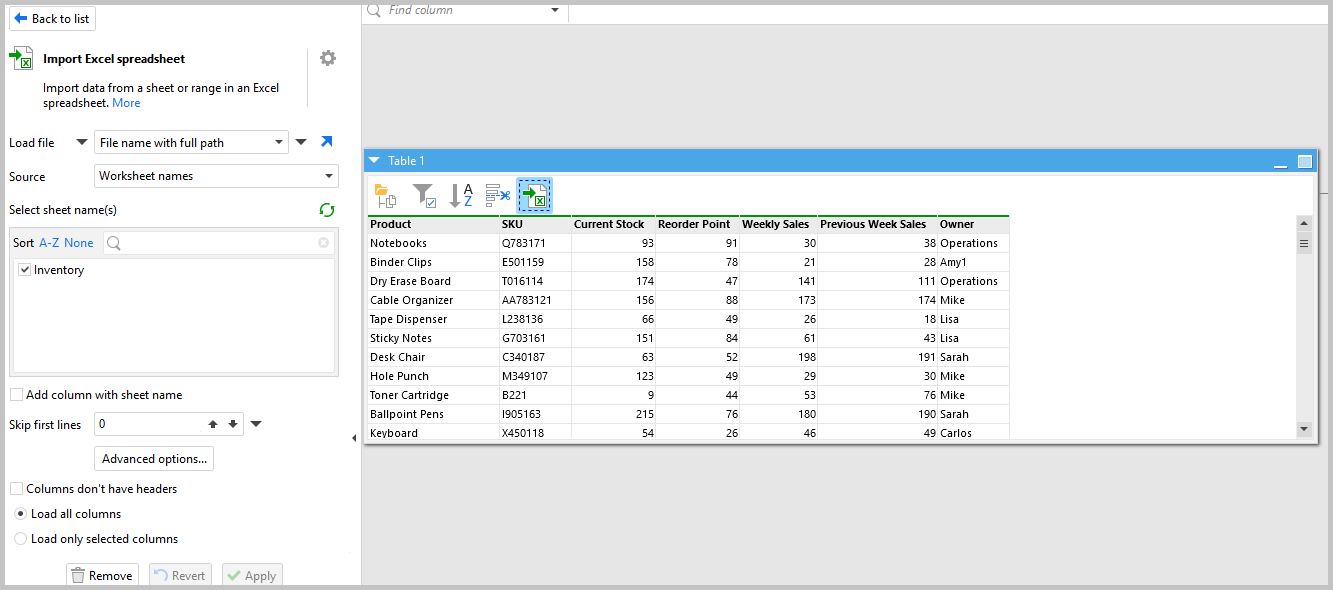
The first step is getting your data into EasyMorph. In this example, we're working with a weekly inventory Excel file that tracks current stock, reorder points, weekly sales, and previous week sales for each product.
To get completely automated with this workflow, rather than simply importing one static document we will create an automation that imports the latest version of the inventory document from a designated folder at all times. The process is as follows:
First, add the List of Files action and select the folder where your inventory reports are saved. For this example, we also need to make sure we select the extension and date modified columns, we will expand more on this later. Keep in mind you can also use actions to pull from shared team folders like Google Drive or SharePoint.
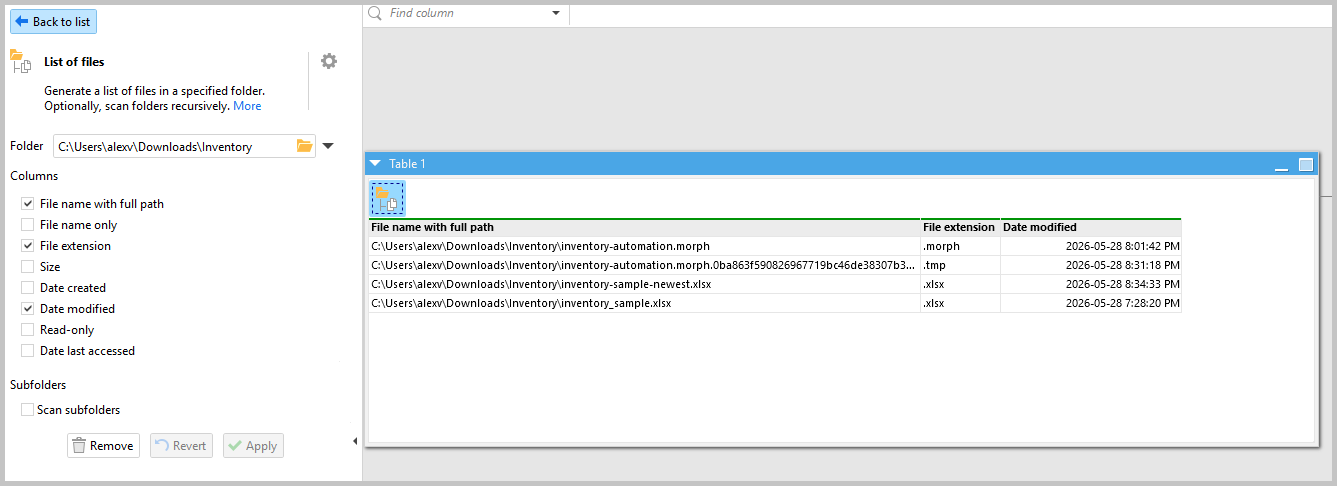
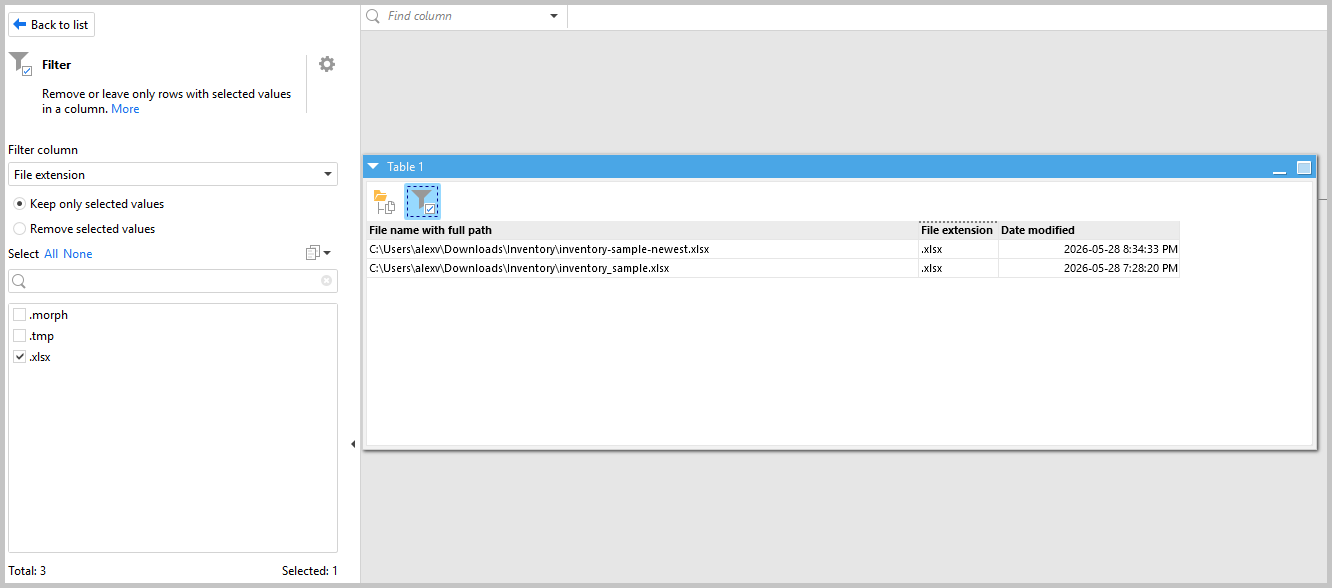
Next, add the Filter action to make sure it only selects .xlsx files, so no other file types get picked up.
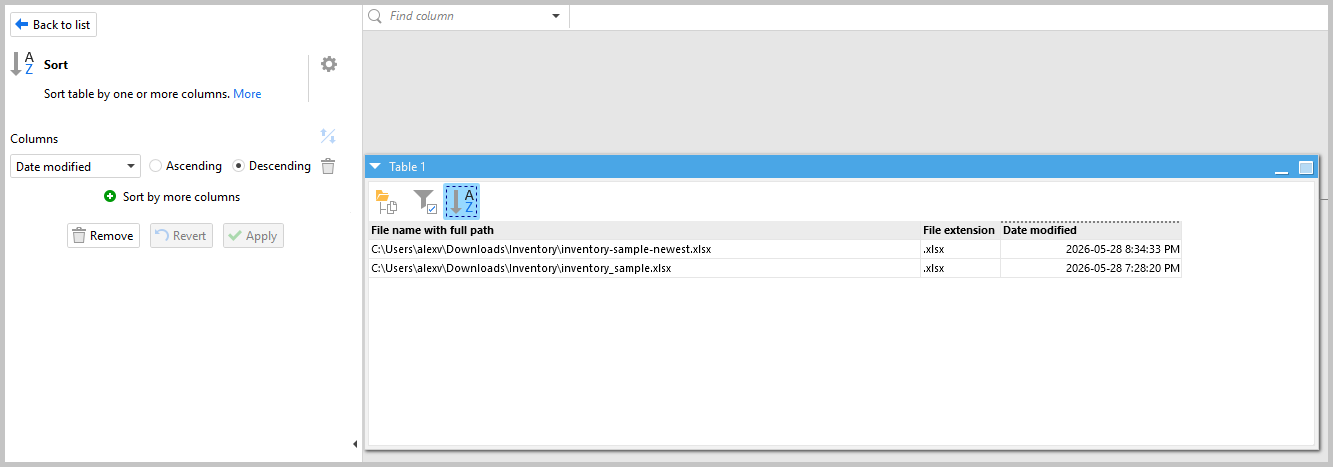
Then add the Sort action to sort by the most recent date, so you're always working with the most up-to-date inventory report.
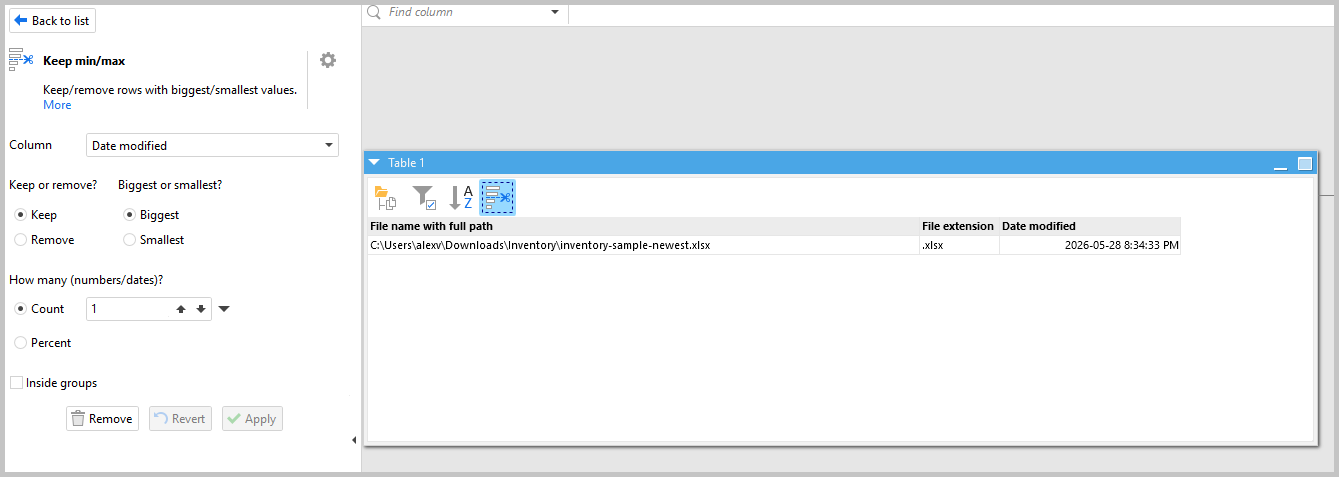
Add the Keep Min/Max action and keep only the top row, the most recently created file.
Finally, add the Import Excel Spreadsheet action and change the path type to “First value of column” and then select the column, "File name with full path" to pull in the correct file.
Automating this process eliminates the need for manually checking each file.
Step 2: Flag Low-Inventory Products
Now that your inventory information has been uploaded, it is now time to find out which items are on low stock. This is how EasyMorph transforms your inventory worksheet into an automatic Excel alert tool.
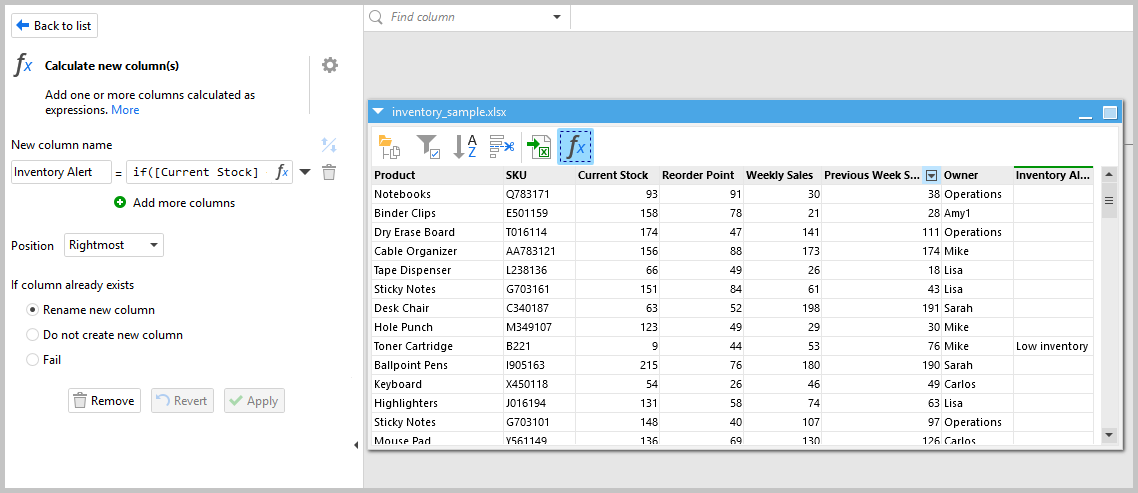
Add the Calculate New Column action and enter the following expression:
if([Current Stock] < [Reorder Point], "Low inventory", "")
This examines every row in your worksheet and flags those items whose current stock quantity falls below their respective Reorder Point. All of the other cells will remain blank.
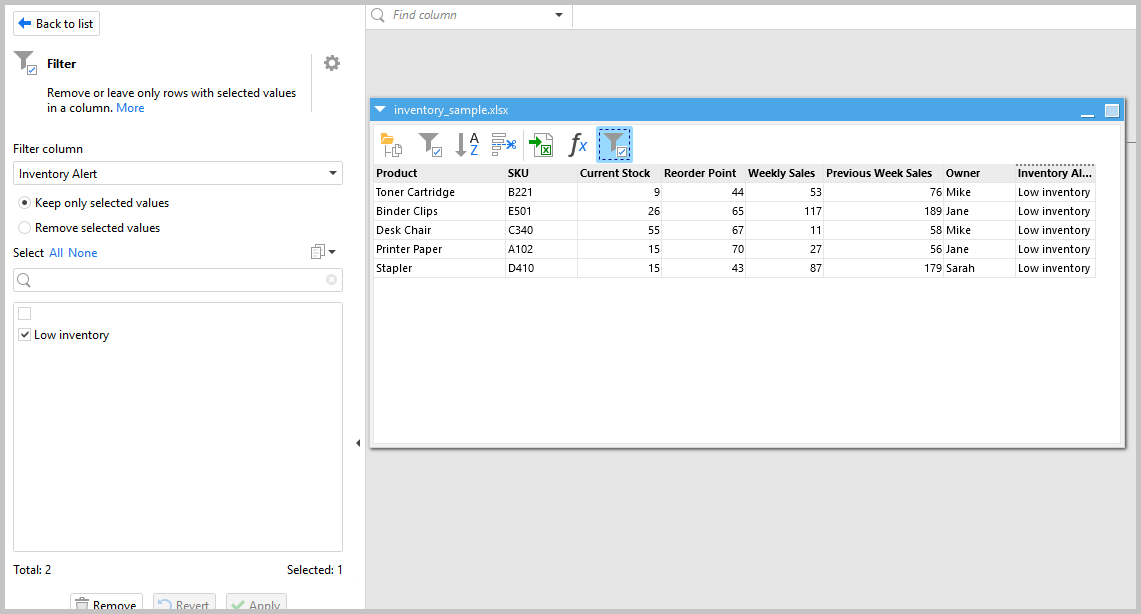
Next, add the Filter action and configure it to only keep rows where the new column equals "Low inventory." Now your workflow is only working with the products that actually need attention, which keeps your automated Excel alerts clean and relevant.
Step 3: Build the Alert Message
You can proceed to create your notification message for distribution to your team after identifying your flagged rows. The notification message is created from the raw data you have gathered and allows for clear, concise action based upon that data.
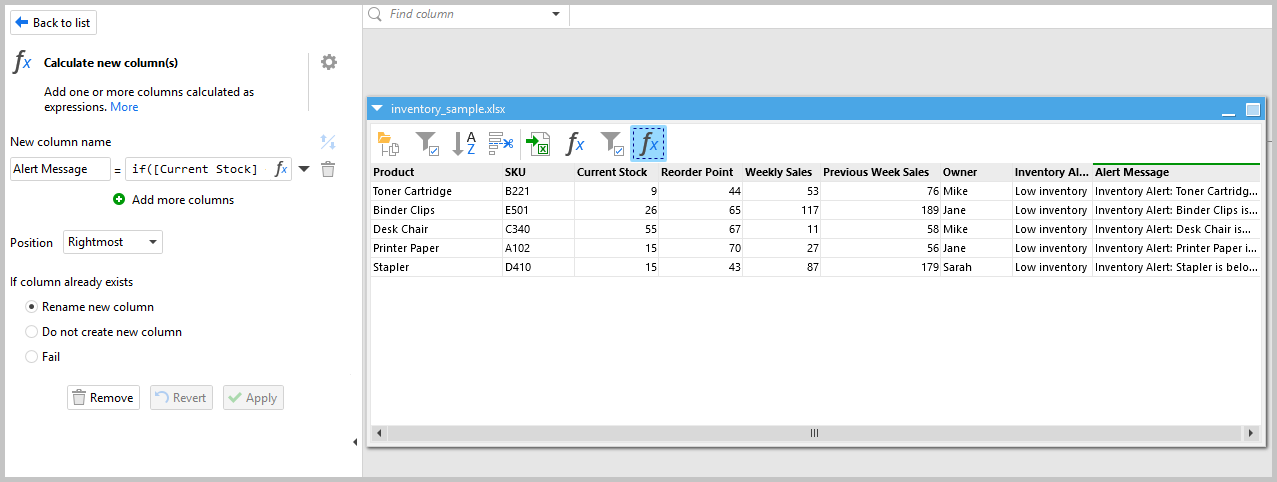
Add another Calculate New Column action and enter the following expression:
if([Current Stock] < [Reorder Point],"Inventory Alert: " & [Product] &" is below its reorder point. Current Stock: " & [Current Stock] &" Reorder Point: " & [Reorder Point] & " Owner: " & [Owner],"")
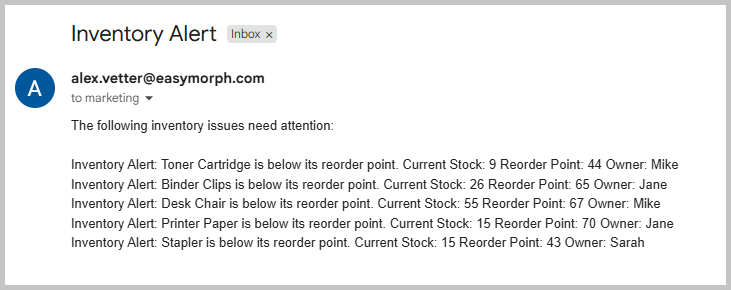
This builds a full alert message for each flagged product, including the product name, current stock, reorder point, and the owner responsible for restocking.
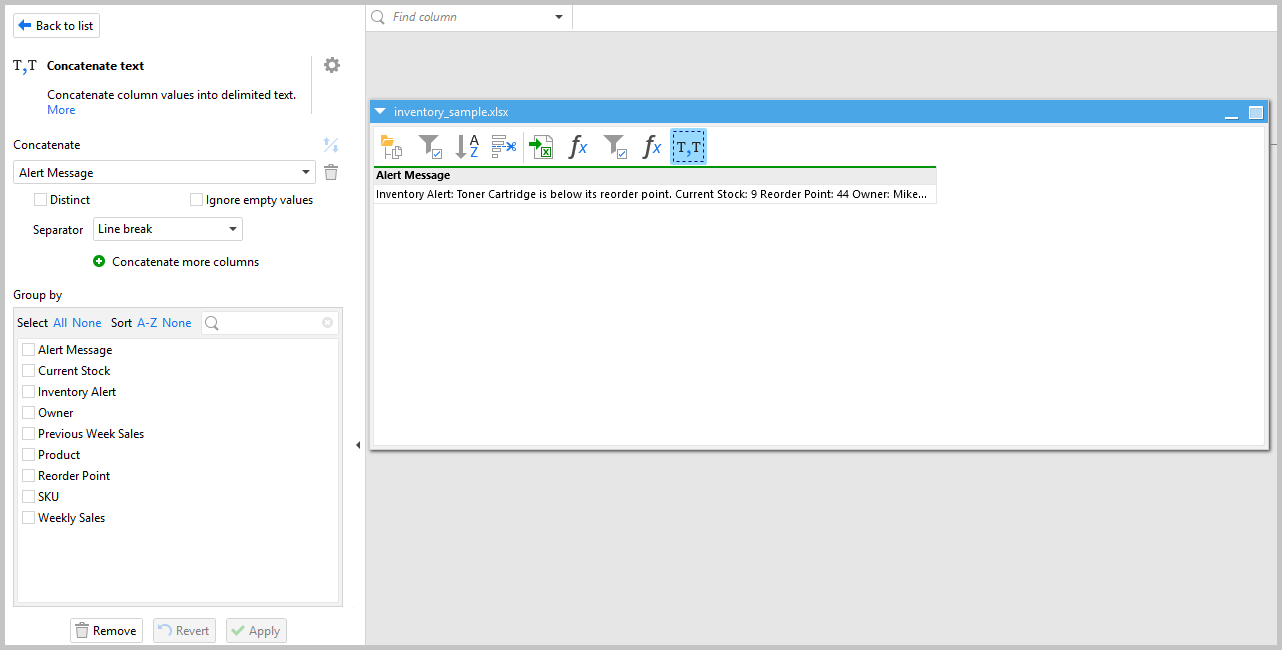
Next, add the Concatenate Text action and select the Alert Message column and make sure to set the separator to “Line break”. This rolls all of the individual product alerts into a single message body, so your team receives one clean notification with every issue listed — rather than a flood of separate messages.
Step 4: Send Automated Email Notifications
The next part of this process is to define who receives the notification messages.
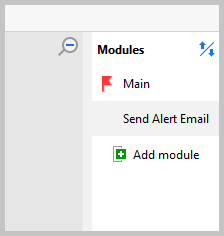
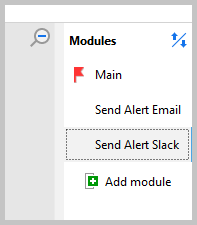
EasyMorph uses a module system for organizing workflows. Your workflow will contain one primary module which manages the data, and additional modules for each type of notification channel (i.e., email, slack, teams). If you’d like to know more about how modules work, check out our tutorial here.
First, create a new module and name it Send Alert Email.
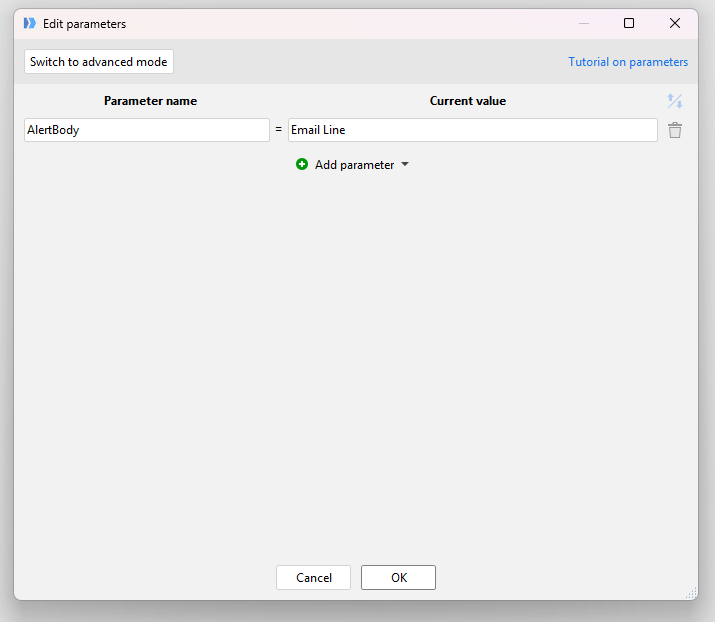
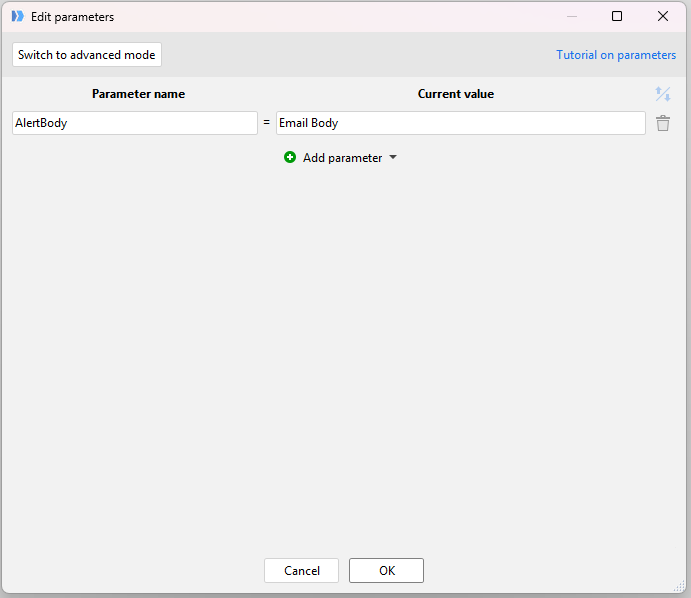
Inside that module, create a Parameter called "AlertBody" and assign it any placeholder value for now, you'll connect it to the real data in a moment. If you’d like more information about how Parameters work, view our tutorial here.
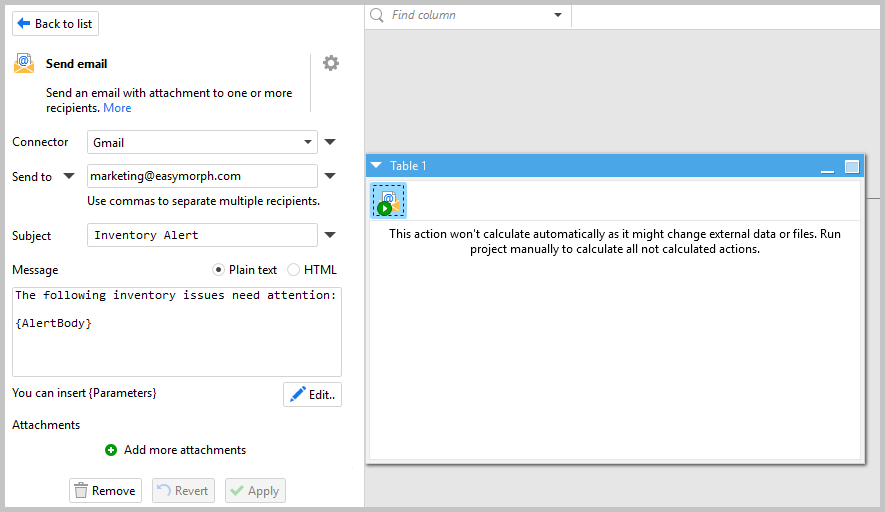
Then add the Send Email action inside the module. You can reference the AlertBody parameter directly in the email body, so the message is dynamically populated with your inventory alert text every time it runs.
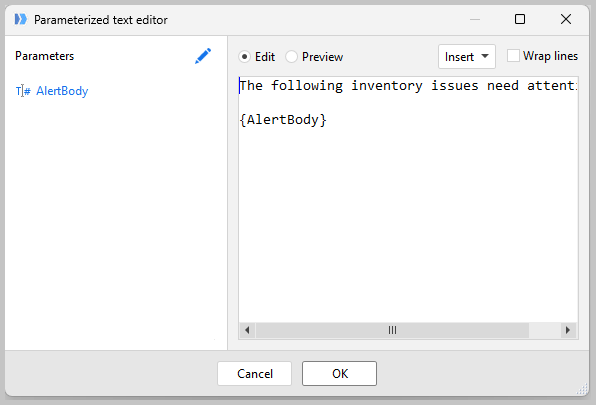
By clicking Edit, I can easily add parameters to my body.
Back in your main module, add the Call another module/project action. Select the Send Alert Email module and assign the AlertBody parameter to your Alert Message column.
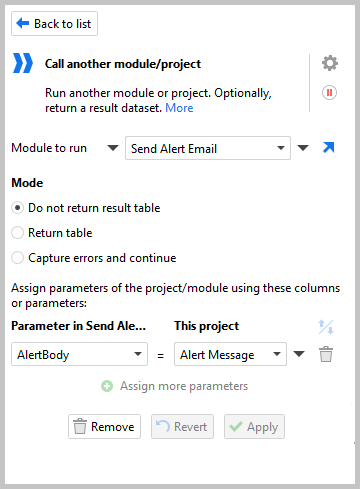
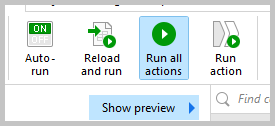
Now you just need to click run all actions.

And now you should be able to see the inventory as sent via Email.
Step 5: Send Automated Slack Notifications
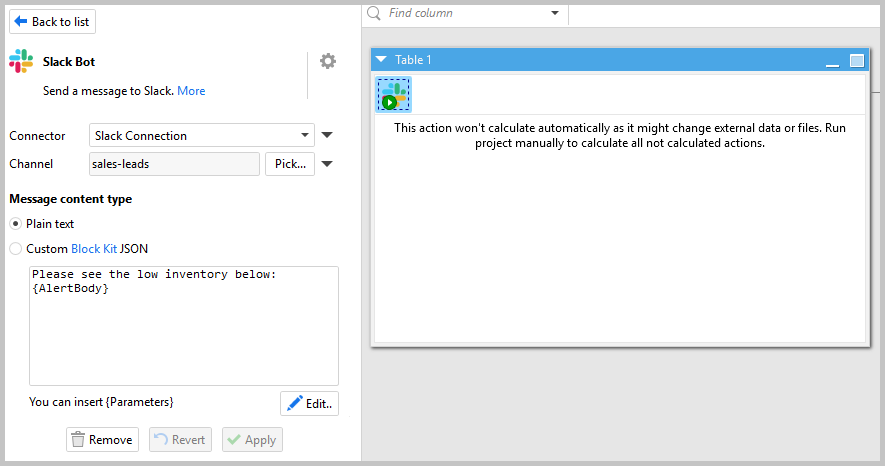
Setting up automated Slack notifications follows the exact same pattern. Create a new module and name it "Send Alert Slack".
Inside the module, create another Parameter called "AlertBody" and assign it a placeholder value.
Then add the Slack Bot action. Set up your message text the same way you did for email, referencing the AlertBody parameter so the Slack notification is populated dynamically with your inventory data.
Back in your main module, add another Call another module/project action. Select the Send Alert Slack module and assign the AlertBody parameter to your Alert Message column.
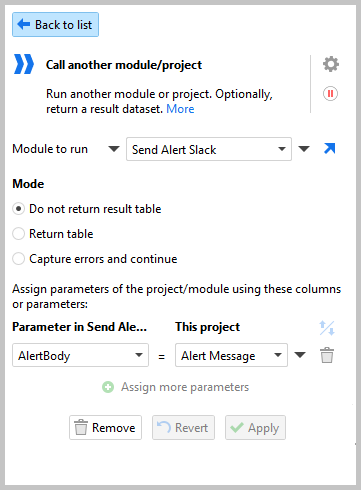
Now I just need to run all the actions.
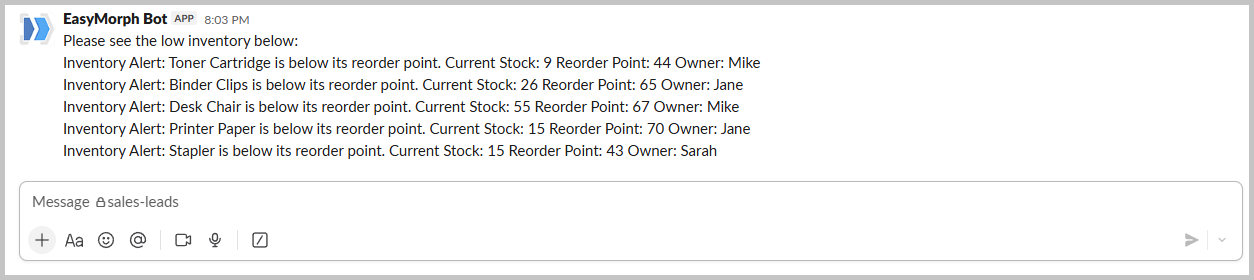
Your workflow will automatically send notifications to your Inventory Channel within Slack every time low stock levels are identified in your warehouse, along with the product names, current quantities available, reorder points, and the employee(s) responsible for ordering/stocking the item.
Step 6: Send Automated Teams Notifications
If your team uses Microsoft Teams, adding automated Teams notifications is just as straightforward. Create a new module and name it Send Alert Teams.
Follow the same steps as the Slack setup, but this time add the Teams Bot action instead of the Slack Bot. Wire up the AlertBody parameter the same way and add the corresponding action Call another project/module in your main module.
EasyMorph’s module based approach allows you to easily expand beyond the number of notification types needed while maintaining the functionality of your workflow. Your automated excel alerts can reach whatever platform your team uses like email, slack, teams or more.
Scheduling Your Notification Workflow
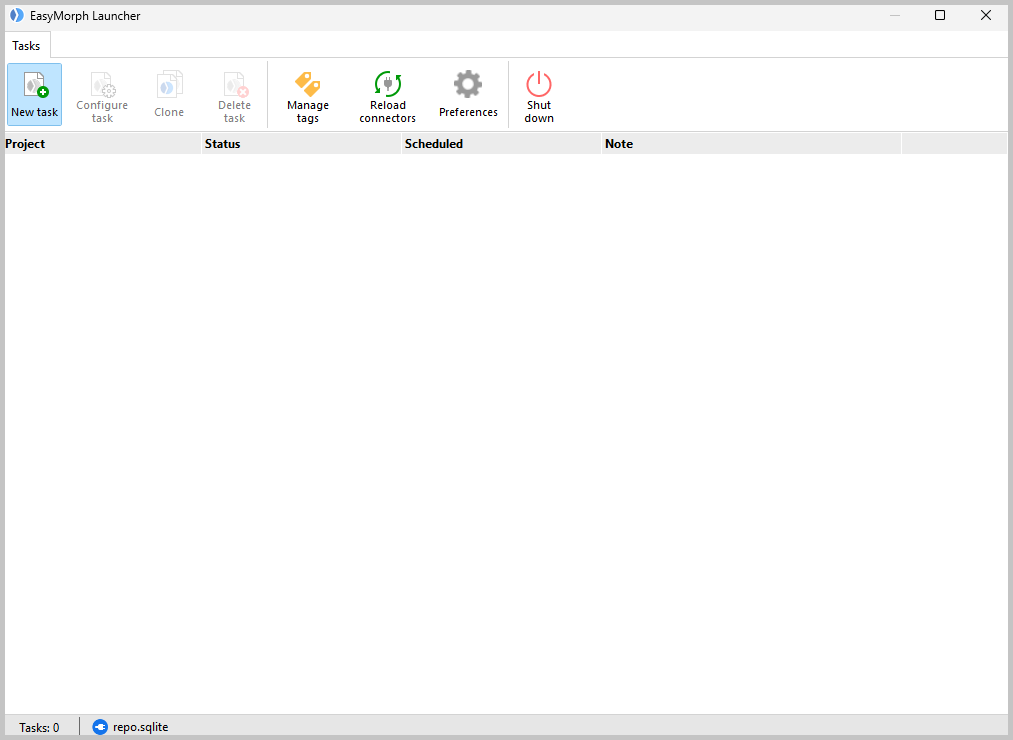
You've built the workflow — now let's make it fully automatic. To schedule your automated Excel notifications, you'll use EasyMorph Launcher, which comes installed alongside EasyMorph Desktop.
Open EasyMorph Launcher and click New Task.
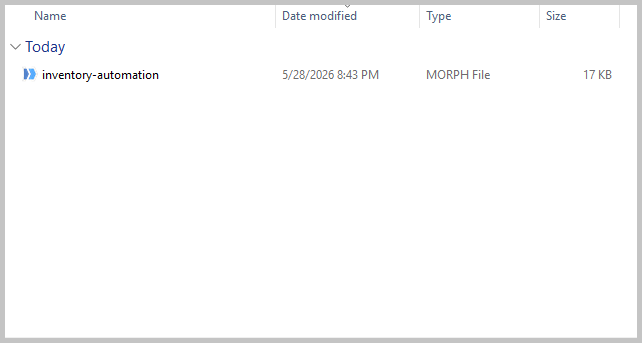
Select the .morph file for the workflow you just built.
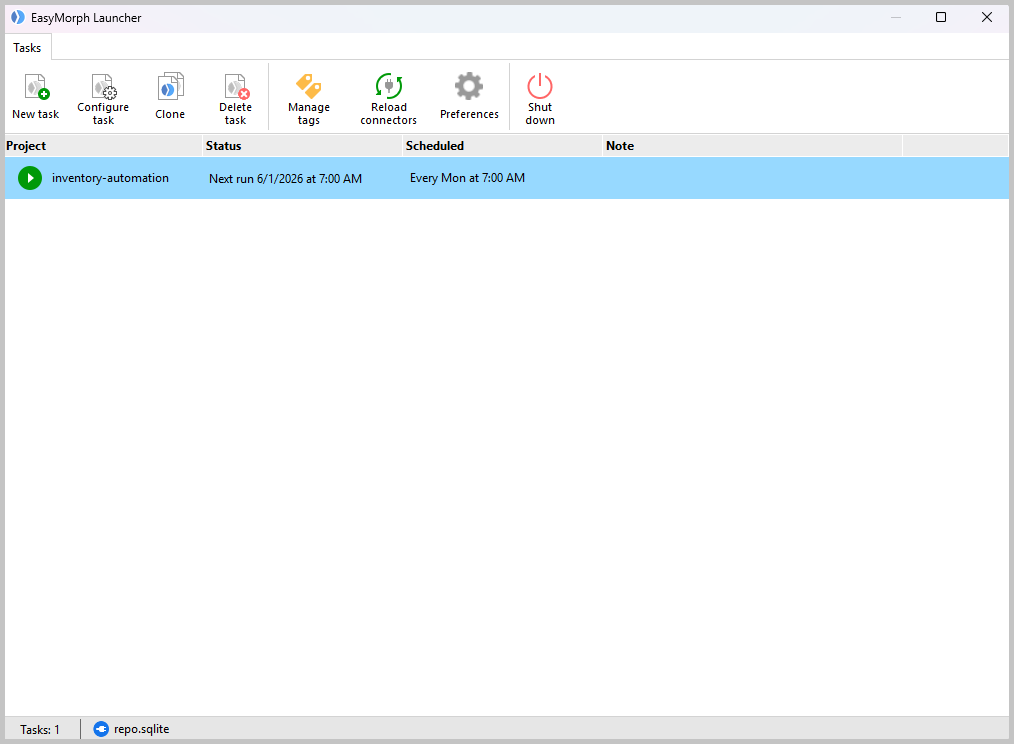
Go to the Scheduling tab and set it to run at the day and time that fits your reporting cycle — for example, every Monday at 7:00 AM to catch any inventory issues before the week gets going.

Click OK, and your automation is live.
Important note: If you're running EasyMorph on a local machine, that machine needs to be turned on at the time the workflow is scheduled to run. If you need always-on scheduling or more advanced triggers, EasyMorph Hub offers server-based scheduling that runs regardless of whether your local machine is on.
Start Sending Automated Excel Alerts Today
Set-up of automated Excel notifications via Email, Slack and Teams does not have to be an expensive developer or an expensive enterprise software solution. Using EasyMorph you can create the entire process within minutes - Import your Inventory File; Flag Low Stock Products; Create your Alert Messages; Send them to each communication tool that your Team(s) use (all on a Schedule).
As soon as your inventory team receives their first Monday Morning Alert while no one has even opened a Spreadsheet yet - you will be wondering how you were able to do this so long without using automation.
Want to automate Excel Notifications and Stop Hand Checking Spreadsheets?
Try EasyMorph free and build your first automated alert workflow today.