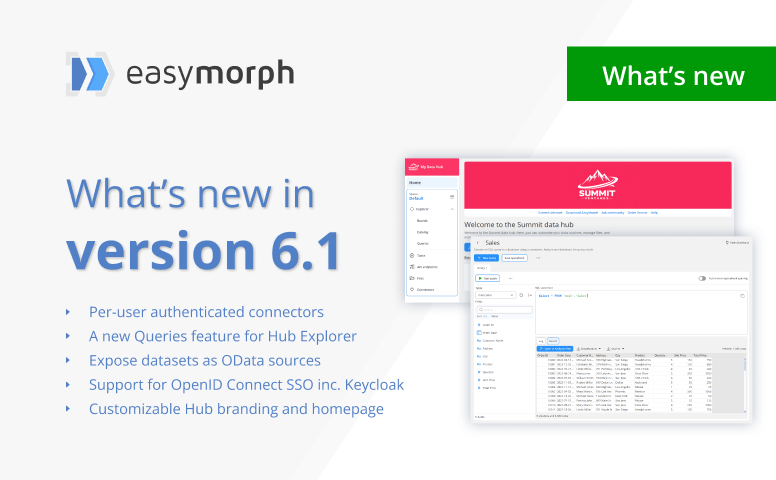
We’ve just released version 6.1 of EasyMorph Hub and EasyMorph desktop bringing some major new features as well as the usual improvements and fixes. Let’s take a look at what’s new.
Download version 6.1 of EasyMorph Desktop and EasyMorph Hub download from our website now.
Per-user connectors
One of the biggest changes in this release comes to connectors. Connectors stored in a Hub Space repository can now be configured as either “Shared authorization” or “Per-user authorization”.
The configuration of any connector can be split into two main sections:
- Connection - The details necessary for connecting to the relevant system such as the server address or URL, port numbers, etc.
- Authentication - The username and password, API key or other authentication details required to access the system.
Both shared authorization and per-user authorization connectors have both of these sections configured. The difference lies in the authentication.
Shared connectors work in the same way as EasyMorph connectors always have. When the connector is created, the person creating it configures both the connection and authentication for the connector and when anyone uses it, they use these same settings.
Per-user connectors are new in this release. When creating a per-user connector, the person creating it still configures both the connection and authentication information, but importantly, the authentication information will be “tagged” to the specific user creating it. When a different user tries to use the connector, they will need to provide their own authentication information, which will be saved and “tagged” to them. In this way, per-user connectors store different credentials for each user.
Note: This feature is considered as “Experimental” and as such, in version 6.1 per-user connectors can only be created for PostgreSQL and Microsoft OneDrive. We’ll be adding support for more connector types in future releases.
So for example, IT can configure an email connector, providing the server address, port, and other settings. Users can then use the connector, simply providing their own username and password for their email account and no one will be able to access an email account other than their own.
In a similar way, if a database is configured to provide row level access permissions. Per-user authorization connectors mean that different users may return different sets of data based on the permissions their accounts have within the database.
When creating any of the supported connectors, you’ll now be prompted to choose between shared and per-user authentication.
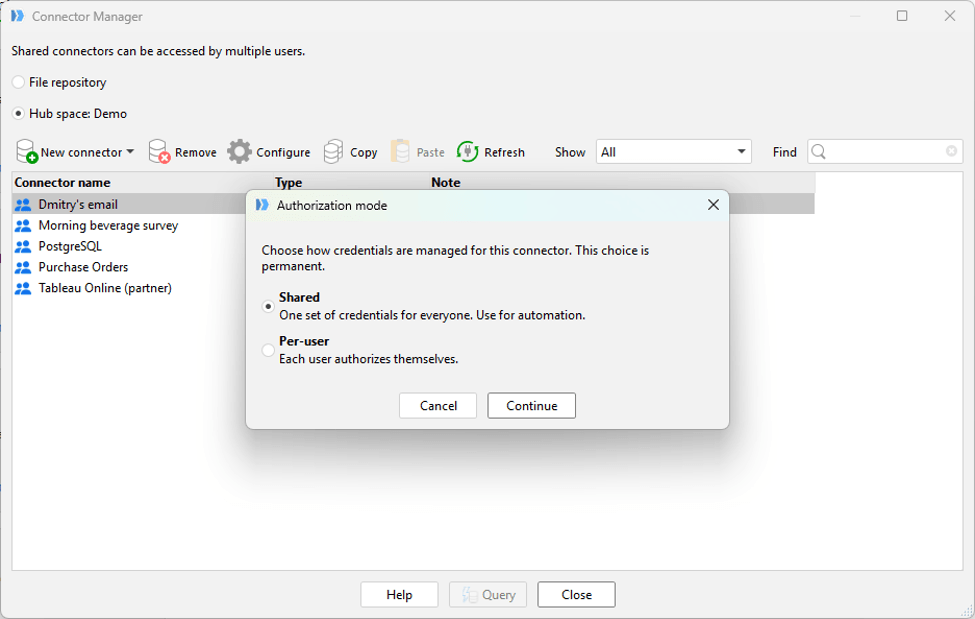
If we select the “Per-user” option, we can configure the connector in exactly the same way as we always have, including any authentication information such as a username and password so that we can test if the connection works and even use the connector ourselves, safe in the knowledge that no one else will be able to use the authentication credentials we provided.
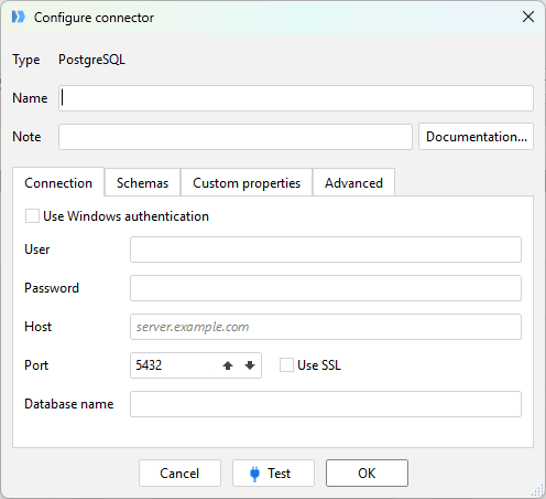
Once created, the connector will then appear in the connector list and an icon next to each connector indicates whether it is a shared (2 person icon) or per-user (single person icon) connector.
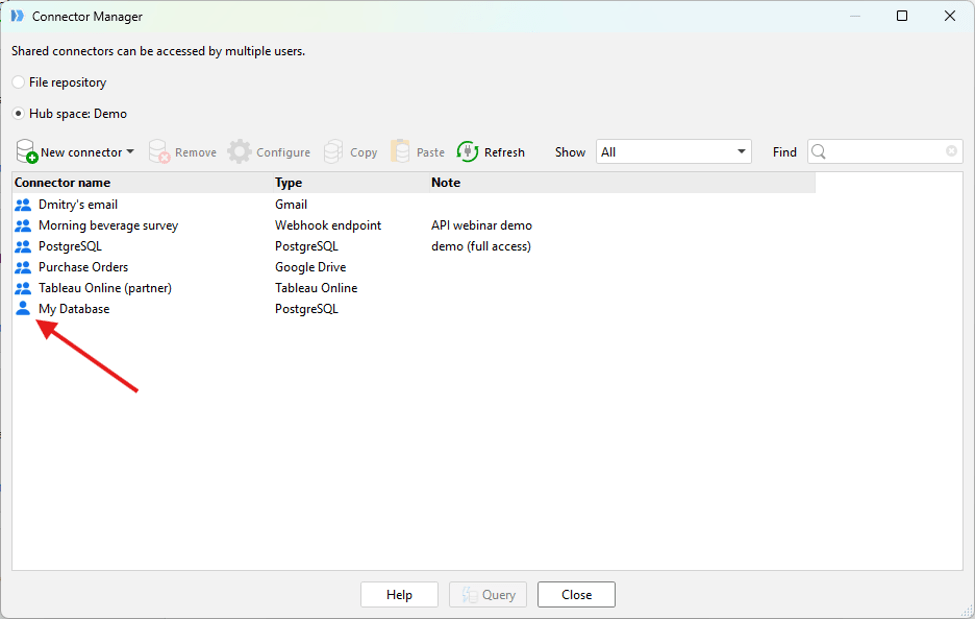
Before another user can use the connector in a workflow, they’ll first need to configure their own authentication information to be able to use it.
For those who use EasyMorph Desktop to create workflows, they can authenticate the connector in the same way they always have using the Connector Manager. For someone who wishes to simply run a workflow in EasyMorph Hub, such as manually running a Task or retrieving a calculated dataset asset from the Explorer Catalog, it would be prohibitive for them to have EasyMorph Desktop installed and set up to do this. We’ve therefore added the ability to authenticate per-user connectors directly in the Hub web user interface.
In the last release, we added the ability to see and audit connectors within the Hub UI. For per-user connectors, these now show up in the Connectors section of Hub with an “Authorize” button.
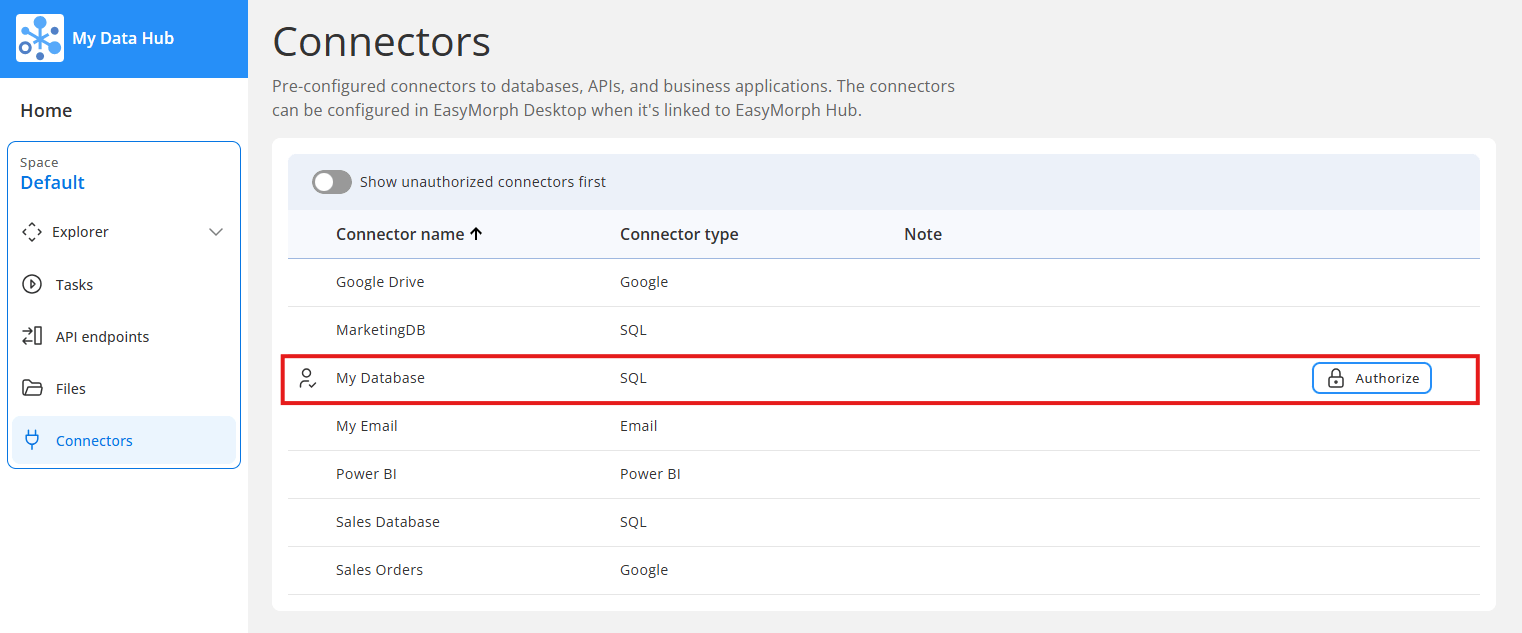
Each user can click this button and enter their own credentials for the connector to use.
Note: When workflows are executed on EasyMorph Hub by a user, Hub knows the logged in user who triggered the task or Catalog asset and so will use that user’s credentials for the connector. When a workflow is executed automatically on a schedule or triggered by an event, the workflow is run as a local service account which won’t have credentials for the per-user connector. Because of this, per-user connectors can’t be used for Hub Tasks with triggers.
A new Queries feature for Hub Explorer
EasyMorph Hub Explorer has also received a huge new feature, Queries, which lets you organize and execute SQL queries against any database which EasyMorph can connect to. This includes Microsoft SQL Server, Oracle, MySQL, MariaDB, PostgreSQL, Amazon Redshift, Snowflake and any other database using an ODBC driver.
Note: NOTE: Because of the potential impact this feature could have on your important systems and databases, by default, no one has permissions to run Queries. You can add permissions by:
1) Navigating to the Hub administration panel.
2) Select "Spaces" on the left-hand navigation panel.
3) Select the space you wish to add permissions for.
4) Go to the "Users & Permissions" tab.
5) Edit the role you wish to add permissions for.
6) Select the desired permissions for Queries.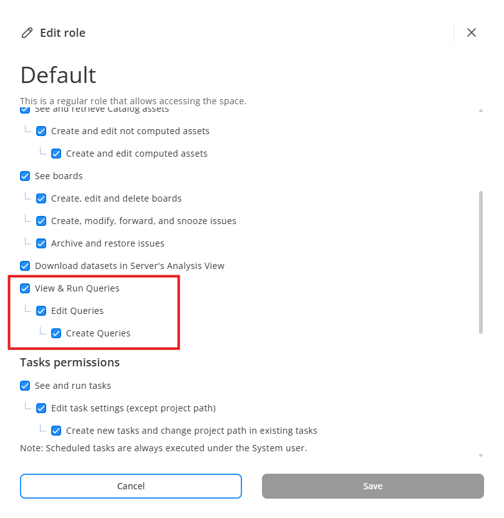
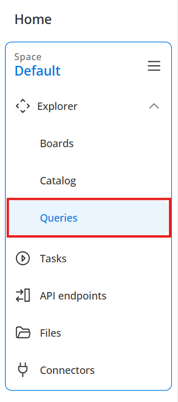
Once enabled, you can access the Queries feature from the left-hand menu under Explorer.
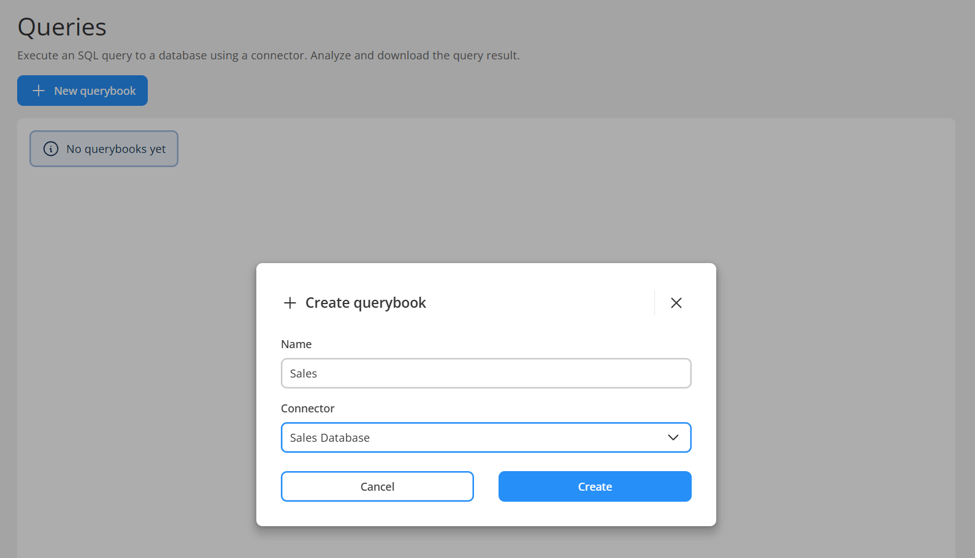
Queries are collected into “querybooks”. Each querybook can connect to a single database. When creating a querybook, we must specify the connector to use from the Hub Space connector repository.
Now we can create a new Query within the book by clicking on “New query” (1). Write or paste our desired SQL query in the “Sql statement” window (2). On the left of the query editor we can see a dropdown where we can see and select a table from the database (3). Clicking on the arrow to the right of the dropdown will add the table name to the statement. We can also see all of the fields available in the table (4) and if we hover over any, we will see a similar arrow to add it to our SQL statement.
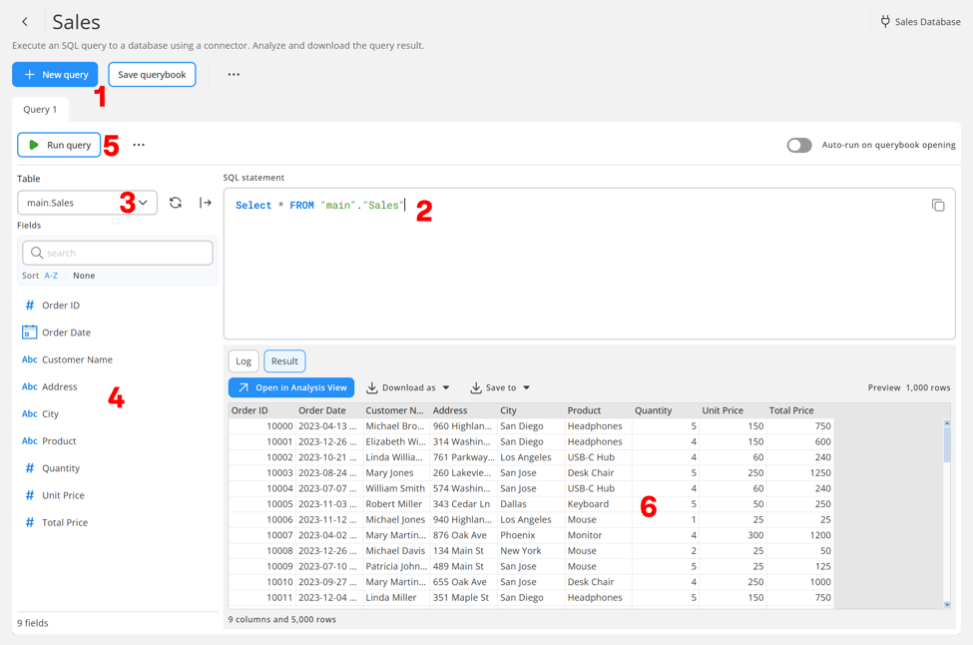
When complete, we can click on the “Run query” button (5) to do exactly that. The resulting data table will be visible at the bottom (6).
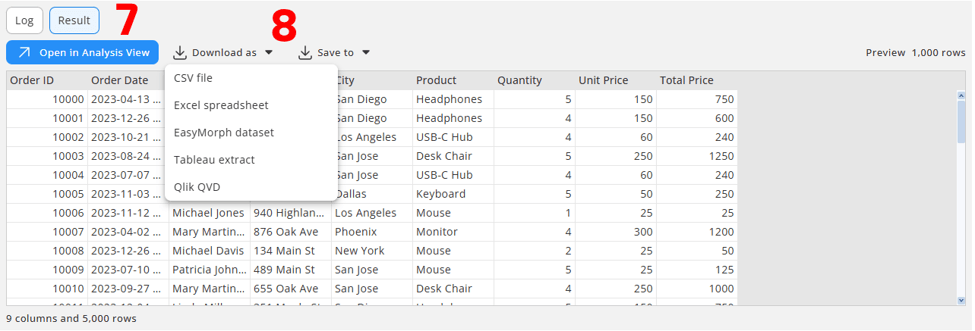
There are options just above the results table to open the data in Analysis (7) view for further filtering and profiling, as well as options to download the data (8) as an EasyMorph .dset file, a CSV, Excel spreadsheet, Tableau extract or Qlik QVD file. You can also save the data to the Hub in any of the same formats.
Explorer Queries are a great tool for allowing SQL developers and data analysts to create and execute SQL queries and to easily share the data with EasyMorph users, without having to disclose any credentials. Improving security and collaboration across data, technical and business teams. We’ll be bringing some more improvements to Queries in coming versions.
Note: Query books can also use per-user connectors. This means a query can return different results based upon the user running it. For example, if row-level security is applied in the source database, some users may be restricted to only certain data within a table.
Expose datasets as OData sources
The next new feature is a big deal, because it makes it much simpler to use the data you have in EasyMorph in other tools and systems, such a BI platforms, other ETL tools, Excel or anything else which supports loading data from OData feeds.
EasyMorph Hub can now expose any EasyMorph dataset (.dset) file as an OData source. Before you can do this, you must first enable the “API server” option in the Space settings.
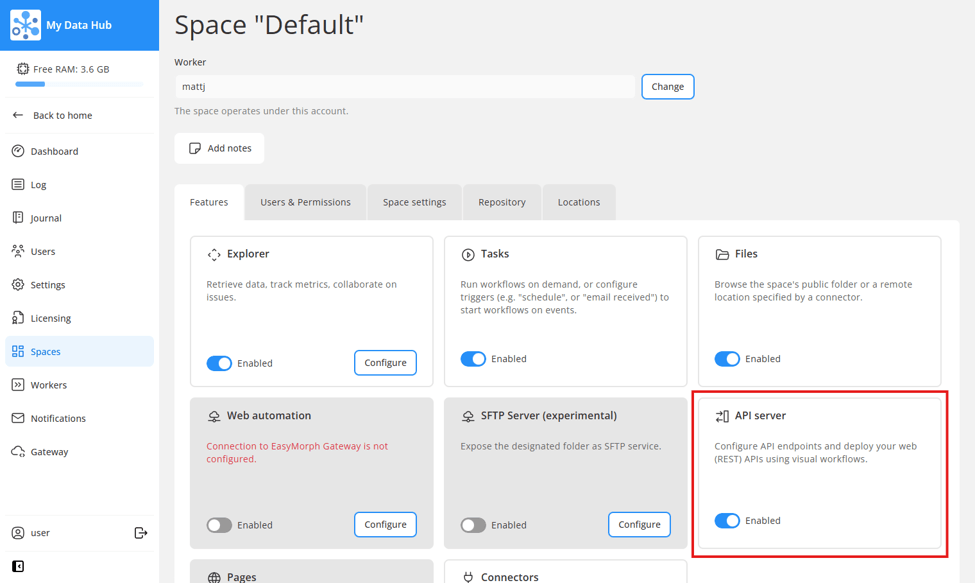
Once enabled, you should see the “API endpoints” section in the left-hand navigation menu. There are now 2 tabs in this section:
- “REST” for creating REST API endpoints based on EasyMorph workflows as you have been able to do for some time.
- “OData” where you can now configure OData feeds.
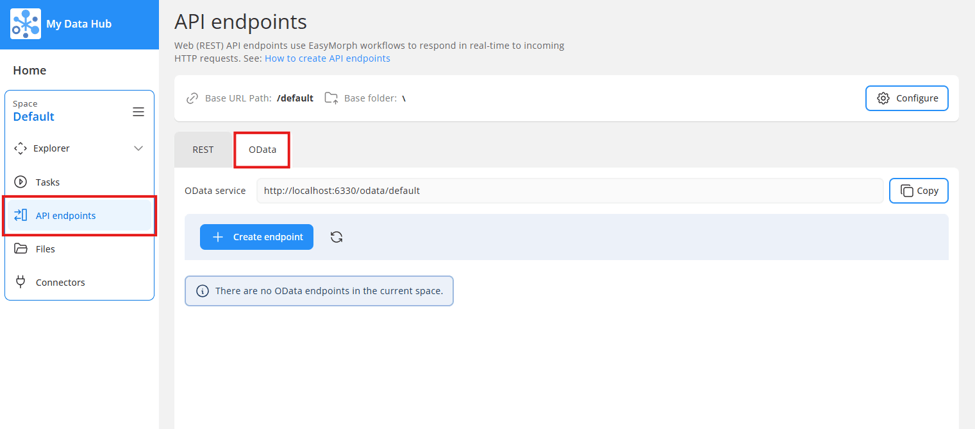
Creating an OData feed couldn’t be any simpler. Click on “Create endpoint”, give it a name and URL path slug (the last part of the URL which will be used to access the feed). Once created, click on the name of the feed where you can configure the .dset file and other options.
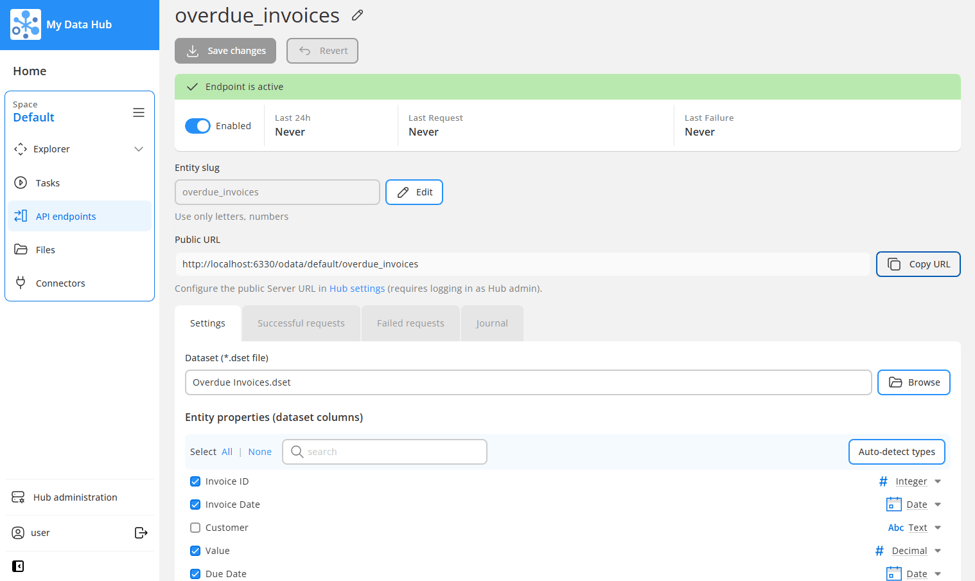
Select the EasyMorph .dset file you wish to use for the feed, and configure which fields you want to include and their data types. EasyMorph generates a “Public URL” for the endpoint which we’ll need to use in a minute.
We can now make use of this new feed in whatever other system we need. For example, we can load data from it directly into Excel. If we go to the Data tab in Excel and choose the option to “Get data” → “From Other Sources” → “From OData Feed”. Then paste in the Public URL EasyMorph provided for the endpoint.
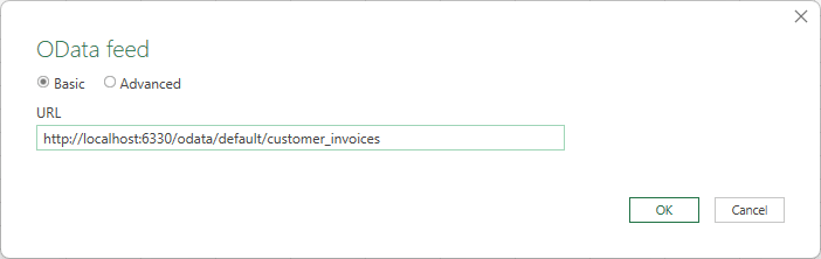
Your data is then loaded into Excel ready for you to do whatever you need.
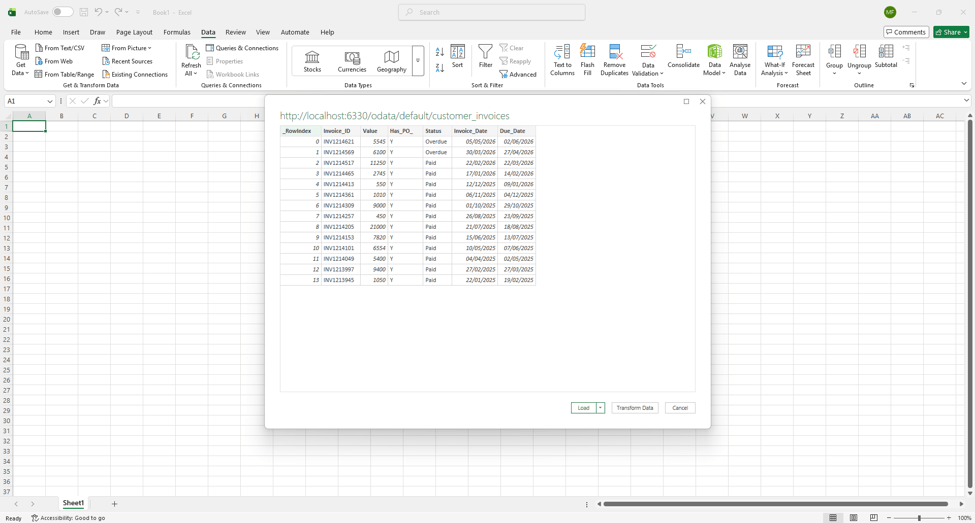
The most exciting part of using OData in this way is that the connection is “live”. For instance, you can pull a dataset from EasyMorph to an Excel table and build charts and pivot tables based upon it. If we then simply refresh the data source in Excel to bring in a newer version of the table, all of the charts and pivot tables will update automatically. No more manual data copying!
OpenID Connect identity provider
Following on from other recent releases, version 6.1 of EasyMorph Hub also brings another new external identity provider, for OpenID Connect. You can now integrate with single sign-on services such as GitHub and Keycloak.
Note: This feature is currently considered experimental. Not all OpenID providers may work or provide all functionality.
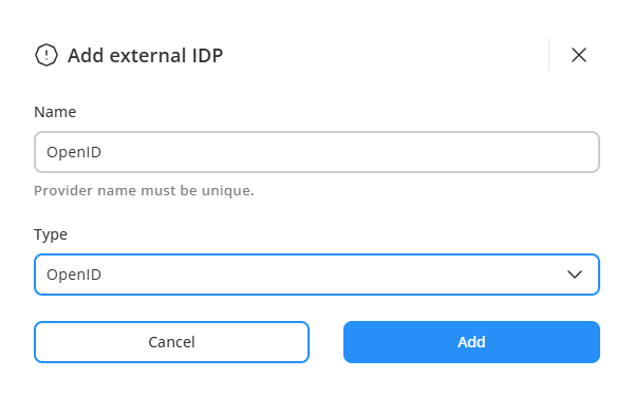
An OpenID Connect provider can be added in just the same way as any other external provider by navigating to the Hub Administration panel, clicking on “Settings” on the left-hand navigation bar, and then on the “Identity providers” tab.
Collapsible Task groups
A simple, but really helpful improvement is the addition of the ability to collapse and expand Task groups.
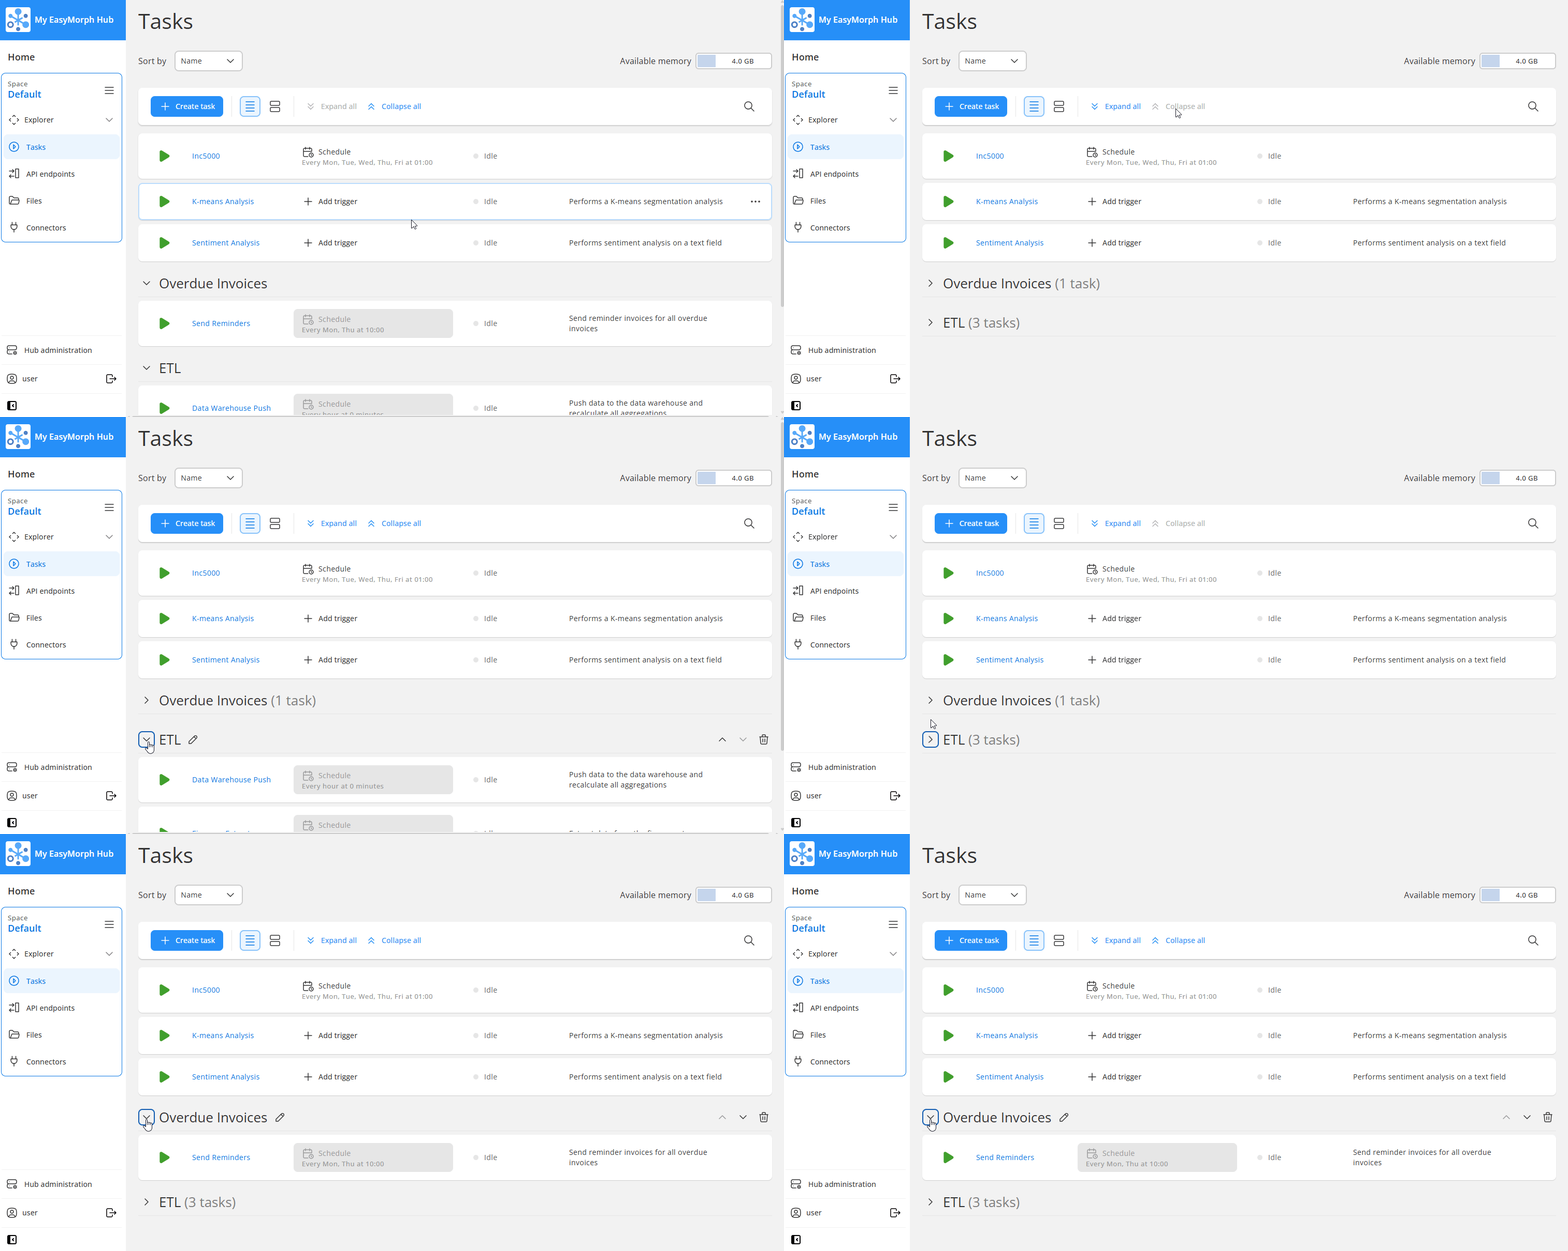
There are options at the top of the task list to expand and collapse all groups, allowing you to collapse all groups and then expand just the one you need. Although this might not seem like a big deal, it can make working with large lists of tasks much simpler.
We’ve also improved how EasyMorph Hub handles long lists of tasks. It’s now much faster, even with thousands of tasks and dozens of groups.
Additional config for Metric and State Catalog assets
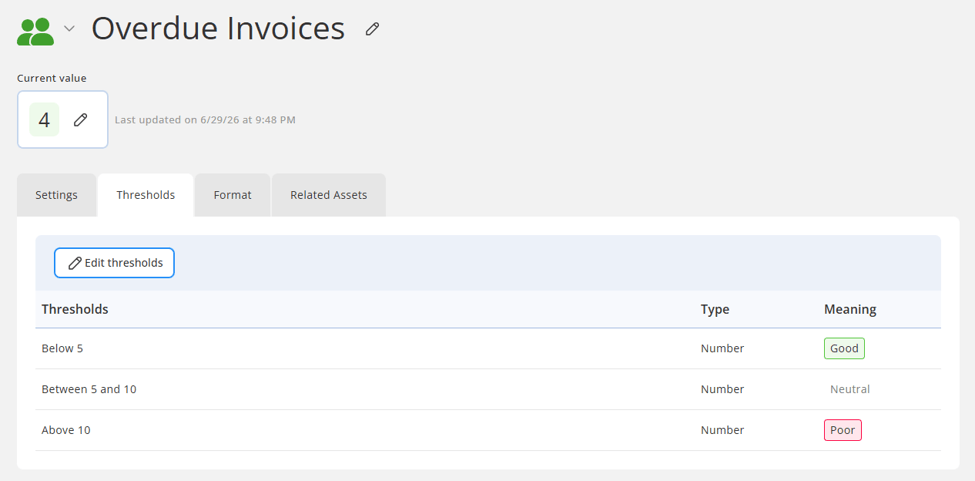
Both Metric and State Catalog assets have received some attention also. Metric assets can now have their “thresholds” created and changed directly within the EasyMorph Hub user interface. If you aren’t familiar, thresholds allow you to configure conditional highlighting of the metric if its value goes above or below specified values.
In much the same way, you can also add and manage State asset’s “meanings” from the Hub UI, allowing you to configure conditional formatting based on specific values, such as a system status showing in green if it is “Online” or red if it is “Offline”.
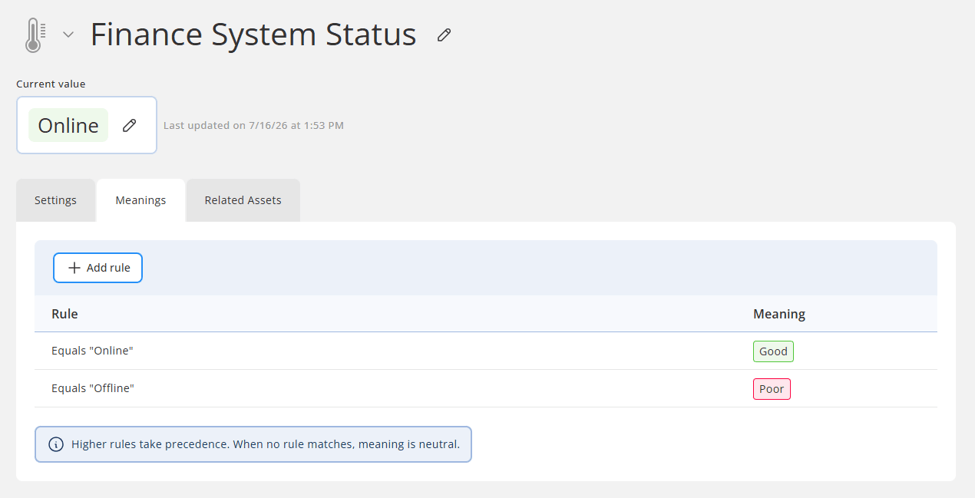
Metric and State assets then show with this formatting in both the Catalog and when added to a Board. You no longer need to have EasyMorph Desktop connected to EasyMorph Hub to manage these settings.

Customizable Hub branding and homepage
When we first released version 6 of EasyMorph, with the complete redesign of the Hub user interface, we promised more options to customize the UI to match your company branding. In version 6.1 we’ve done just that, adding more options to change the Hub homepage and logos.
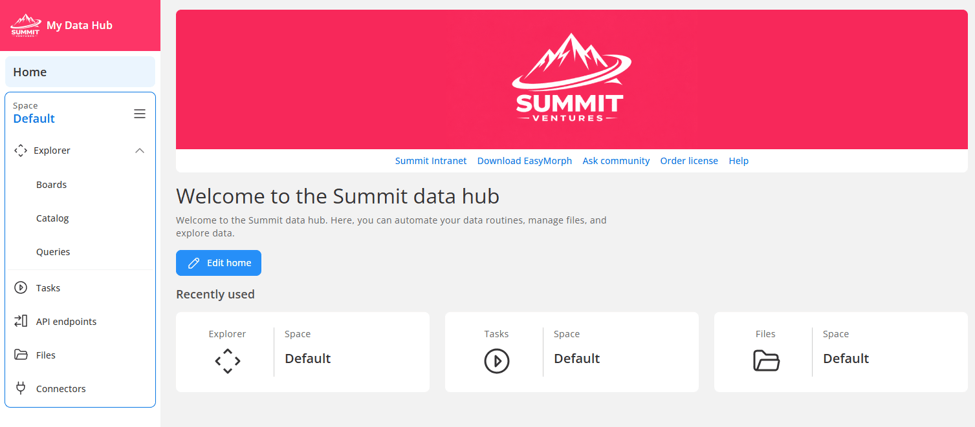
To customize your Hub, on the homepage (assuming you have suitable permissions) you can click on “Edit home” where you’ll find all of the new options.
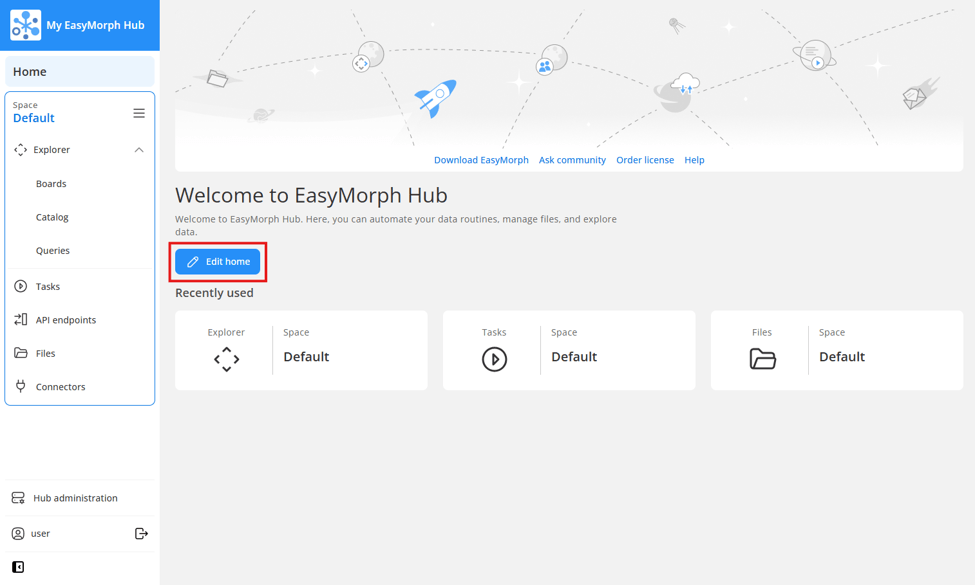
You can now:
- Change the logo and background color shown at the top-left corner of the Hub.
- Change the text shown next to the logo in the top-left corner of the Hub.
- Change the banner image shown at the top of the Hub homepage.
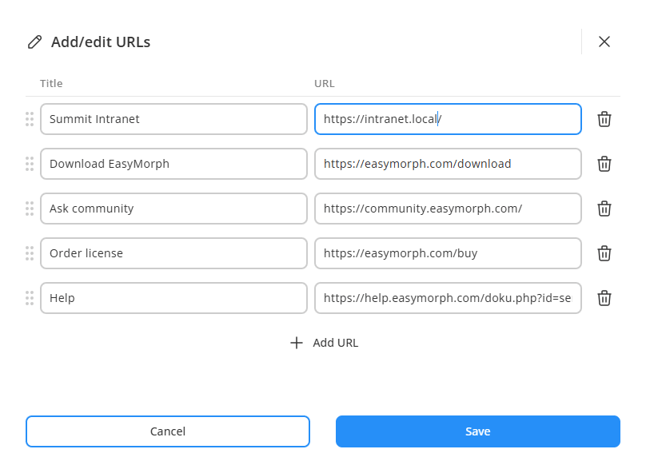
- Add, edit or remove links shown immediately below the banner image on the Hub homepage.
- Change the title and text shown on the Hub homepage.
Parameters in Issue attachments
Issues in Boards can have lots of different files and links attached to them. When attaching an asset from the Explorer Catalog which is computed, such as a computed dataset or computed web link, we are effectively attaching an EasyMorph workflow (.morph file) which is run when someone opens the attachment.
In previous versions, if the workflow had parameters, the workflow was run with the default values set for the parameters when the workflow was created, and there was no way to specify different parameter values.
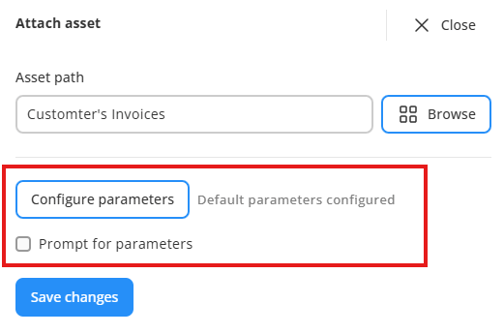
With version 6.1, when attaching a computed asset to an issue, you can now optionally specify what parameter values should be used when someone opens the attachment. Computed Catalog assets include computed datasets, computed file paths and computed web links.
So for example, if we create an issue about a problem with a specific customer’s invoices, we can attach a computed dataset asset and specify the correct customer in the parameter of the workflow. Now when anyone opens the attachment, they’ll see only invoices from the relevant customer.
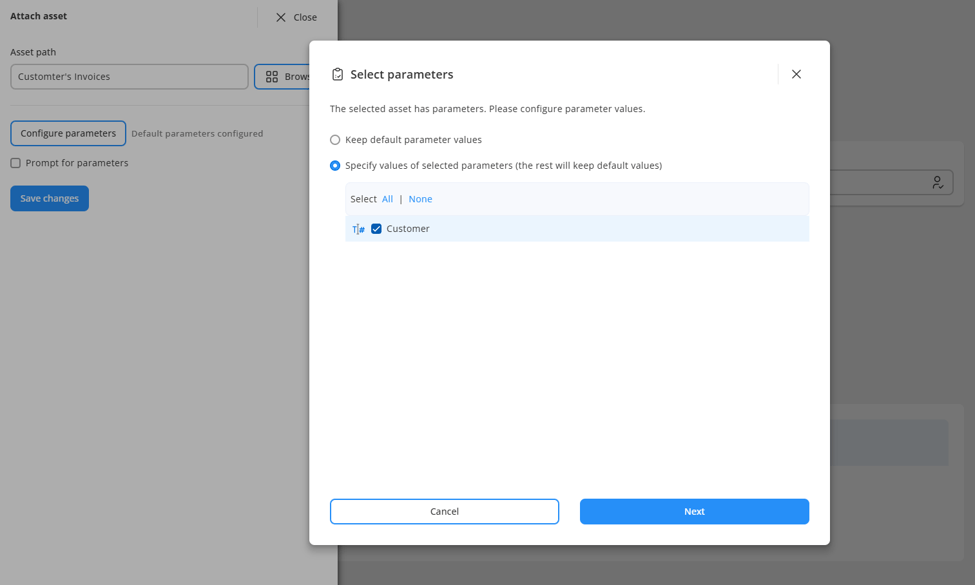
We also have the option to prompt the user who is retrieving the attachment to enter parameter values instead. These changes make issue attachments much more useful, helping users to go directly to the problem without needing to further filter or analyse data themselves.
Parameters in Board shortcuts
In a much the same way as attaching computed assets to Issues, when computed assets are used in shortcut sections of Explorer Boards, you can also now specify the parameter values which should be used when the shortcut is run.
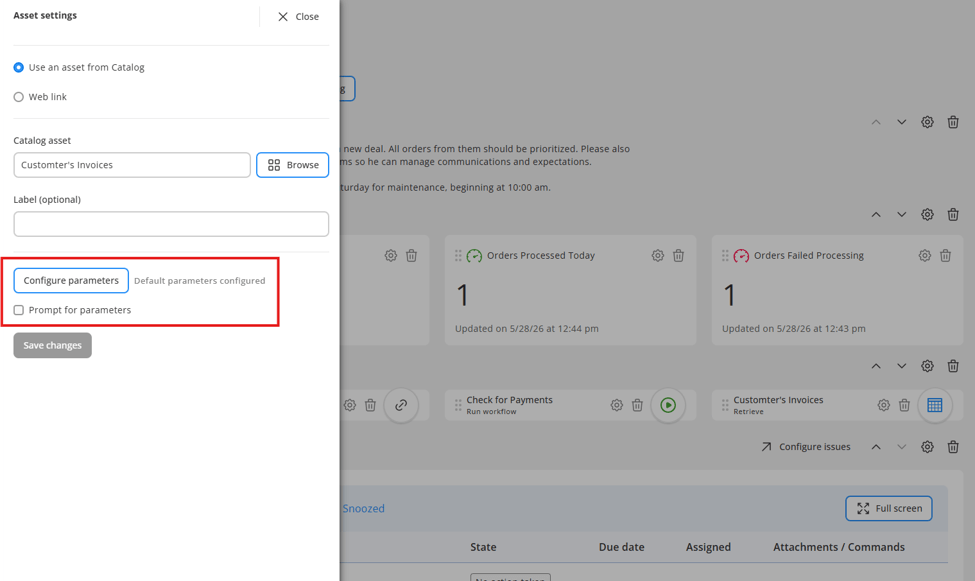
Again, this makes shortcut sections more useful and helps users to cd quickly go directly to the data or resource they need.
A new “Add data” dialog in Desktop
Not to be left out, EasyMorph Desktop has also received a new dialog which is shown when clicking on the “Add data” button on the toolbar.
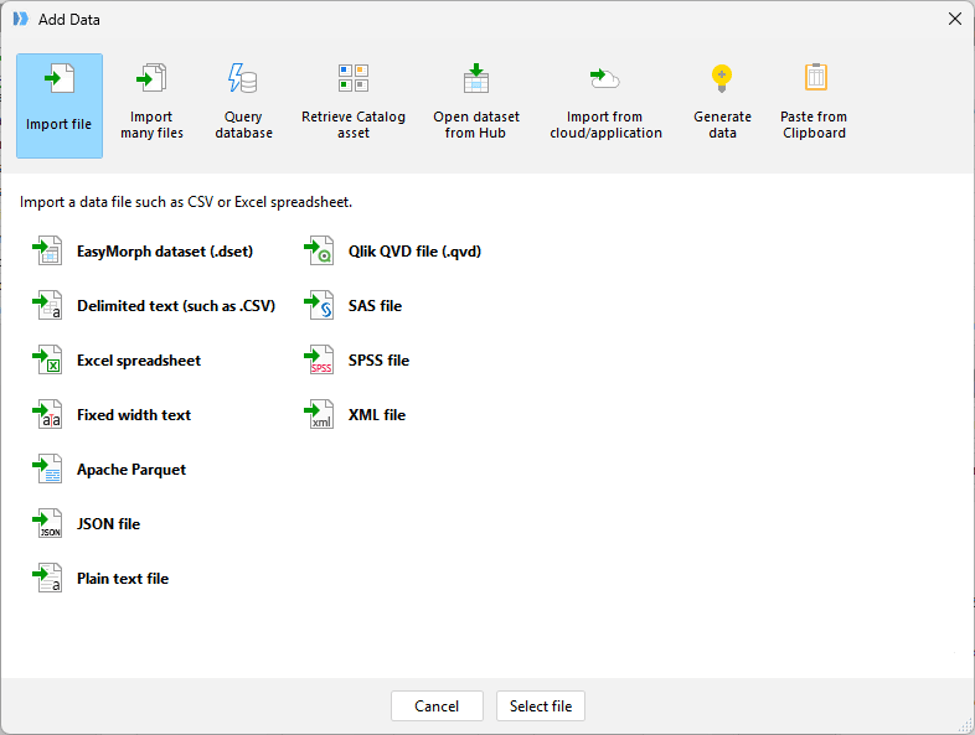
This dialog makes it quicker and easier to load data from some sources, such as databases and datasets stored on EasyMorph Hub.
Other Changes
As always, version 6.1 also contains a significant number of other improvements and bug fixes. For full details, check out the detailed release notes available from our website.
What's Coming Soon
As always, we have a long list of new features and improvements planned for upcoming releases. Just a few coming soon include:
- Python scripts as Tasks in EasyMorph Hub.
- The ability to restart failed Tasks with the same parameter values.
- Hidden columns in Analysis View.
- Support for more “Per-user” connector types.
- A "trash bin" for deleted Catalog assets.
- Playground, a simple in-browser data preparation tool with support for custom actions.
- And much more…
Download EasyMorph Hub and EasyMorph Desktop version 6.1 now!