EasyMorph is designed to be as intuitive to use as possible. We want you to be able to open EasyMorph for the very first time, and with no prior experience or training, build a useful workflow.
Over the last 10 years, our product, UX and development teams have put in a lot of work, designing each new feature to ensure this ease of use is maintained as the product grows and evolves. If one new customer’s recent testimonial is anything to go by, the extra effort is worth it:
I have tried many different tools, and yours is nearly perfect. It requires almost no learning curve - I was able to start using it intuitively right away. It is truly outstanding.”
Despite all of this effort, because there are so many tools and features available in EasyMorph Desktop, it is easy to overlook some of the most helpful and important. Let’s take a look at 5 tips for getting the most out of EasyMorph as a beginner.
Hint: Even if you are an experienced EasyMorph user, there might still be something new for you to learn below.
Prerequisites
Before we dive into the tips, I want to first offer some prerequisites/recommendations that will hopefully make the rest of this post as useful as possible.
Firstly, I’m going to assume you have EasyMorph Desktop already installed. If you don’t, you can download the “free forever” version from our website: https://easymorph.com/download.html. Installation couldn’t be simpler; just follow the prompts and you’ll have it installed in a few minutes at most.
If you are brand new to EasyMorph, I would also recommend reading the “Workflow basics” section of the tutorials, which will help you get oriented and to understand the basic principles of EasyMorph workflows: https://easymorph.com/learn/overview.html.
Tip 1 - You Can Drag and Drop Almost Everything
You can “drag and drop” a lot of things in EasyMorph. For example, as well as importing data files using the “Add data” button, you can also simply drag the file from Windows file explorer and drop it directly into EasyMorph Desktop.

EasyMorph will analyse the file type and configure the correct action to import the data from the file for you. If you have more than one data file you wish to import, you can also drag and drop a whole folder of files and EasyMorph will take care of that also.
Actions are probably the most common things we drag and drop. We can drag them from the “Add new action” panel to exactly where we’d like to place them in our workflow.
Actions already in our workflows can also be dragged around within their action chain to reorder them. They can even be dragged from one table to another in our workflow; great for when you accidentally put one in the wrong place. You can even remove an action from your workflow by dragging it back to the “Add new action” panel.
My favorite drag and drop trick is for reordering columns in a table. Simply click on a column title and drag it left or right to where you would like it to be. EasyMorph will automatically add a “Reorder columns” action to your workflow and configure it for you.
Tip 2 - Use Right-Click Shortcuts
Like the above tip for reordering columns, EasyMorph has lots of other shortcuts which will add the necessary action for us. Most of them are accessed by right-clicking.
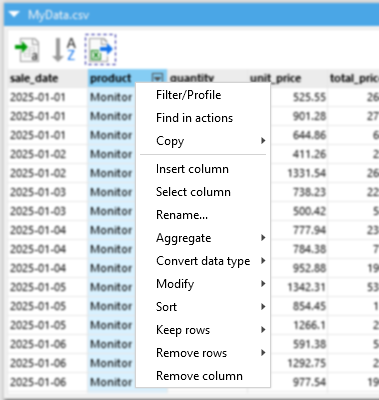
If you right-click on a column title, you will find a large number of these shortcuts to handle the most common data preparation transformations, such as:
- Removing the column from the table.
- Renaming the column.
- Sorting the data by the column.
- Filtering the data by keeping or removing specific values, values of a certain type (e.g. numeric, text or empty values), positive or negative number, duplicate values and more.
- Modify the values in many ways such as making them upper or lower case, removing unnecessary spaces or characters, trimming to a maximum size or using much more complex rules.
- Modifying the data types, such as turning numbers to text or dates stored as text to numeric dates.
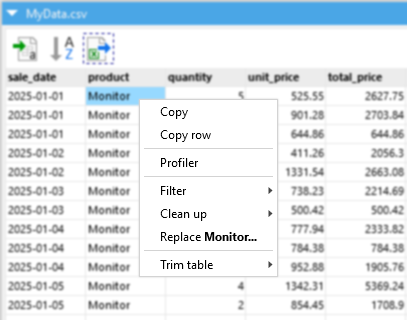
You can also right-click a specific cell in a table. Doing so provides shortcuts to:
- Remove or keep only the specific value in that cell.
- Replace all instances of the cell’s value with a different value.
Again, for each of the shortcuts, EasyMorph will add the appropriate action to the workflow, configured as needed.
Tip 3 - Finding the Perfect Action
With more than 180 actions available to add to your workflow in EasyMorph Desktop, and with many of these actions containing multiple capabilities, it can sometimes be tricky as a beginner to know which action does what you need. Even those with lots of experience with EasyMorph - myself included - can forget the name of an action if it isn’t one we use regularly. Thankfully, EasyMorph has a couple of tricks to help.
The first and most obvious is to search for what you need. Let’s take an example of concatenating one table to the bottom of another. In EasyMorph, the action to do this is called “Append another table”. However, if you are familiar with other data tools or SQL, you might try searching for “union” or “concatenate” instead - neither of which will return the correct action.
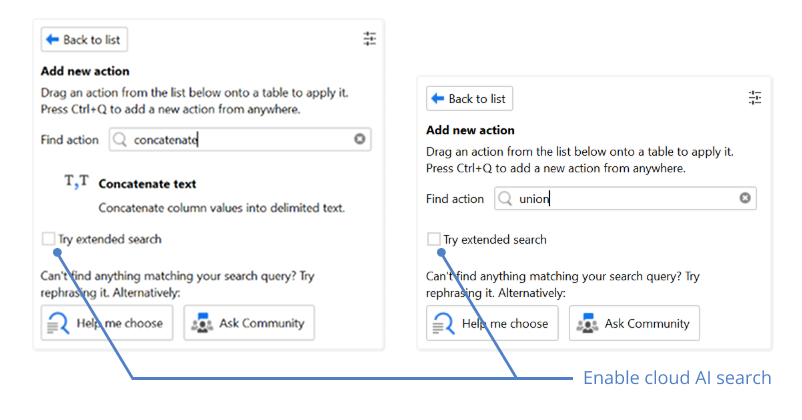
Thankfully, EasyMorph has a “Try extended search” option that appears at the bottom of any results returned by the “normal” search. If you tick this box, your search will be sent to our cloud AI engine, which will suggest actions that might fit what you need. It will even sort them so that the most likely one is at the top. Keep in mind that the extended search is considered an experimental feature currently and so may sometimes include actions which aren’t relevant.

Hint: The AI-powered extended search supports over 80 languages, not just English.
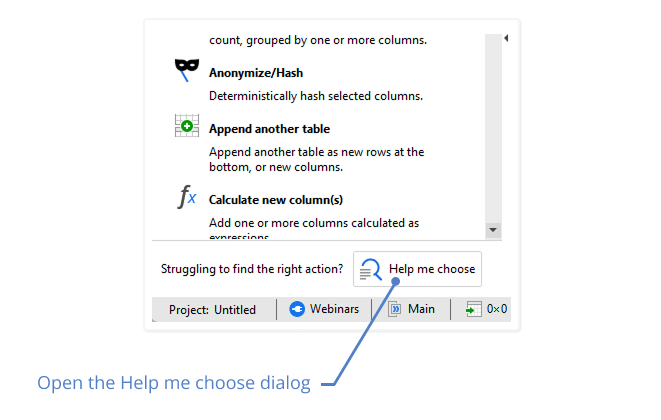
Another useful tool for finding the right action is the “Help me choose” dialog. To access it, you’ll find a button at the bottom of the “Add new action” side panel.
The dialog has 2 main modes. The first is the “Capability” mode which allows us to browse capabilities and see all of the tools, data sources and systems which EasyMorph provides that capability for. As an example, if I wish to generate a list of folders in my inbox, I can search for “list email” and the dialog will show me capabilities which match my search - in this example the “List email folders” capability. Clicking on it will then show me all of the systems which EasyMorph supports listing email folders. If I click on the relevant system, the dialog will show me the steps needed to achieve what I need - in this case:
- Setting up a connector to allow EasyMorph to access my Gmail account.
- Adding the “Email command” action to my workflow.
- Configuring the action to use the “List folders” option.
Best of all is the big blue “Let’s do it” button. Click on it and EasyMorph will guide you through the steps on-by-one. It couldn’t be simpler.
As well as starting with a specific capability, you might also want to know all of the capabilities EasyMorph has to work with a specific data source, platform, or business system. The second mode of the “Help me choose” dialog provides exactly this and can be accessed by clicking on “Systems/data” at the top of the dialog. In this mode, you can begin by searching for a data source or system (such as Salesforce), then choose a capability EasyMorph has to work with it. Again, you can click on “Let’s do it” to be guided through adding it to your workflow.
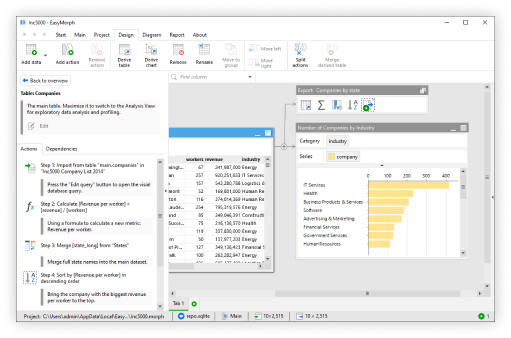
Tip 4 - Understand your data with Analysis View
When starting to work with a set of data for the first time, we often need to understand it in detail. There might be erroneous values we need to remove or it might have product codes which we need to in capitals. Until we see the data, we might have no idea of these problems and thus what actions we need to add to our workflow to resolve them.
Because EasyMorph shows us the table of data in our workflow, not just the chain of actions like some other data preparations, your visibility of the data is already quite good. There is, however, one feature which takes exploring data to the next level - the Analysis View.
To access the Analysis View, simply “expand” any table using the icon in the top right corner of its heading.
The Analysis View allows us to see the full set of data at each step in the Action chain and to apply filters to the data without adding additional actions. We can also create simple charts and data visualizations to help better understand the data. And of course, the “you can drag and drop almost everything” applies in the Analysis View also.
There are a lot more capabilities of the Analysis View - too many to cover in this post. But now that you know it exists, you can explore for yourself.
Tip 5 - Organizing your Growing Workflows
Before you know it, you’ll be building workflows with tens of tables and hundreds of actions. However, as workflows grow, they can become difficult to understand and maintain due to their size and complexity.
The first tool available to help us to organize our workflow are “Groups”, also known as “Tabs”. These can be found at the bottom of the screen and you can create a new tab for whatever purpose makes sense to help you to organize your workflow.
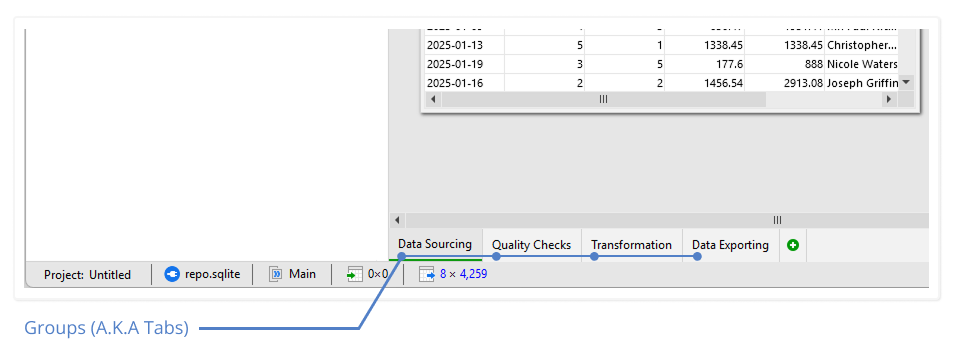
It’s important to know that it is still a single workflow which spans the different tabs. The workflow will still be executed in the same way, irrespective of if it is in a single tab or split into many.
You can easily reorganize your workflow into tabs simply by right-clicking on the table’s header and selecting “Move to group…”.
EasyMorph will show markers indicating that the workflow continues on another tab, and you can click on the markers to be taken straight to the corresponding location.
Another useful feature for helping to organize and maintain your workflows are annotations or notes. Almost everything in EasyMorph can have an annotation added. My favorite uses for annotations are:
- To make a note of the business logic which is being applied.
- To remind my future self why I used a certain action.
- To help others understand the process of the workflow.
- To keep track of where an action is needed because of a specific problem in the data.
Ultimately, I like to ask myself if I’ll remember why I did it this way in a year’s time? And will my future self really appreciate a quick note helping me to remember?
Annotations can be added to:
- Parameters - By adding them to the Notes field of each parameter when configuring them.
- Groups / Tabs - By right-clicking on the tab and selecting “Annotate…”.
- Tables - By clicking on the table’s header and then on “Annotate” at the top of the left-hand panel.
- Actions - By clicking on the action and then on the “cog” icon at the top of the left-hand action settings panel.
Hint: Annotations appear in the auto-generated documentation EasyMorph can create for your project. This means they can be used to make the documentation not just a technical specification of the workflow, but to include explanation for business users who might need to follow and understand what you’ve implemented.
Another useful trick to help planning your workflow and to again aid your future self, is to use the “To-do” action. Unlike all other actions, the To-do action doesn’t actually do anything. It simply allows you to add it to any location in your workflow and configure it with a reminder. You can even assign it to someone and add a due date.
Hint: The Project metadata action includes an option to generate a table of all of the To-do actions in your workflow, helping you to keep track of them wherever they are hidden.
Bonus Tip - Learning more about EasyMorph
Hopefully, this has given you a few tips and tricks you otherwise might not have noticed. To help you continue to learn more about what EasyMorph can do and how you can make the most of it, here are some other resources:
- For more tips and tricks as you start out building your first EasyMorph workflows, check out the tutorials section of our website where you can find lots of beginner friendly (and advanced) guides.
- You can also follow our Youtube channel where you will find videos showing off our favorite EasyMorph features.
- If you have any questions or get stuck, you’ll find lots of friendly advice on the EasyMorph Community Forum. Our own team and lots of other customers are always willing to help. The only silly question is the one you regret not asking!